EmeraldHike
Member
- Joined
- May 10, 2021
- Messages
- 133
- Reaction Score
- 0
- Points
- 21
- #1
In Photoshop, masks are wonderful things. They allow us to non-destructively edit layers and they give us tons of flexibility. They’re so versatile, I’m tempted to say that editors, if they really tried, would be able to find an unlimited amount of use for them. In short, general masking does one thing in Photoshop. It shows and hides pixels in a way that’s totally correctable and changeable at any time.
As cool as regular layer masks are, they have a really big gaping pitfall about them. They affect every layer underneath them in the Layers panel. I know I’m simplifying this greatly and I’ll explain what I’m talking about down below, but just know this; there’s a difference between layer masks and clipping masks and when you discover what it is, you’ll love what clipping masks can do.
Clipping Mask: A clipping mask is a group of layers to which a mask is applied. The bottommost layer, or base layer, defines the visible boundaries of the entire group.
This is from Adobe’s mouth, not mine. In my own words, this is what a clipping mask is – it’s a mask that has the ability to limit where it’s applied. Instead of having three images take up equal parts of a canvas in Photoshop where one mask is applied to all three layers equally, you can have those same three layers take up the same space, but have a clipping mask only affect two of those layers. Don’t worry, once you’re finished reading what I have to share below, you’ll be telling yourselves this is stupidly easy.
In today’s post, I’m going to use the example I just mentioned above to demonstrate how a clipping mask can isolate changes to a layer or layers in Adobe Photoshop. I’ll use the same image that I used for yesterday’s post and will briefly and clearly exemplify what one type of mask can do over the other.
This is something like what my final result will look like below.
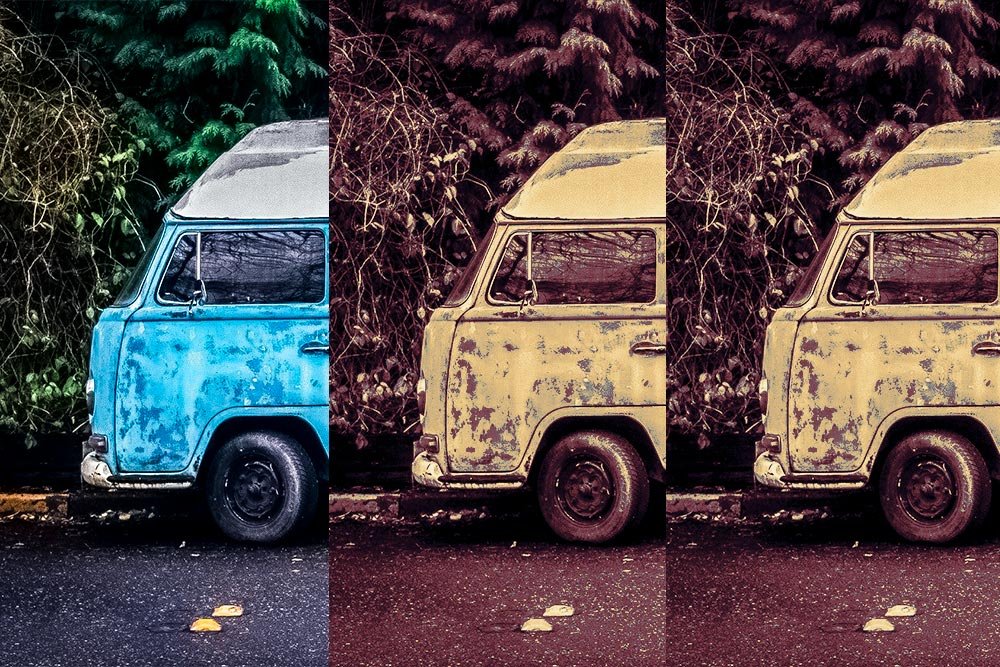
Now, the file is perfectly set up for me to begin explaining how these different types of masks work.
Just like yesterday, this will add an adjustment layer on top of the other layers and will open up the Properties panel for this particular adjustment.
Next, I’ll click on the current gradient inside the Properties panel, which will open up the Gradient Editor.
I’ll randomly click on one of the gradients I imported yesterday. Since this is just an example, I don’t really care which one I click on. I just need things to look much different than the original. When I’m happy with my choice, I’ll click the OK button.
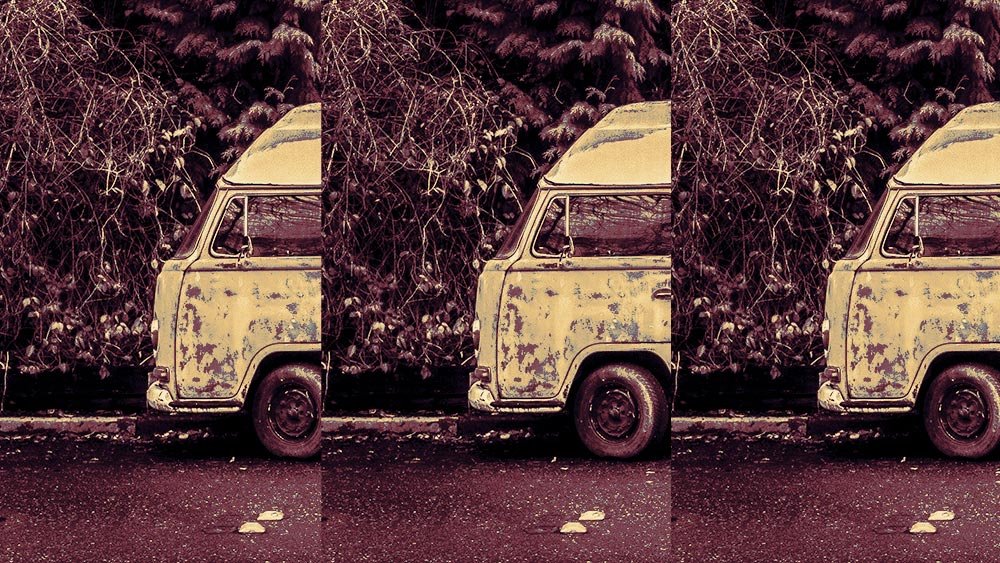
Ahh, that looks pretty good. We can definitely see that an adjustment has been applied.
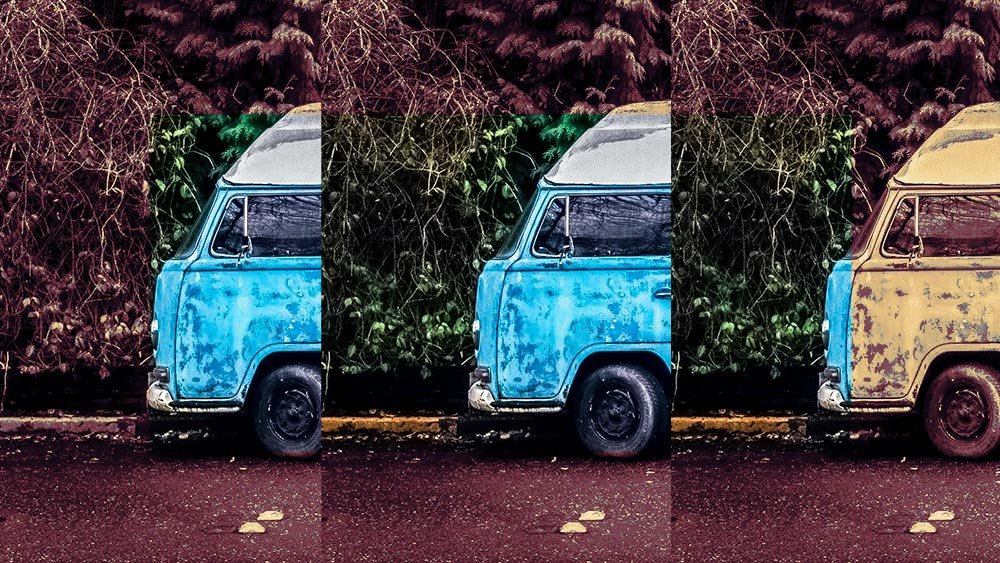
There’s a full color rectangle at the center of all three images. Basically, I erased a rectangle’s worth of mask inside the file.
For better or for worse, when you apply a mask that sits above all visible layers, that mask will affect those layers. Any change made to the mask will change the layers underneath. At times, this is desirable and at other times, it isn’t. Next up, I’ll show you how to circumvent the issue of overall application with the use of a clipping mask.
I’ll start back at the point where all images have a red gradient applied to them equally. After that, I’ll select both of the top two image layers by clicking on one and then holding the Shift key on my keyboard and then click on the other one. Once both layers are selected, I’ll drag them down to the Create New Group icon that sits at the bottom of the Layers panel. Once there, I’ll let go of my mouse.
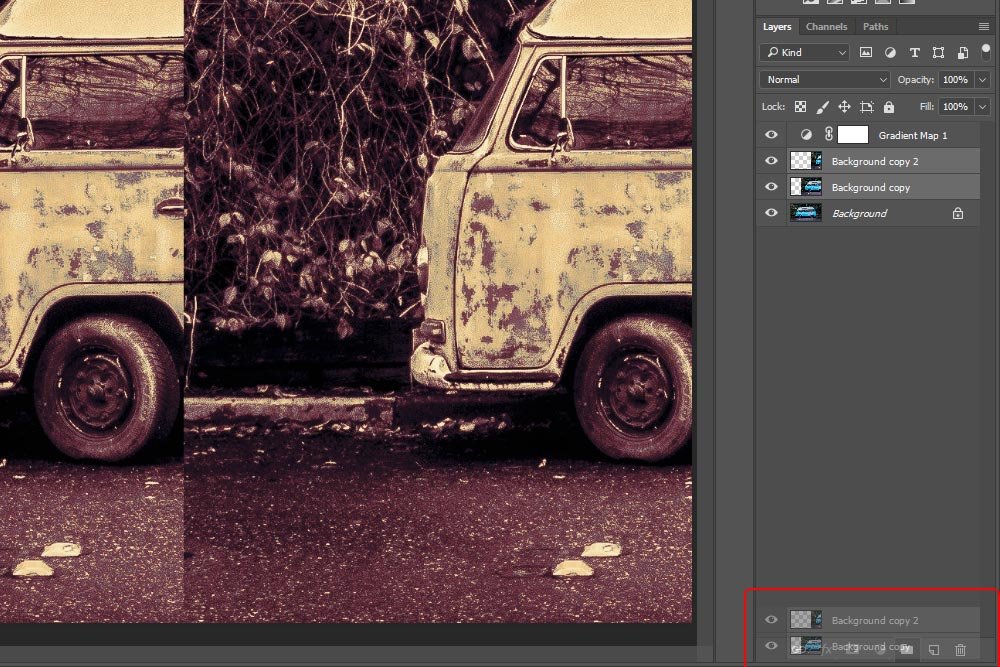
This action will place the two selected layers into a Group inside the Layers panel. Take a look.
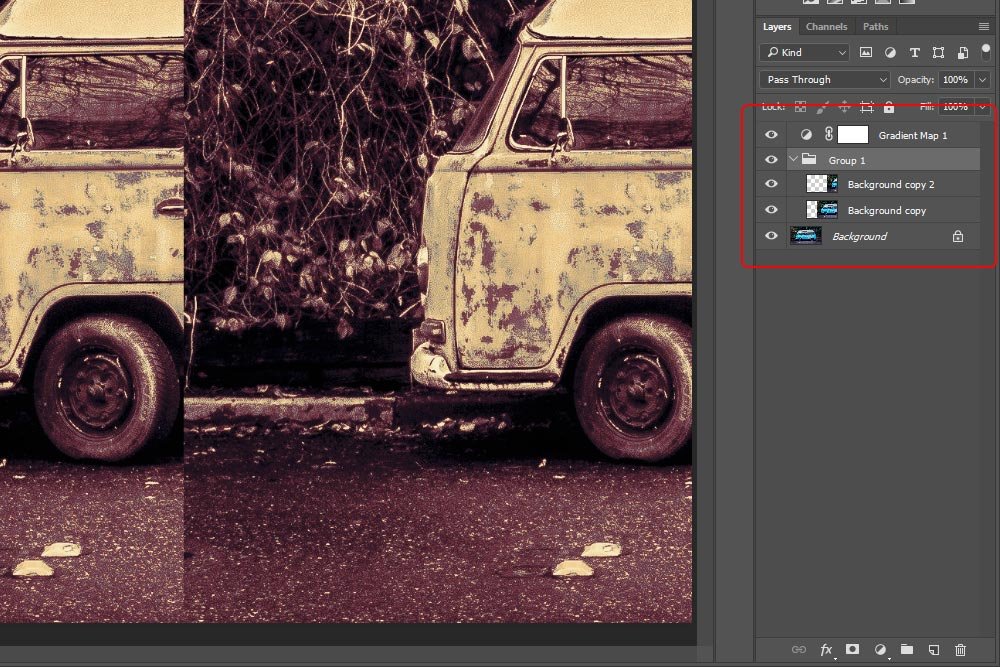
The funny thing is, even though I grouped the two layers I’d like the mask to be applied to, it’s still affecting all three of them. This is because I have yet to transform the regular mask into a clipping mask. I’ll do that now.
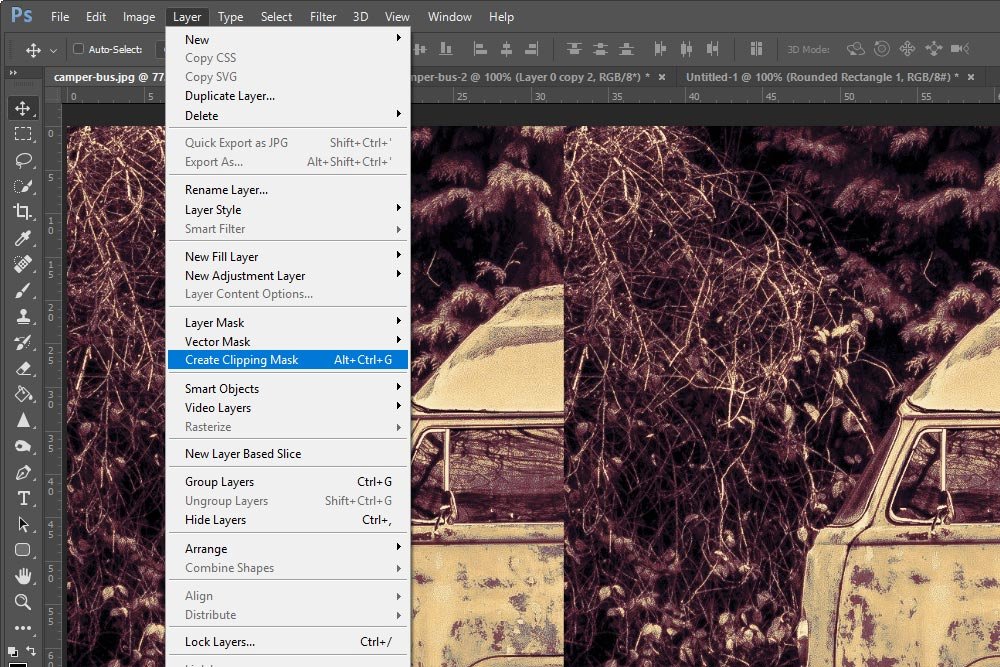
To create a clipping mask, I’ll select the mask I’d like to change. In this case, it’s the very top layer in the Layers panel. After that, I’ll head up to the top menu and click Layer > Create Clipping Mask.
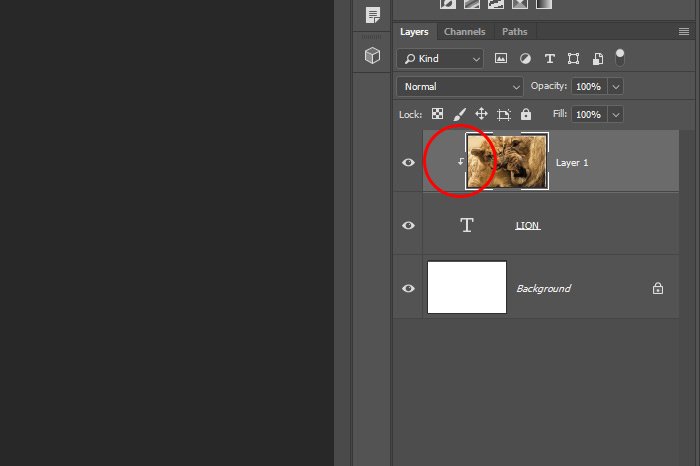
Once that’s done, the mask layer will house a small downward facing arrow inside of it. It’s sort of tough to see, so I circled it in red. This arrow indicates that the mask in question only affects what’s directly below it.
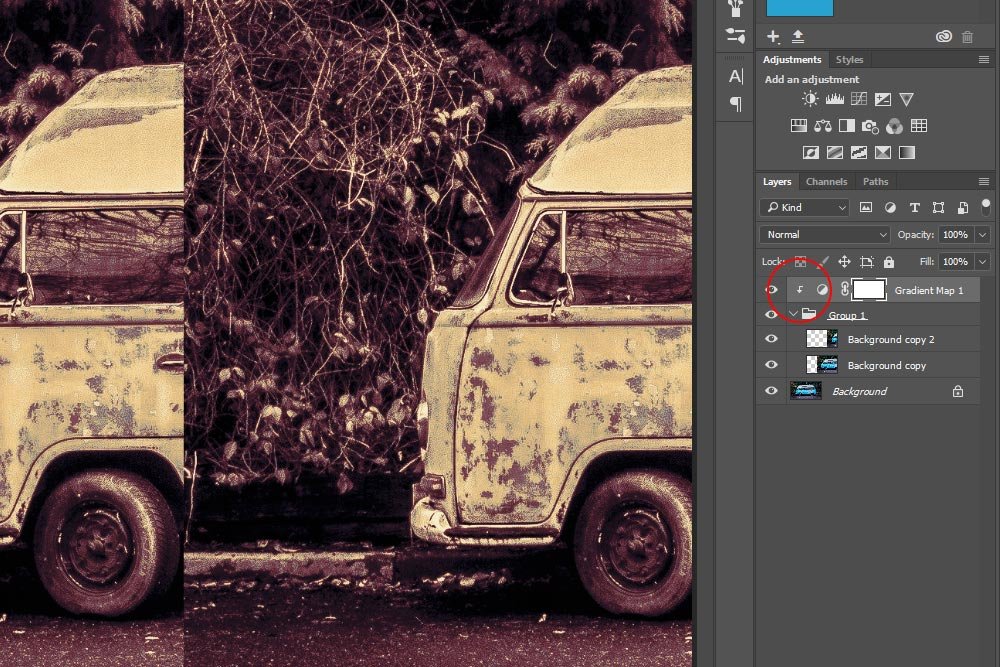
More importantly, the mask now only affects the two layers in the group, leaving the bottom layer that’s not in the group completely untouched.
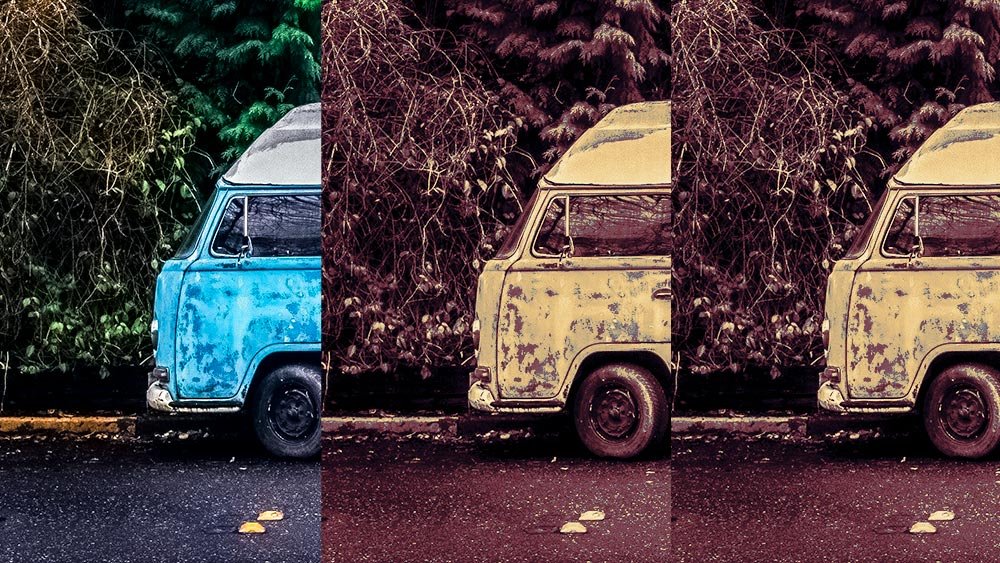
Really, that’s all that’s necessary in this case. Since I only wanted the mask to touch certain layers, I grouped them and turned the mask into a clipping mask. Hopefully, you can see the value in doing this and will be able to use something like this in the real world. Like so many other things when learning Adobe Photoshop, what I explained in this post is merely a concept. It’s how you apply this concept in your own projects that matters.
I hope you enjoyed today’s post. If you have any questions or concerns, please leave them in the comments section below. Thanks for reading!
As cool as regular layer masks are, they have a really big gaping pitfall about them. They affect every layer underneath them in the Layers panel. I know I’m simplifying this greatly and I’ll explain what I’m talking about down below, but just know this; there’s a difference between layer masks and clipping masks and when you discover what it is, you’ll love what clipping masks can do.
What is a Clipping Mask?
Out there on the internet, you have the opportunity to spend countless hours reading horrible definitions of what layer masks and clipping masks are. I have no idea why people complicate things so much. Just a few moments ago, I read an entire (long) thread where people attempted to explain which type of mask does what. They accomplished one thing for sure. they thoroughly confused the person who asked the initial question. They went into crazy explanations about shapes and pixels and all sorts of stuff. All they needed to say was this:Clipping Mask: A clipping mask is a group of layers to which a mask is applied. The bottommost layer, or base layer, defines the visible boundaries of the entire group.
This is from Adobe’s mouth, not mine. In my own words, this is what a clipping mask is – it’s a mask that has the ability to limit where it’s applied. Instead of having three images take up equal parts of a canvas in Photoshop where one mask is applied to all three layers equally, you can have those same three layers take up the same space, but have a clipping mask only affect two of those layers. Don’t worry, once you’re finished reading what I have to share below, you’ll be telling yourselves this is stupidly easy.
In today’s post, I’m going to use the example I just mentioned above to demonstrate how a clipping mask can isolate changes to a layer or layers in Adobe Photoshop. I’ll use the same image that I used for yesterday’s post and will briefly and clearly exemplify what one type of mask can do over the other.
This is something like what my final result will look like below.

Arranging the Images
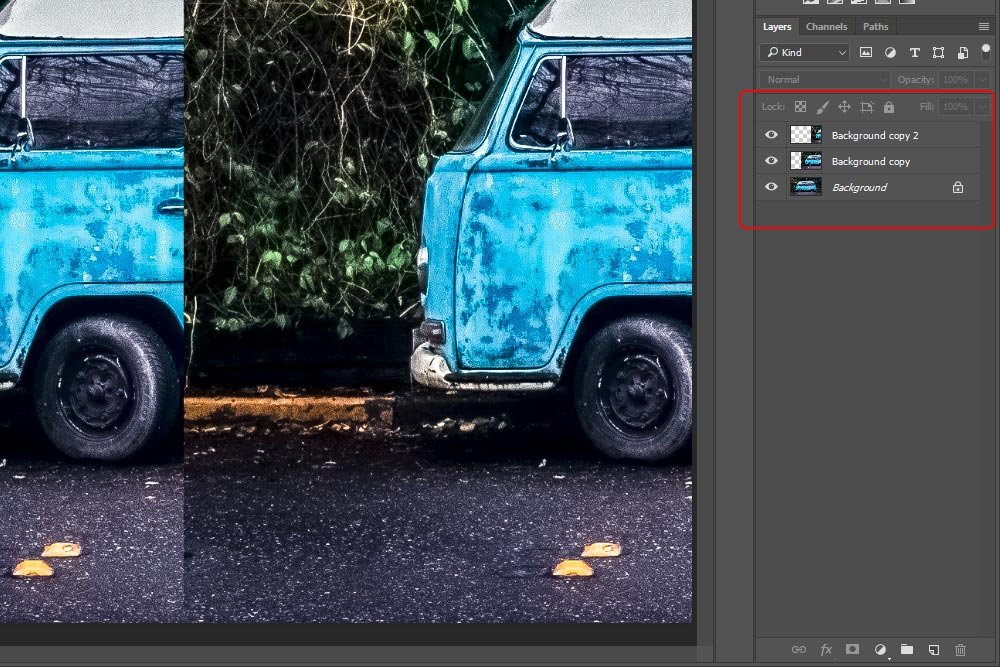
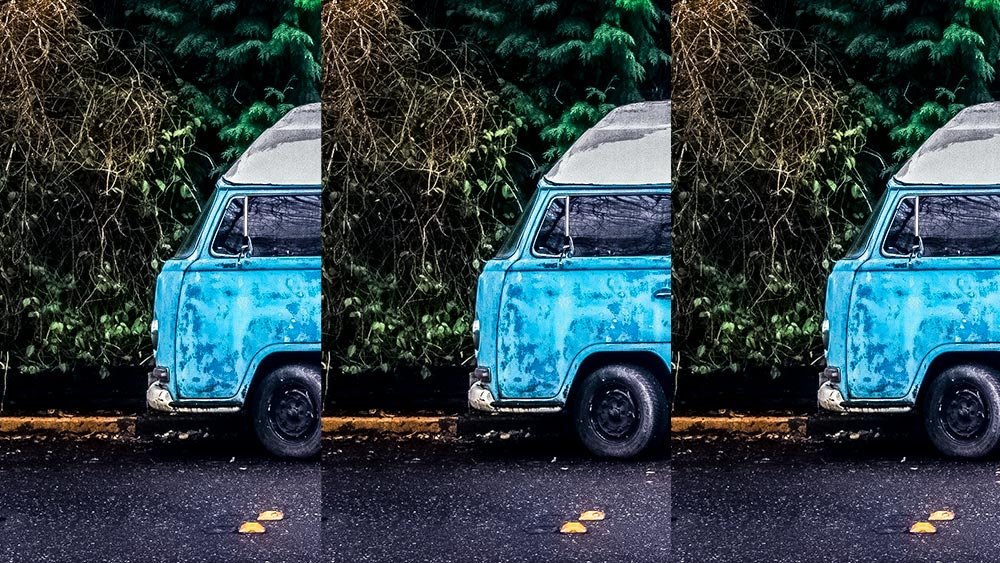
To start things off, I’ll open an image into Photoshop and duplicate its layer twice, so there are a total of three duplicate layers. After that, I’ll keep the bottom layer where it is and then nudge over the top two layers so each layer takes up a third of the image.

Now, the file is perfectly set up for me to begin explaining how these different types of masks work.
Applying the Gradient Map Adjustment Layer
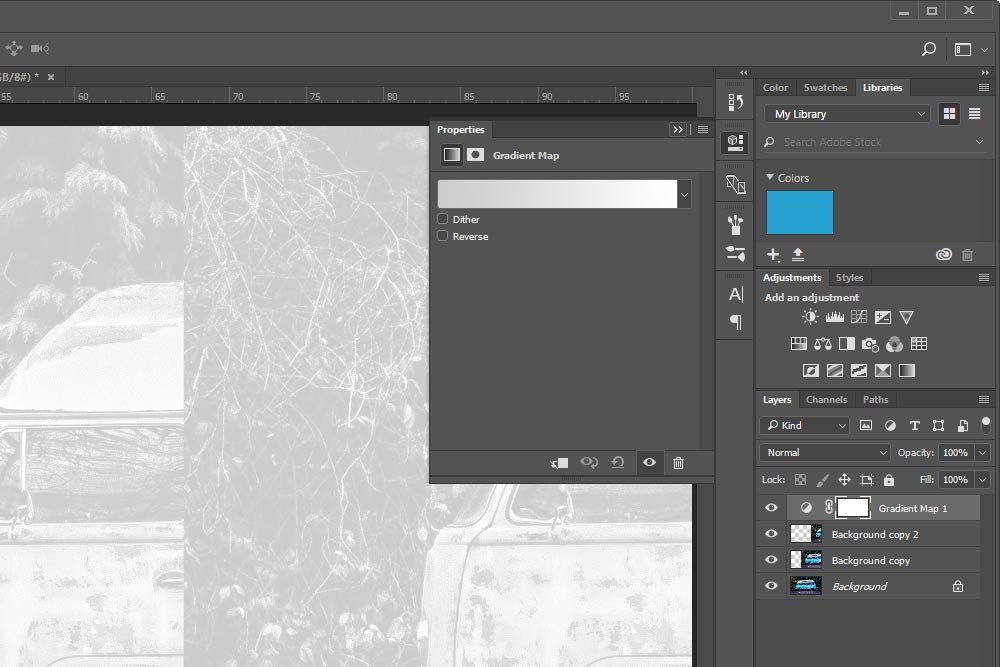
I’m going to build off of yesterday’s post in that I’ll use the Gradient Map adjustment layer to show how things are done. So, to do this, I’ll make sure the top layer is selected and then I’ll go ahead and click on the Gradient Map adjustment layer icon in the Adjustments panel.
Just like yesterday, this will add an adjustment layer on top of the other layers and will open up the Properties panel for this particular adjustment.
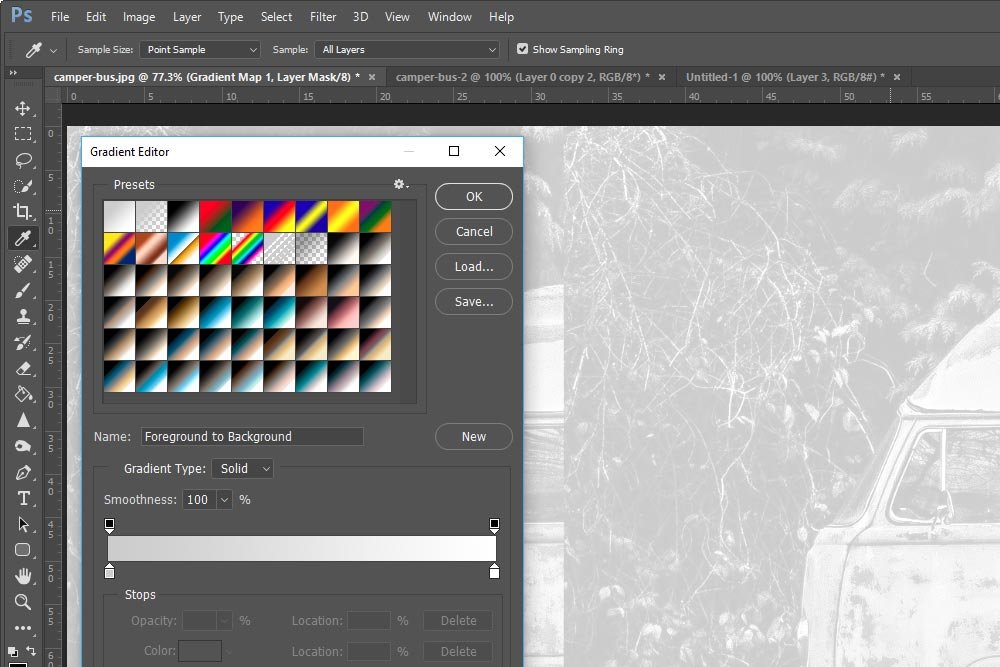
Next, I’ll click on the current gradient inside the Properties panel, which will open up the Gradient Editor.

I’ll randomly click on one of the gradients I imported yesterday. Since this is just an example, I don’t really care which one I click on. I just need things to look much different than the original. When I’m happy with my choice, I’ll click the OK button.

Ahh, that looks pretty good. We can definitely see that an adjustment has been applied.
Current Status
At this point, I need to talk about where I am in this process. Basically, I applied a mask (as an adjustment layer) that sits as the top layer in the Layers panel. Like I mentioned above, this mask affects every visible layer underneath it. So, if I used the Rectangular Marquee Tool to fill black into some of the mask, the part of the mask would be erased across all visible layers. I’ll do just that as an example.
There’s a full color rectangle at the center of all three images. Basically, I erased a rectangle’s worth of mask inside the file.
For better or for worse, when you apply a mask that sits above all visible layers, that mask will affect those layers. Any change made to the mask will change the layers underneath. At times, this is desirable and at other times, it isn’t. Next up, I’ll show you how to circumvent the issue of overall application with the use of a clipping mask.
Creating a Clipping Mask
Remember up at the top of this post when I mentioned that we can control which layers a mask affects? Well, in this section, I’m going to show you how we can apply the same gradient as an adjustment layer, but have that gradient only apply the two top layers and ignore the bottom one. It’s simple to accomplish.I’ll start back at the point where all images have a red gradient applied to them equally. After that, I’ll select both of the top two image layers by clicking on one and then holding the Shift key on my keyboard and then click on the other one. Once both layers are selected, I’ll drag them down to the Create New Group icon that sits at the bottom of the Layers panel. Once there, I’ll let go of my mouse.

This action will place the two selected layers into a Group inside the Layers panel. Take a look.

The funny thing is, even though I grouped the two layers I’d like the mask to be applied to, it’s still affecting all three of them. This is because I have yet to transform the regular mask into a clipping mask. I’ll do that now.
To create a clipping mask, I’ll select the mask I’d like to change. In this case, it’s the very top layer in the Layers panel. After that, I’ll head up to the top menu and click Layer > Create Clipping Mask.

Once that’s done, the mask layer will house a small downward facing arrow inside of it. It’s sort of tough to see, so I circled it in red. This arrow indicates that the mask in question only affects what’s directly below it.

More importantly, the mask now only affects the two layers in the group, leaving the bottom layer that’s not in the group completely untouched.

Really, that’s all that’s necessary in this case. Since I only wanted the mask to touch certain layers, I grouped them and turned the mask into a clipping mask. Hopefully, you can see the value in doing this and will be able to use something like this in the real world. Like so many other things when learning Adobe Photoshop, what I explained in this post is merely a concept. It’s how you apply this concept in your own projects that matters.
I hope you enjoyed today’s post. If you have any questions or concerns, please leave them in the comments section below. Thanks for reading!

