Cameron
Member
- Joined
- May 10, 2021
- Messages
- 108
- Reaction Score
- 3
- Points
- 23
- #1
Layer masks are hugely important when it comes to working inside of Adobe Photoshop. Just as learning about layers themselves is critical to accomplishing anything beyond simple photo edits, learning about layer masks can step your game up a whole bunch of notches. Gone are the days of using the Eraser Tool and the Undo command. Layer masks can give you the flexibility you’ve been searching for. And the best part is, using them is so easy. Once you wrap your head around what’s going on, you’ll be well on your way to beautiful and customized images.
I’ve actually written a lot about masks on this blog. Take a quick look at the links below to learn more about what they are and how you can use them.
What are Layer Masks in Adobe Photoshop?
How to Adjust Layer Masks by Color Range in Adobe Photoshop
How to Duplicate Masks Between Layers in Adobe Photoshop
There are actually quite a few posts on this topic. To see them all, simply search “layer masks” in the top search bar.
In today’s post, I’d like to share a few advanced tips that have to do with masks. Once you understand what they’re used for and what they can do, you’ll want to move onto making your life easier when engaging with them in Photoshop. So, down below, I’ll pass along a few little tricks and explanations that I’ve picked up through the years that can help you work faster and smarter.
To select the orange slice on the right, I used the Quick Selection Tool and then to mask the image so only that selected area shows, I went down to the bottom of the Layers panel and I clicked on the Add a Mask button. It was really that easy. Check out the result of my efforts.
Now let’s take a look at the Layers panel to get a better idea of what’s going on here.
Do you see how the white area in the mask in the layer thumbnail is where the orange slice is showing through? Also, do you see how there’s no content where the black area is? Remember, white reveals and black conceals. That’s the rule when it comes to masks. So if the mask thumbnail was selected in the Layers panel and I painted with either white or black in the image area, content would be either revealed or hidden.
When this lock icon is visible, it means that both the image and the mask are connected. So, if I take my mouse pointer and click and drag the orange slice around, it’ll move around the workspace just fine. I’ll do that now.
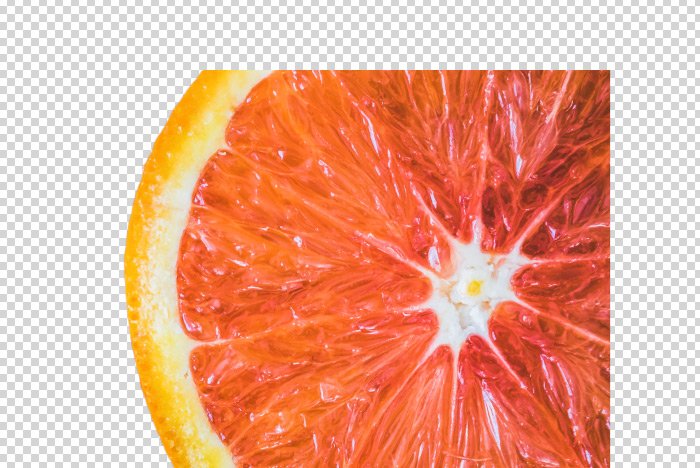
If I click on that small lock icon, I can separate the pixel based thumbnail and the mask. I’ll unlock the two thumbnails now and then I’ll select the image thumbnail and drag that one around in the workspace. Let’s see what happens.
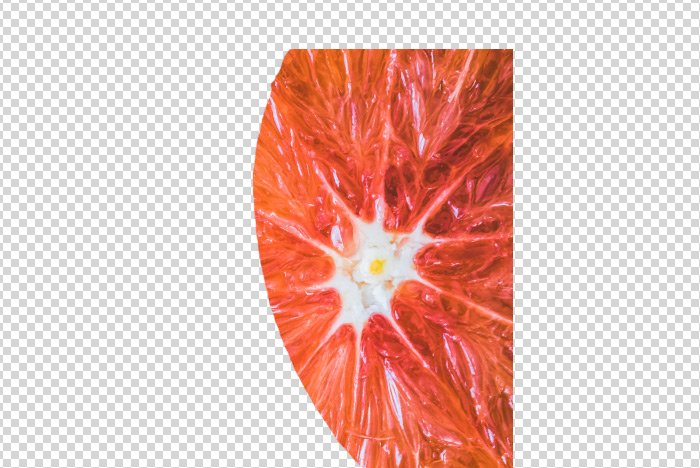
That’s interesting. It appears that the mask has maintained its position while only the image moved when I clicked and dragged. I’ll undo that so everything is back in their original positions and then I’ll select the mask thumbnail in the Layers panel. After that, I’ll click and drag around in the work area again. Let’s see what happens now.
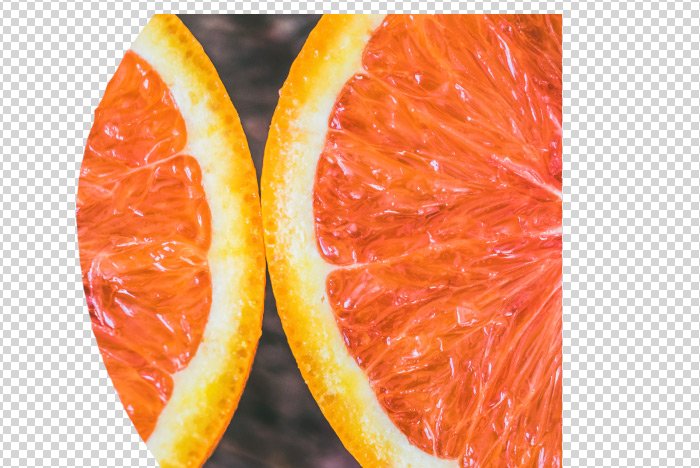
Well would you look at that. Just the masked area moved around this time. This is good to know. By unlocking the thumbnails, I can move around either the image itself or the mask itself. That’s very cool.
Here I am revealing some area by painting with white.
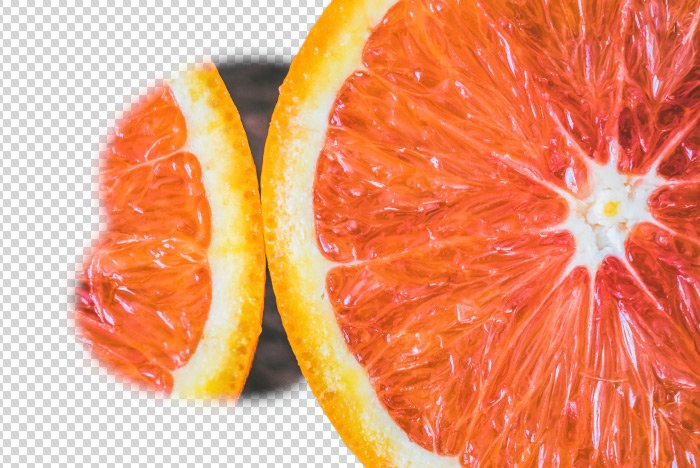
And here I am concealing some area by painting with black.
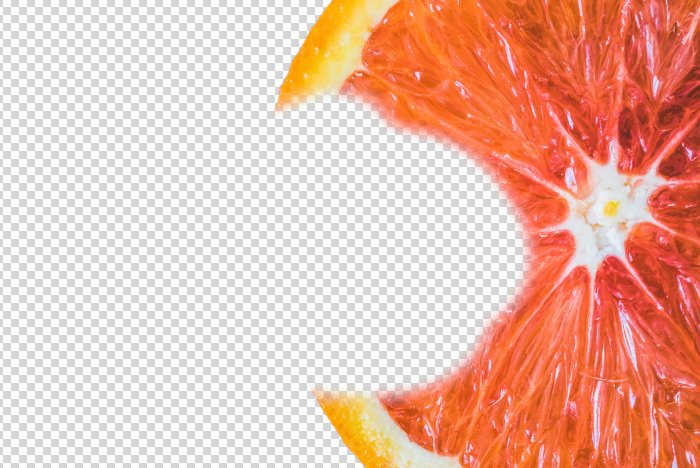
This is why masking is so powerful. I no longer need to permanently erase something to hide it. I can now simply hide it temporarily by masking it out.
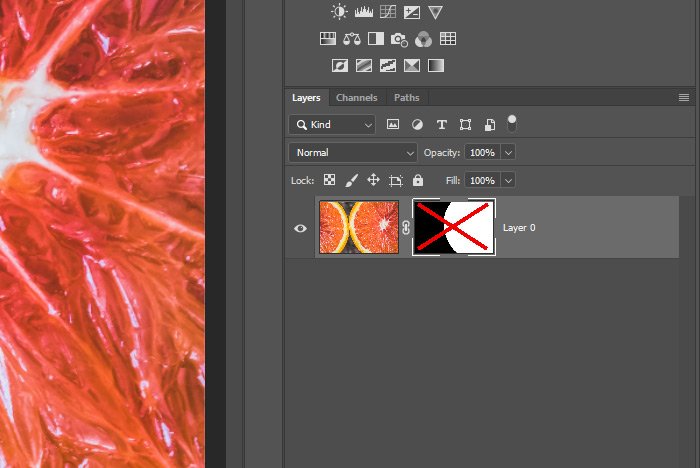
To enable the mask once more, I’ll simply Shift-click on the thumbnail again.
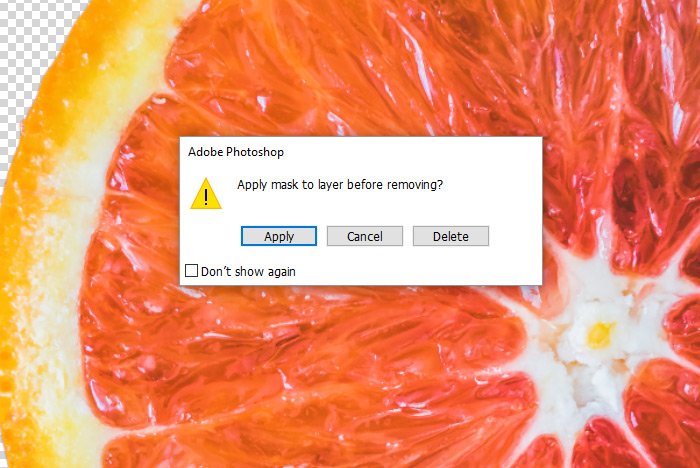
If I click on the Apply button, the mask will be applied to the image before it’s deleted, meaning any pixels that have been hidden by its use will be permanently deleted. If I click on the Delete button, the mask will be deleted as if it was never there in the first place.

And if I press both the Shift+Alt or the Shift+Option keys and then click on the mask thumbnail, I’ll get a sweet looking half red, half transparent overlay in the work area.
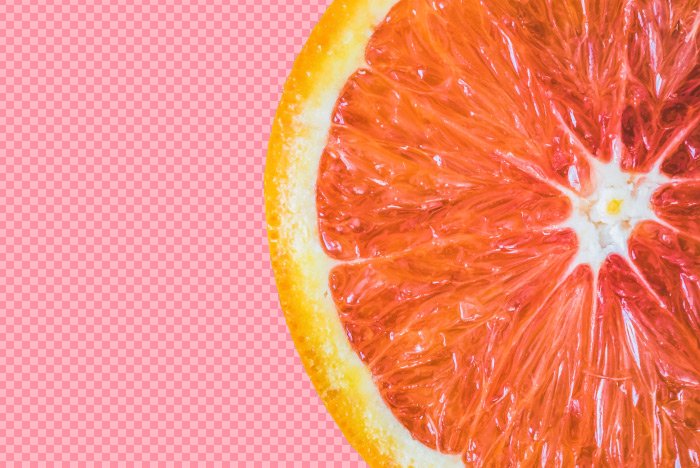
How’s that for cool? This view is very helpful, again, when dealing with intricate details while masking.
Okay, I think that’s good enough for today, but don’t worry, there’s more to come. Layer masks are deep and varied, so there’s a lot to talk about. If you have any questions regarding layer mask commands or layer masks in general, please ask below or in the Photoshop forum. Thanks for reading!
I’ve actually written a lot about masks on this blog. Take a quick look at the links below to learn more about what they are and how you can use them.
What are Layer Masks in Adobe Photoshop?
How to Adjust Layer Masks by Color Range in Adobe Photoshop
How to Duplicate Masks Between Layers in Adobe Photoshop
There are actually quite a few posts on this topic. To see them all, simply search “layer masks” in the top search bar.
In today’s post, I’d like to share a few advanced tips that have to do with masks. Once you understand what they’re used for and what they can do, you’ll want to move onto making your life easier when engaging with them in Photoshop. So, down below, I’ll pass along a few little tricks and explanations that I’ve picked up through the years that can help you work faster and smarter.
The Selected & Masked Image
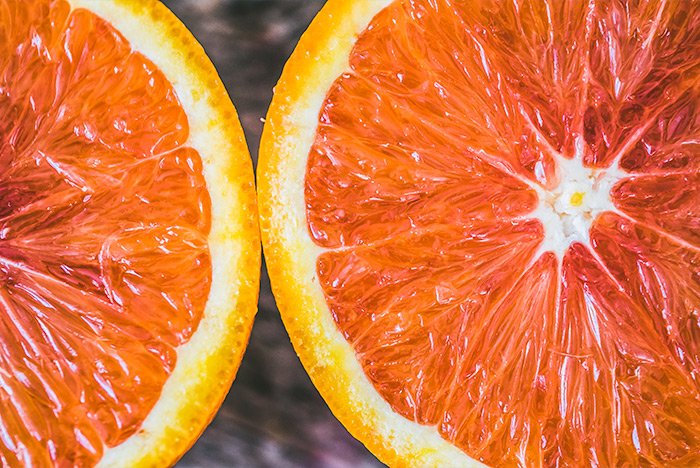
Okay, since we all now know how masks work, I thought I’d start off with an image of some orange slices in which I’ve already made a selection. I’ve also already applied a layer mask, so that only the orange slice on the right is showing. Let’s take a look at the original photo first.
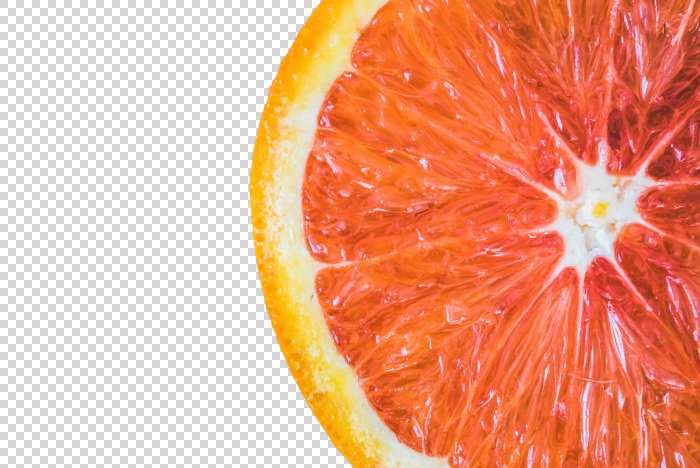
To select the orange slice on the right, I used the Quick Selection Tool and then to mask the image so only that selected area shows, I went down to the bottom of the Layers panel and I clicked on the Add a Mask button. It was really that easy. Check out the result of my efforts.

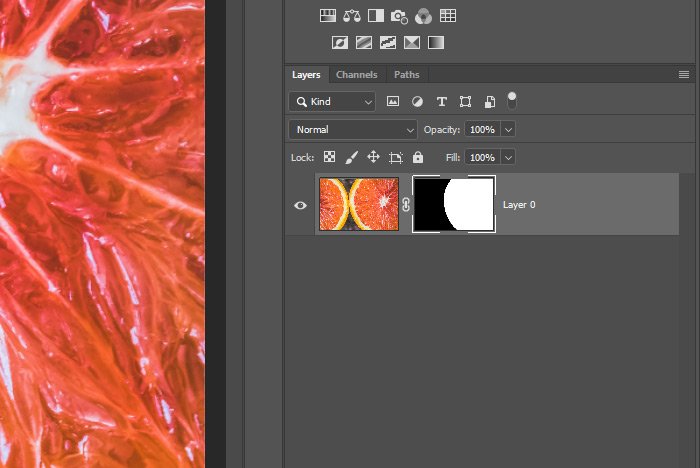
Now let’s take a look at the Layers panel to get a better idea of what’s going on here.

Do you see how the white area in the mask in the layer thumbnail is where the orange slice is showing through? Also, do you see how there’s no content where the black area is? Remember, white reveals and black conceals. That’s the rule when it comes to masks. So if the mask thumbnail was selected in the Layers panel and I painted with either white or black in the image area, content would be either revealed or hidden.
Keyboard Shortcut For Selecting Thumbnails
I’ve just mentioned that one of the thumbnails in the Layers panel needs to be selected in order for something to happen. When working with masks, you’ll quickly come to learn that selecting between the pixel based thumbnail and the mask based thumbnail needs to occur quite a bit. You can use your mouse pointer to accomplish these selections, but what’s even faster (after you get used to them) are some keyboard shortcuts. To select the image thumbnail in the Layers panel, use Ctrl+2 on your keyboard and to select the mask thumbnail, use Ctrl+\ on your keyboard. Command on Mac.Disconnecting the Image & Mask
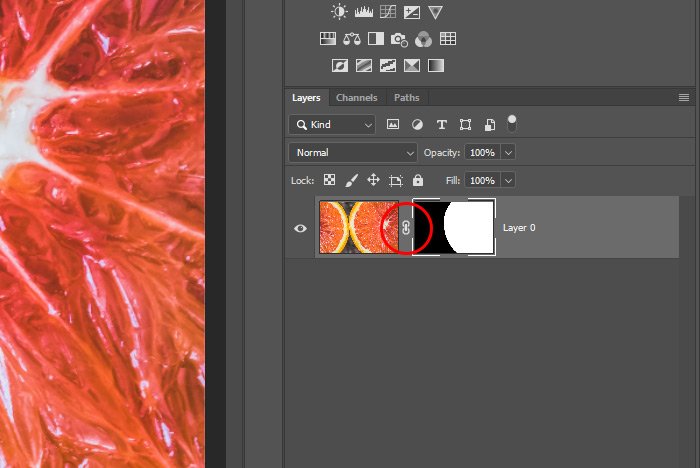
If we take a closer look at the two thumbnails in the Layers panel, we’ll notice a small lock icon that sits between the two thumbnails.
When this lock icon is visible, it means that both the image and the mask are connected. So, if I take my mouse pointer and click and drag the orange slice around, it’ll move around the workspace just fine. I’ll do that now.

If I click on that small lock icon, I can separate the pixel based thumbnail and the mask. I’ll unlock the two thumbnails now and then I’ll select the image thumbnail and drag that one around in the workspace. Let’s see what happens.

That’s interesting. It appears that the mask has maintained its position while only the image moved when I clicked and dragged. I’ll undo that so everything is back in their original positions and then I’ll select the mask thumbnail in the Layers panel. After that, I’ll click and drag around in the work area again. Let’s see what happens now.

Well would you look at that. Just the masked area moved around this time. This is good to know. By unlocking the thumbnails, I can move around either the image itself or the mask itself. That’s very cool.
Adding To & Removing From the Mask
I know you already know this, but I’ll mention it quickly anyway. If you would like to add to the mask or remove from it, you’ll need to first make sure the mask thumbnail is selected in the Layers panel and then paint in the work area, using the Brush Tool, with white or black. To select the mask thumbnail, I’ll click on it right now in the Layers panel. When I do that, I’ll notice that the colors in the Color Picker boxes change to white and black. I’ll first paint some area of the image with white to reveal the content and then I’ll paint with black to conceal it. These next two screenshots will show those two scenarios.Here I am revealing some area by painting with white.

And here I am concealing some area by painting with black.

This is why masking is so powerful. I no longer need to permanently erase something to hide it. I can now simply hide it temporarily by masking it out.
Disabling the Layer Mask
If I would like to disable the layer mask without completely deleting it, I can do so by holding down the Shift key on my keyboard and then by clicking once on the mask thumbnail in the Layers panel. When I do this, the mask will no longer have any effect and there will be a large red X through its thumbnail.
To enable the mask once more, I’ll simply Shift-click on the thumbnail again.
Deleting the Layer Mask
If I ever wanted to actually delete the mask as opposed to just hiding its effectiveness, I could easily do that. If I click and drag the mask thumbnail down to the trash can at the bottom of the Layers panel and drop, a dialog box will appear in the center of my screen.
If I click on the Apply button, the mask will be applied to the image before it’s deleted, meaning any pixels that have been hidden by its use will be permanently deleted. If I click on the Delete button, the mask will be deleted as if it was never there in the first place.
Larger Views of the Mask
I used this option all the time when working with masks. Sometimes, masks can be very intricate and detailed and the larger their view, the easier it is to work with them. If I hold down the Alt (Option) key on my keyboard and then click on the layer mask thumbnail, I’ll get a large white and black version of the mask in the workspace. Take a look.
And if I press both the Shift+Alt or the Shift+Option keys and then click on the mask thumbnail, I’ll get a sweet looking half red, half transparent overlay in the work area.

How’s that for cool? This view is very helpful, again, when dealing with intricate details while masking.
Okay, I think that’s good enough for today, but don’t worry, there’s more to come. Layer masks are deep and varied, so there’s a lot to talk about. If you have any questions regarding layer mask commands or layer masks in general, please ask below or in the Photoshop forum. Thanks for reading!
