Question: I am at a loss as to how to set my electronic level on my Canon T6i. I swear I’ve seen it done before, but for the life of me, I can’t find the setting. Does anyone know how to make this setting so I can use the level?
Answer: Unfortunately, your camera doesn’t come with the electronic level option. I’ve seen other questions on some forums that asked the same as you asked. In some cases, T6i owners asked whether or not their camera came with vertical leveling as well as horizontal leveling. The camera comes with neither option. From what I gather, the Canon T6s does come with the horizontal option, but not the vertical or the front and back tilt.
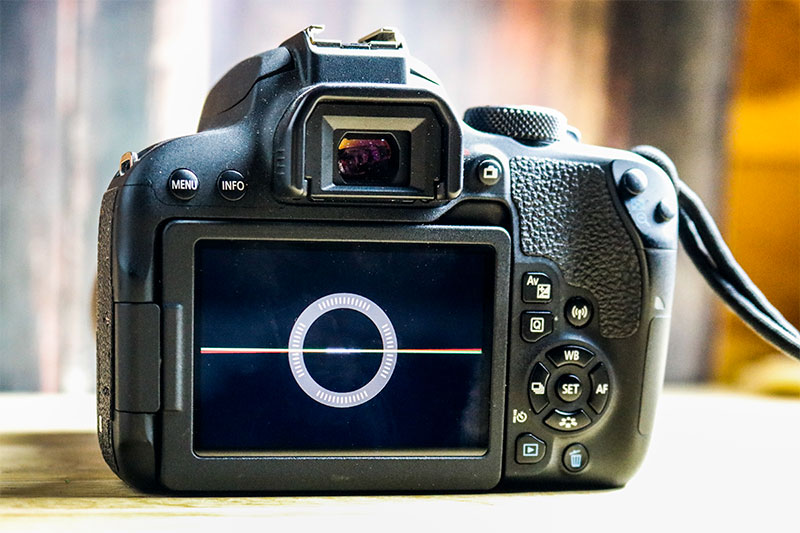
If you owned the T7i, I can help you, as you’d be in luck. That one’s got the horizontal leveling. To set this, all you need to do is press the INFO button on the back of your camera until you see the level. If you’re using the viewfinder, then you’ll see the level appear and take up the entire screen as in this photo:

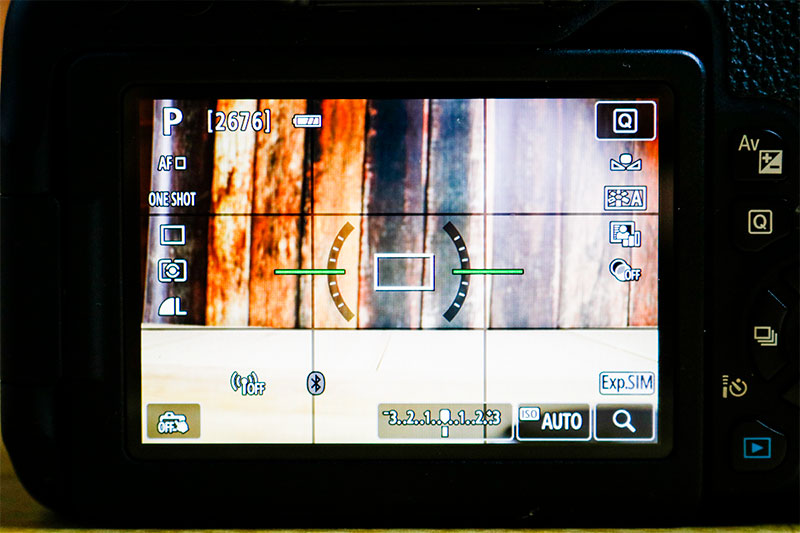
If you’re using the read LCD screen, then pressing the INFO button a few times will show you the level in this fashion:

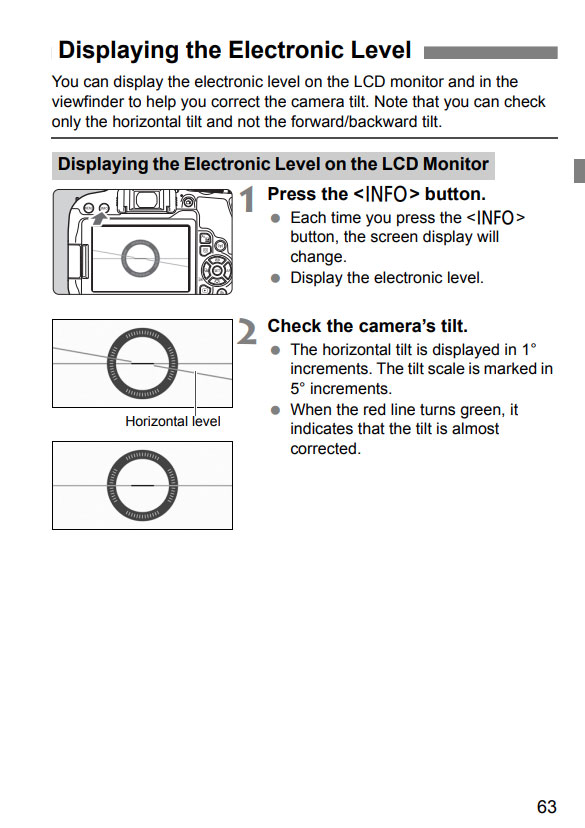
Either way, it’s very simple to make this setting. Here’s the page from the T7i owner’s manual that describes viewing the level on the rear screen:

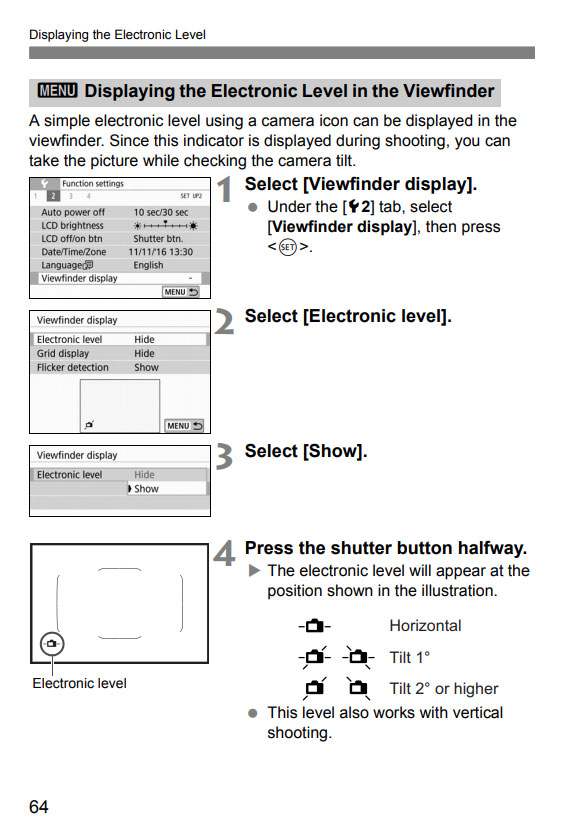
And what’s very cool about this camera is that it also can display a small icon-like level right inside the viewfinder itself. Yes, the small hole you look through on your camera. To make this setting, press the MENU button on the back of your camera and navigate to VIEWFINDER DISPLAY. Press the SET button to enter the area. Then, press ELECTRONIC LEVEL and use the up/down arrows to navigate to SHOW. Then press the SET button to accept your change and then press the MENU button again and again to exit the settings area. To see the level inside the viewfinder, turn your camera on, take off the lens cap, and press the shutter button half way down. You’ll see an icon of a small camera in the lower left corner. If you tilt your camera side to side, you’ll see small lines appear on either side of it. Two horizontal lines means your camera is level. Here’s the page from the manual that covers this function:

I have a Canon EOS 6D. How do I view the level on this camera? I just got it so I don’t really know what I’m doing yet. I don’t know all the functions. Thanks.
I’m not sure if you have the Mark I or the Mark II.
Like the T7i, your camera comes with only the horizontal level. You can view it on the LCD monitor or in the viewfinder. To view it on the LCD monitor, all you need to do is turn your camera on and then click the Info button on the back of it a few times until you see the level. If you don’t see it, it may not be active on your camera and you’ll need to set it so it’s active. To do this on the Canon 6D, press the Menu button on the back and then navigate to the Info Button Displays section. This is the yellow wrench with three dots. Then, press Set to enter that area and navigate down to the Electronic Level option and make sure it’s active.There should be a check next to it if it is. To exit the menu, you can either press the Menu button again a few times or just half press the shutter button.
Once you’re done with all this you can turn the level on to test it out. Also, if you’re shooting in Live View, you can follow the same procedure to turn the level on. But just remember, if you’re in video mode and want to shoot some video, you may level the camera only before shooting. Once you begin shooting the video though, the level will disappear. You can’t both shoot video and see the level simultaneously.
If you’d like to display the electronic menu while looking through the viewfinder, you’ll need to activate that option in your camera as well. For the 6D, you’ll need to be in view finder mode and then press the Menu button to enter the menu area. From there, navigate to the C.Fn III:Operation/Others section. This is in the orange one that looks like a small camera icon. From there, navigate left or right until you hit the 5:Custom Controls section. Press the Set button to enter the area. Next navigate to the DOF preview button. Again, press the Set button to enter that area. After that, navigate to the VF electronic level option. Press Set and then the Menu button a few times to exit the menu area. Basically, what you just did was assign the electronic level option to the DOF preview button. So now, when you area in viewfinder mode and when you press the DOF preview button, the level will appear when you’re looking through the viewfinder. It’s a tilting scale, so you should be able to see exactly how level or unlevel your camera is. I believe this camera displays how level it is in 1° increments.