I’s say this is one of the very first settings I edit after getting a new computer. Working with the mouse is critically important to a user’s sanity and if that mouse is too slow, too fast or all around annoying, the user might just go crazy.
Today, I offer you a quick post that will explain exactly how to go about adjusting two mouse settings in Windows 10. First, we have the setting that controls which button is the primary one and which is the secondary and second, we have the setting that controls how many lines are scrolled per one roll-click of the mouse roller. Both settings are extraordinarily simple to edit, so this shouldn’t take much time at all.
Launching the Mouse Settings
To adjust these two settings, I’ll click the Start button to open the Start menu. Remember the time I wrote a post that covered the many aspects of the Windows 10 Start menu? If you don’t, you should really check it out.
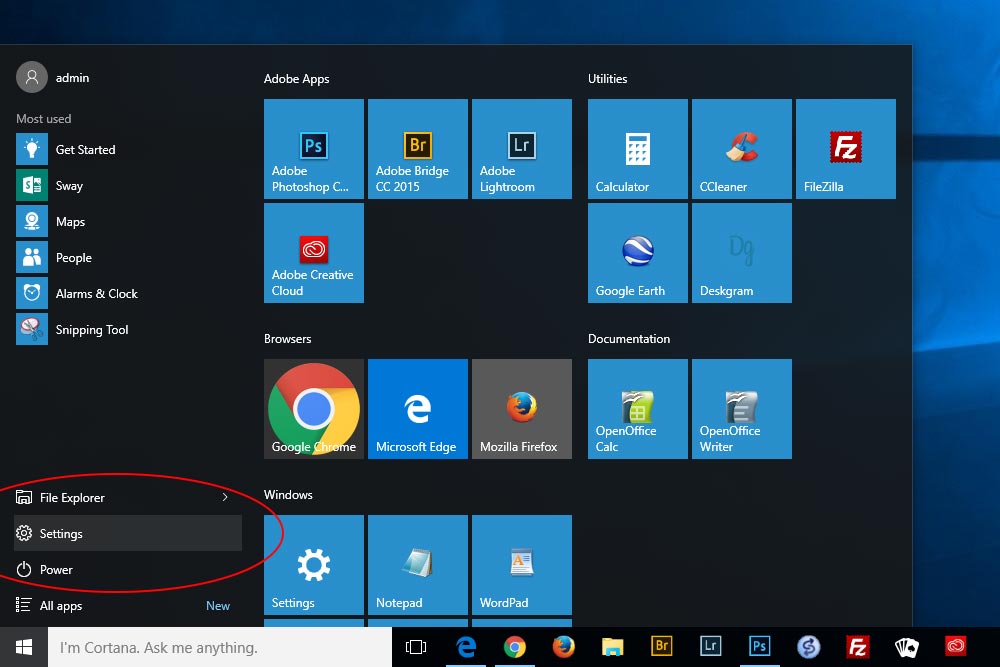
When the menu opens, I’ll click on the Settings menu item, which I’ve circled in red above.
After I click on the Settings button, the Settings menu will open.
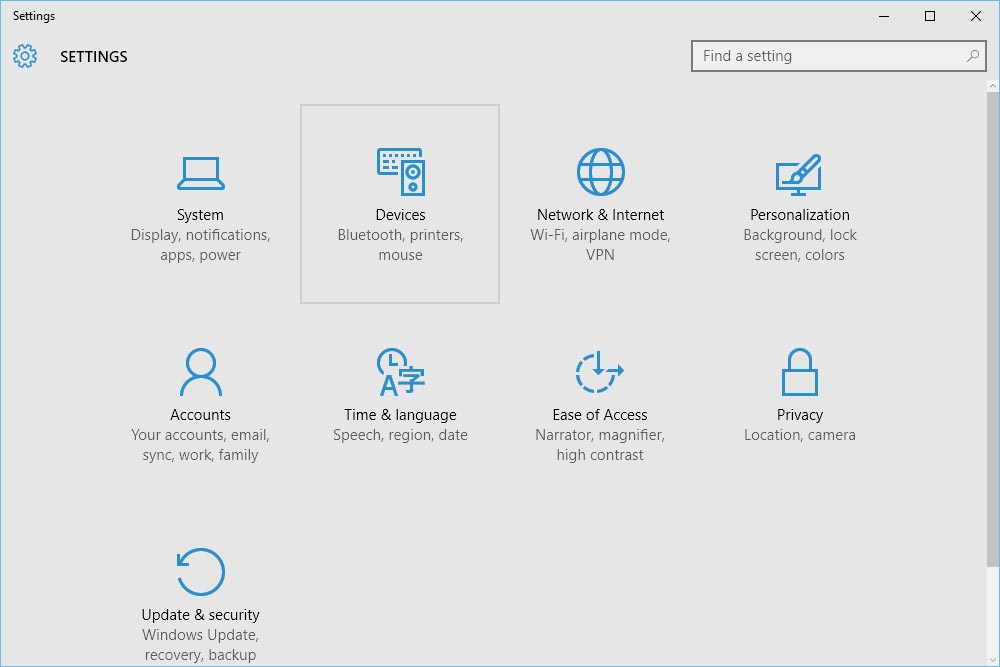
Next, I’ll go ahead and click on Devices.
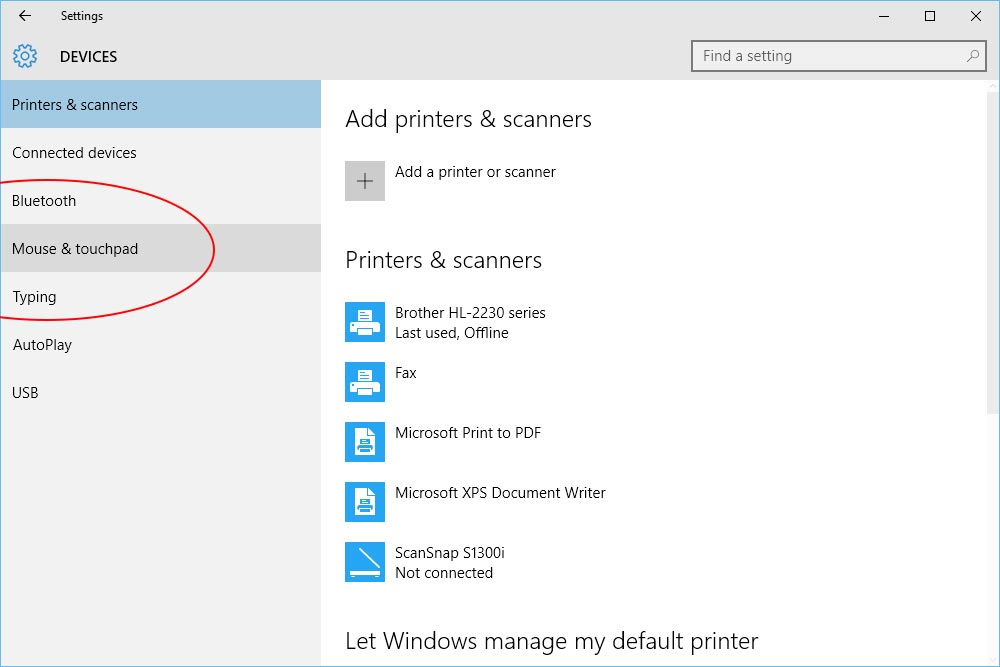
The next button I’ll click on is called Mouse & Touchpad. Once I do that, I’ll find myself at the Mouse settings window. Perfect.
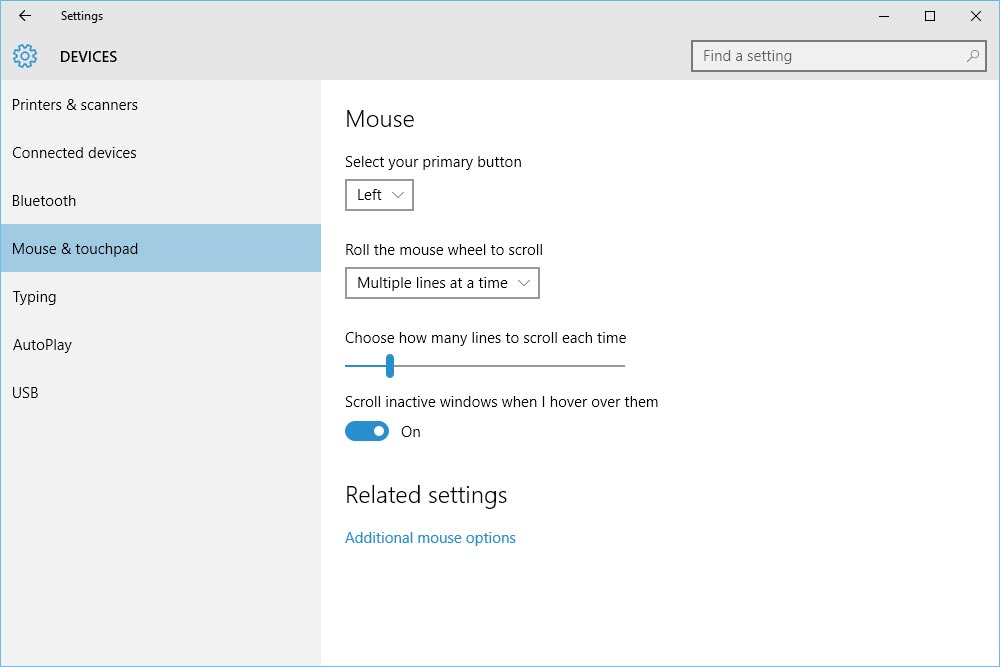
Switching the Left & Right Mouse Click
Do you know what the difference between the left mouse click and the right mouse click is? No? Well, let me help.
Simply put, in Windows, the left click selects something and carries out some sort of an action. You can either single click it or double click it. If you single click, you generally select something. Think of a file or a folder as a target for some action to come in the future. If you double click, whatever the possible action is, it’s carried out.
If I head into a folder, I can select a file by left clicking on it once. If I want to open that folder, I can double click it. It’s that easy.
Remember, don’t confuse the operations of working inside of Windows with the operations of working on the internet. The internet consists of hyperlinks that only need to be clicked on once to carry out an action. There’s no need to double click a link on a web page.
In Windows, if I right click, I’m presented with a menu of possibilities for action. Once the menu appears, I’ll need to left click on one of the selections to make something happen. I’ve never double right clicked on anything, so I don’t think that’s even an option.
The reason I bring this up is because in Windows 10, we have the ability to swap which buttons control the left and right clicking on our mice (or mouses). Or more specifically, which button is the Primary button and which is the Secondary. Traditionally, the left button is primary.
To switch which does what, all I need to do is locate the drop-down menu right below the line that says “Select your Primary Button.” I’ll click it and choose either the left or the right.
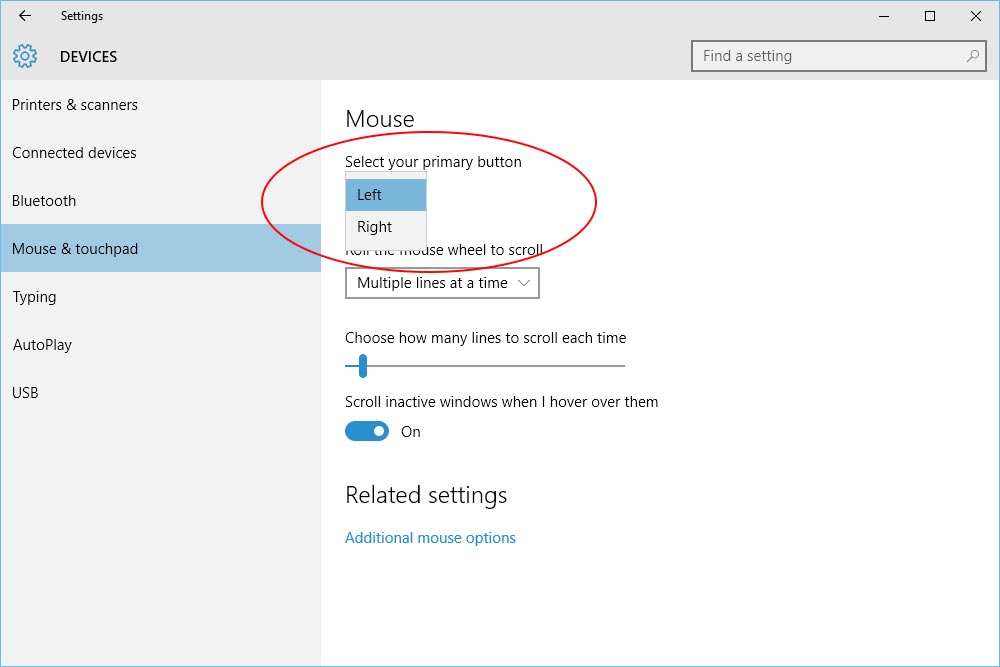
There is no need to hit Save. Actually, there is no Save button to hit.
Adjusting the Mouse Roller Wheel
The mouse wheel is the best invention to hit the computer in the last twenty years. I know, crazy. I can remember the days before this wheel and boy, they were tough. Every time I wanted to scroll down a screen, I had to move my mouse pointer over to the scroll bar on the right, click it and drag it down. Horrible for the carpal tunnel.
These days, I just flick my finger and the screen magically moves up and down. The thing is, if the settings for how far the screen moves are off, life is almost as miserable as they were back in the day. Just imagine rolling the mouse wheel so the screen moves down – but only moves down one line at a time. Imagine how frustrating that would be.
The next topic I’d like to discuss deals with how to edit the settings that control how far a page moves when you roll the mouse wheel one click. Most mice wheels “click” gently when rolled, so I consider that a click.
Windows 10 comes set to move a page 3 lines with one click on a mouse wheel. That’s sort of mild, so I changed mine a while back to scroll 6 lines per click. This is a very realistic setting because it’s just enough, but not too much.
In the same window, if I look at the drop-down menu right below the line that reads “Roll the Mouse Wheel to Scroll” I can make the first change.
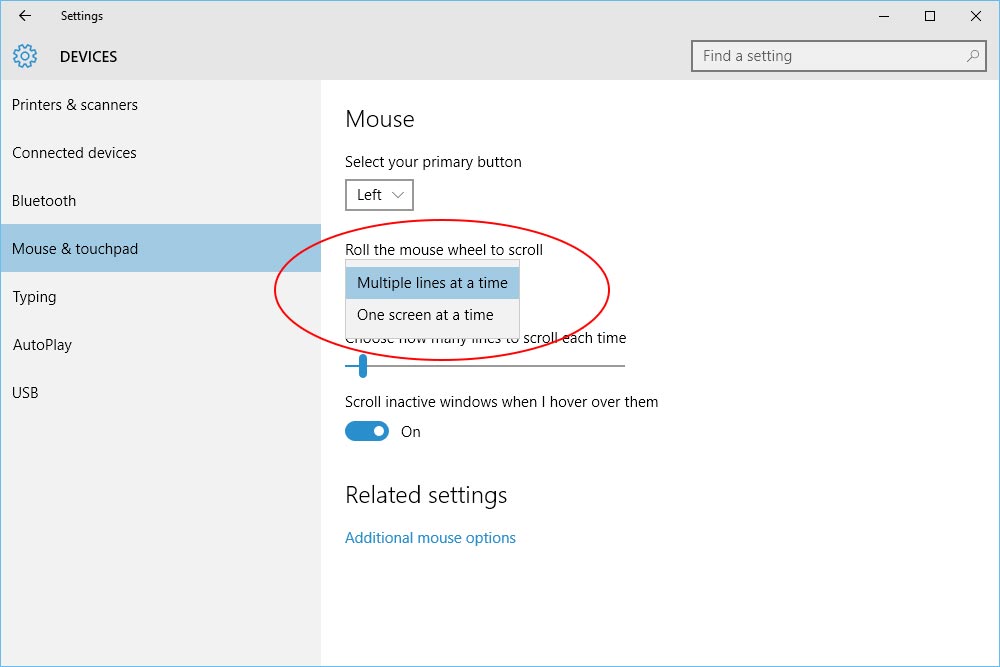
If I select the first option that says Multiple Lines at a Time, I’ll have the ability to edit just how many lines that is with the slider I’ll talk about next. If I select the option right below that, that says One Screen at a Time, the slider below will gray out and when I roll the mouse wheel one click, the page I’m on will move an entire page worth, either up or down. To me, that’s drastic.
If I move down one spot, I’ll see the slider that controls how many lines the page will move up or down with one click of the mouse wheel.
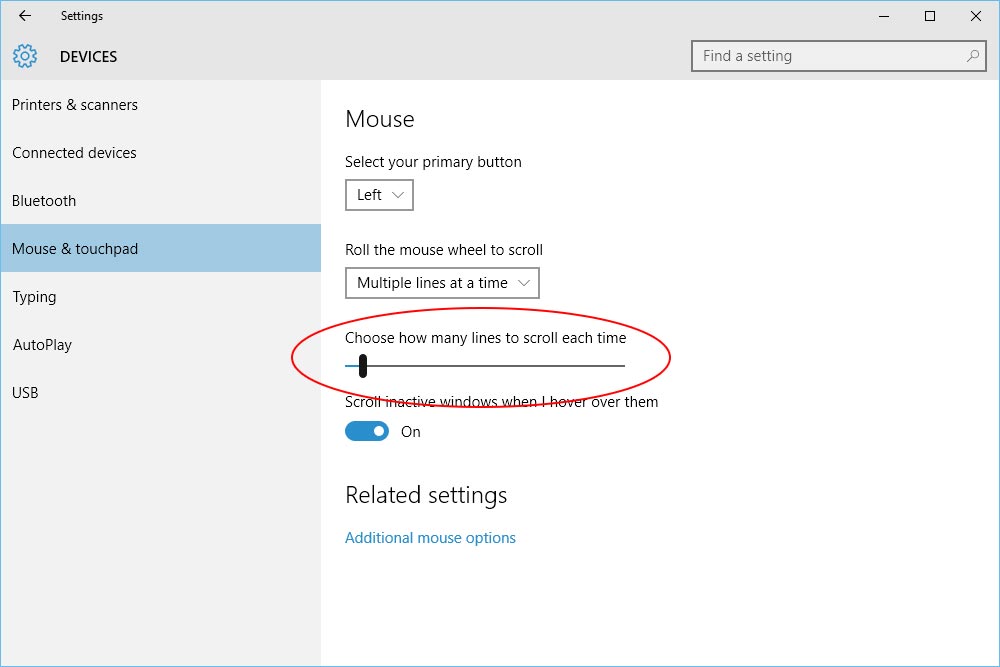
When active, the slider handle will be blue. When you roll over it, such as I did in the above screenshot, the handle will turn black.
This setting is rather self explanatory. Push the handle to the left to reduce the number of lines moved and to the right to increase it. As you’re pushing, the number of lines will appear above the handle. Use these numbers as a reference point when making changes.
Scrolling Inactive Windows
I use this feature a lot. I actually didn’t even know it existed until I looked into how to edit the mouse settings. It’s handy because I generally have multiple windows open when I’m working on my computer.
By default, Windows 10 comes with the Scroll Inactive Windows When I Hover Over Them setting to On. All this means is that you’ll have the ability to control the visible content of a window that’s behind the active one on your computer by scrolling. Of course, your mouse needs to be hovering over the inactive window for anything to happen, but that’s simple enough to do. If I wanted to turn this feature off for some reason, I would just click the switch in the Mouse settings window.
When I’m in a website, say, Yahoo news and I use the mouse wheel to scroll up or down, the page changes to the last page I looked at or the next page on the list. How do I stop this?
I have Windows 10 on an HP laptop.
Thank you, I hope.
Settings > Devices > Mouse
– Roll the Mouse Wheel and SELECT MULTIPLE LINES AT A TIME.
– Adjust the slider for the number of lines to scroll when you roll the mouse ball.
For so long, I have been trying to fix this problem on my PC, but it just wouldn’t work right. Then I landed here and followed everything step by step and it finally got fixed. All thanks to you.