Let’s talk about the panels we see inside Photoshop for a moment. There’s a lot to learn about these panels, but I’ll limit this post to just a few aspects of them in this post. Today, I’d like to discuss how you can open any panel in the application, how to group panels, and how to hide panels. This shouldn’t take long.
To see an entire list of available panels offered inside of Photoshop, simply click the Window toolbar menu option.
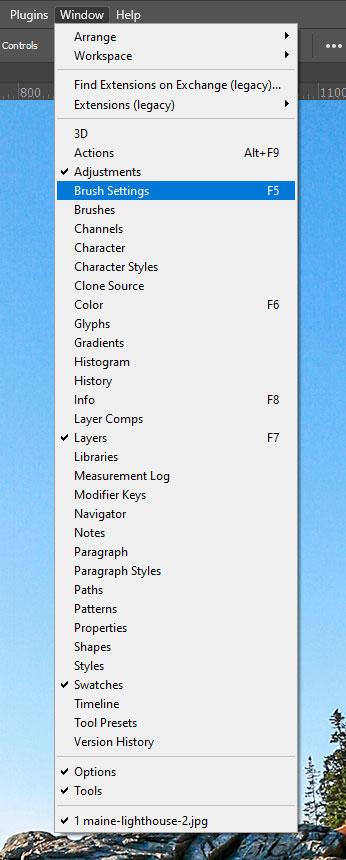
As you can see, there are quite a few of these things. Also, if you’ll notice, in my list, some have black checks to the left of their name and some don’t. The ones that have the checks next to them are currently open and visible inside of the Photoshop workspace while the ones that have no checks are hidden. They may be available in a group of panels, but they aren’t active. For instance, let’s take a look at the Swatches panel. We can see that Swatches has a check next to it in the list above and that it’s active in the workspace.
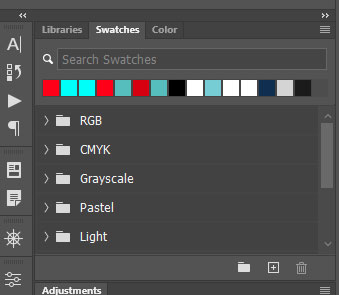
We can also see that this panel is grouped with the Libraries and Color panels, although those aren’t active. And they also have no checks in the list above.
Now, if I open the list of panels again by clicking on the Window menu item, I can click the Color panel option to see if it becomes live. Let’s see what happens.
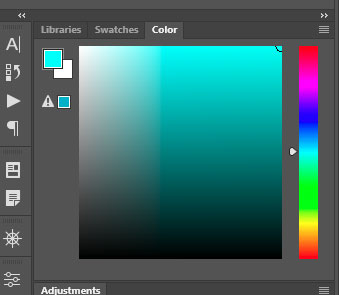
It does indeed become active in the group of panels. It also gained a black check in the list above. And at the same time, the Swatches became inactive and lost the check. The same things would have occurred had I simply clicked on the Color tab in the group of panels. The panel would have become live and gained a check and the other panel would have lost its check.
So there you go. That’s how you can open and close panels in Photoshop. Or perhaps I should say activate them an inactivate them.
Here’s a quick tip for you. If you’d like more room in your work area and would like to hide all of the panels, panel groups, and even the options bar, all you need to do is press the Tab key on your keyboard and let go. Everything will disappear. Press it again and everything will come back.
Now let’s group and ungroup panels. As you saw, I already have a group of three panels I’m using as an example for this post. These three panels are Libraries, Swatches, and Color. These three are set as tabs right next to one another. If I were to click and drag the Color tab out of the group and drop it in the work area, let’s see what would happen.
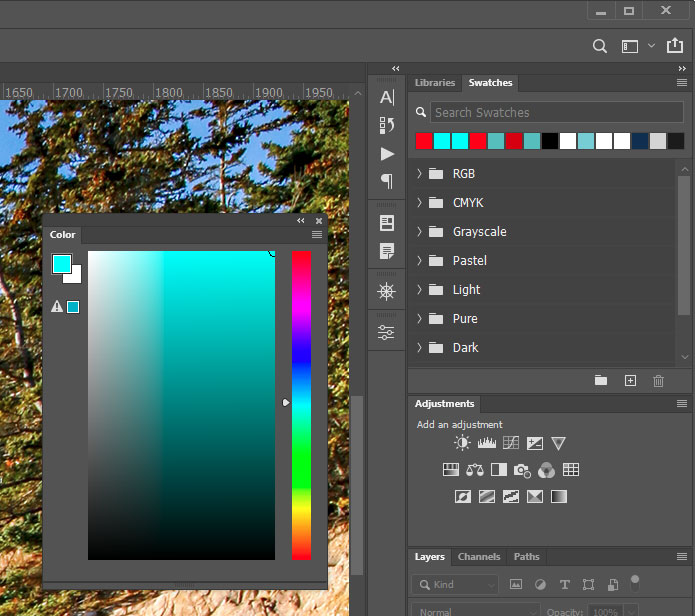
As you can see, I have undocked the panel so it floats in the workspace. I can do this with any panel in the program, which is pretty cool. To return it to the group or place it in another group, I would click the tab of the panel again and drag it where I wanted. I’ll put it back where I found it. When I get close, a blue area will highlight. When that appears, I know it’s safe to drop.
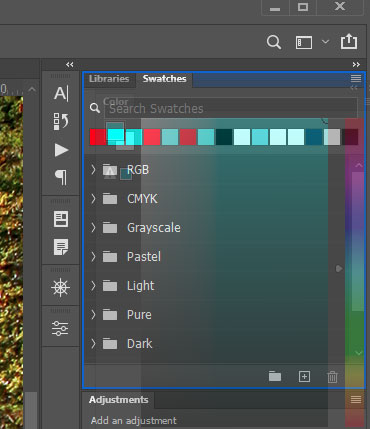
And just to let you know, I could also just as easily undock the entire group of panels by clicking next to the tabs on the right and dragging like I just did above. And the same process is used to return the group to the side area.
If I wanted to undock the entire right side of panels, I could do that too. All I would need to do is click on the top most part of the group, click, and drag outward. Take a look.
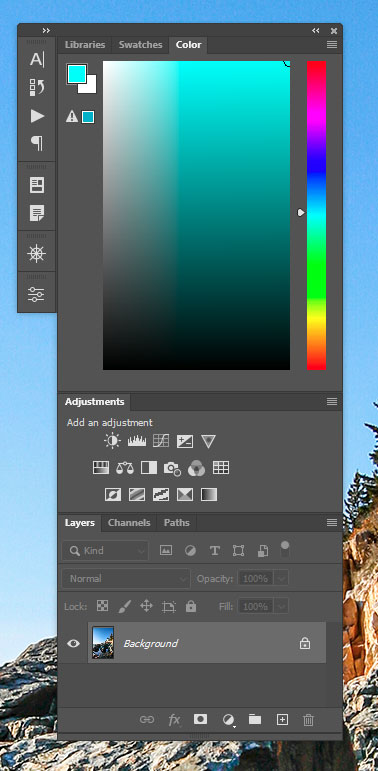
To return them to their rightful position, I could click that same area and bring my mouse all the way over to the right edge of Photoshop. A vertical blue bar will appear and that’s when I’d know it’s safe to drop them.
And there you have it. If you have any questions about panel grouping, opening, closing, docking, or anything else in Photoshop, please ask down below. Thanks!
Leave a Reply