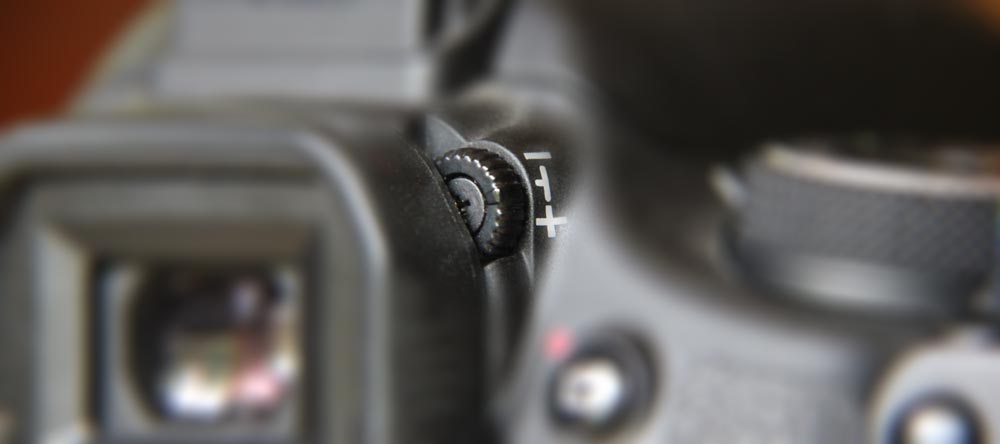
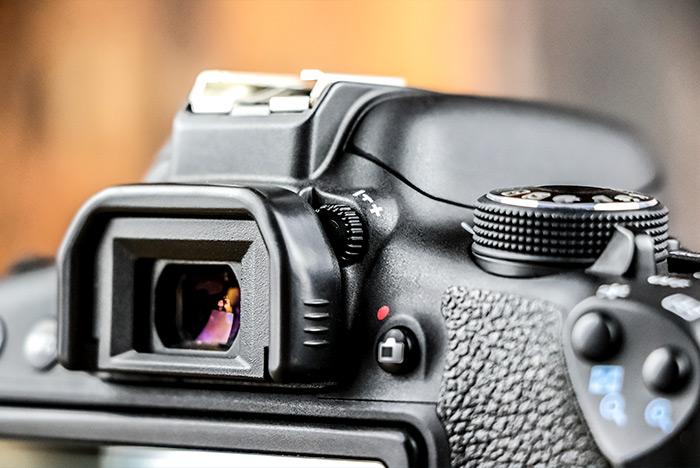
With any DSLR camera, before you head out to do some serious shooting, you’ll need to make a few fine adjustments. In this post, I’m going to talk about one of those adjustments – how to dial in, or “calibrate” the diopter of your camera.

What is the Diopter?
First, I think it might be beneficial to explain what exactly the diopter of your camera is. If you’re new to photography, it’s one of those things that you’ve seen a million times on your camera and, while you were sure it was of the utmost importance, you ignored it. If you still don’t have a clue as to what I’m referring to, please take a quick glance toward the photo at the top of this post. It’s that little dial next to the viewfinder on all DSLR cameras and a good portion of point and shoot cameras.
What’s the Purpose of the Diopter?
The purpose of the diopter is to adjust the image you see in the viewfinder to match your eyesight. If you take a lot of pictures using auto-focus and look through the large LCD screen at the back of your camera, this most likely isn’t a big deal. But if you wear glasses, use manual focus and look through the small viewfinder, adjusting the diopter is of extreme importance. It’s critical to calibrate what your camera sees to what you see because if you don’t, you’ll be taking photos that you think are clear, but that are actually blurry. And I’m sure you can find better things to do than banging your head against the wall the night you decide to flip through all those photos you took days before.
Calibrating the Diopter
This is the part I love. I love it because it’s just so dang easy to make this calibration and once you do, you’ll feel like you just breathed new life into your photography. I suppose I can compare it to finally removing a piece of dust from your eye – something so simple can make you feel so good.
Steps To Make Calibration
1. If you wear glasses, remove them. It’s important to look through the camera’s viewfinder with your uncorrected vision.
2. Set your camera up using a tripod. For later steps, you’ll need a steady camera, so a tripod is perfect. If one isn’t available, you can rest your camera on a desk or a table – anything that will stop the natural sway of photographing freehand.
3. Find a subject to focus on that’s got good contrast on its edges. A street sign or a license plate is a good example. If you’re indoors, perhaps a painting on the wall or a design on something in the kitchen. As long as your subject has some contrast between its shapes, you should be good to go.
4. Set your tripod up a few meters away from your subject. You’ll want to have a nice range between your camera and your subject, but not too much distance. When you focus in, you’ll want to be able to see everything clearly.
5. Use autofocus to focus in on your subject. Autofocus is extremely accurate and reliable, so when you focus in on your subject using it, you can rest assured that what your camera is seeing is clear to it.
6. Adjust your diopter’s dial until what you see is clear. Once your subject is in focus using your camera’s autofocus, while looking through the small viewfinder, turn your diopter adjustment knob back and forth until what you see is absolutely clear. Once you do this, your camera’s viewfinder will be calibrated specifically for your eyes.
See? I told you it was easy. Once you get the hang of customizing your diopter’s setting to your own eyes, you can share your camera with others confidently, knowing you can quickly bring your settings back if need be. Also, if your camera bumps around in your bag and gets whacked out of calibration, you’ll be set back up in no time.
I hope you enjoyed this quick post on how to calibrate the diopter setting on your camera. For more interesting posts on photography, please take a look at my photography tutorials category.
Wear Glasses? How to Easily Calibrate Your Camera’s Diopter
I can remember back years ago, I had very little idea of what was going on with my camera. I had recently purchased my first DSLR and instead of learning what things did, I simply fumbled around and pushed buttons in an effort to take a nice looking photo. I had already heard about the different modes one could use to capture photographs and fiddled a bit with those too. I’ll admit that I had very little success with anything I tried to accomplish with that camera. Auto mode was my best friend, so I stuck with that for a while. Surprisingly, learning about photography the right way wasn’t so difficult after all and when I experienced my first taste of success, I took off like a rocket.
One of the gadgets on my camera that I used to twist and turn was the diopter wheel. Since I didn’t know what this wheel controlled and since it never seemed to make a difference one way or another after I turned it, I used it as sort of a nervous twitch apparatus. As I was waiting for my shot, I’d lift my finger up to that wheel and roll it back and forth. I know, so silly. I didn’t pay attention to a lot of things when I was younger. Today though, I’m much more mature and I now have an appreciation for what that small device does. It allows the scene to appear clearly if you’re looking through your viewfinder and your camera is in focus. This makes all the difference, especially if you wear glasses. What once may have appeared blurry can absolutely appear sharp. All it takes is the twist of one tiny wheel.

Where is the Diopter Wheel?
Take a look at the image above. I just snapped this photo of our Canon Rebel T6i. Do you see the button with the red dot next to it? Good. Now look above that button and slightly to the left. That’s the wheel I’m referring to. It’s got a + and a – next to it.
How Do You Know if Your Diopter Needs Adjusting?
Here’s a little test for you. Turn your camera on and take a look through your viewfinder. Then, press your auto-focus button so whatever it is you’re looking at has been focused on. Is everything clear? Look closely at the grid inside your viewfinder and the image specs down below. You know, the aperture, shutter speed, etc… If the information that’s appearing inside your viewfinder is sharp, but the scene you focused on isn’t, then there’s something wrong with either the auto-focus or your focusing finger. Try focusing again. If your camera isn’t focusing on the scene, you’ll need to check into that. But, your diopter is fine and doesn’t need to be adjusted at all.
Now, if both the information inside the viewfinder and the scene are blurry, you’re diopter most likely needs to be calibrated. Don’t worry, it’s so easy to do this.
How to Calibrate Your Diopter
The simplest method for calibrating your diopter for most DSLR cameras available today is to mount your camera on a tripod for stability and then point it towards something that it can easily focus on. Try hanging a piece of newspaper or magazine in the wall. The camera needs to have crisp edges to bite into to really get a nice focus.
Once you have something to focus on, point the camera lens straight at that (about four feet away) and then use the camera’s auto-focus to focus in on it. Then, take a look through the viewfinder to check out the scene. Is it clear? Is the scene information inside the viewfinder clear? If not, turn the small wheel that sits to the right of the viewfinder one click at a time in either direction. You should see everything get more blurry or less blurry. Continue on until both the scene and the information are both crystal clear. At that point, you’ll know your diopter has been calibrated.
One more thing. If you usually shoot wearing your glasses, try adjusting the diopter without wearing them. The purpose of the diopter is to compensate for not wearing the glasses and to actually mimic wearing them. Calibrating the diopter essentially helps match the camera to your eyesight.
I hope I clearly explained how to calibrate the diopter of your DSLR camera. If you have any suggestions or questions regarding this post, please leave them below. Thanks for reading!
How to Adjust Camera Diopter
When you look through your camera’s viewfinder and see blur, your diopter may be out of calibration. To test this, first ask someone else to look through the same viewfinder. If what they see is sharp, then it’s obvious that you wear glasses and you need to customize your camera for your own eyes. If what they see is blurry as well, then the diopter needs to be adjusted – period.
Now, when I say “what they see,” I’m referring to the scene that you’re pointing your camera at as well as the scene information that’s located inside the viewfinder itself. Information like lens aperture, shutter speed and so on. Those small digital details should be just as clear as the scene itself.
Okay, so let’s get to calibrating, or adjusting, the diopter of a DSLR camera. It’s a very simple process.
Place your camera on something steady, such as a tripod or a table. You can even handhold your camera if you stay very still. Point it at something that includes detail, such as a newspaper, book or another object that the camera can easily focus on. Be sure the object is flat and that you’re facing your camera directly at it. Placing the object against a wall is a good idea. Then, auto-focus the camera so it’s locked onto the object. Look through the viewfinder. If what you see is crystal clear, there’s nothing more to do. If the scene is blurry, but the scene information inside the viewfinder is sharp, you’ll need to check out your auto-focus mechanics. Something may be off. If both the scene and the information are blurry, then roll the small dial that sits just to the right of the viewfinder until both are sharp again. This is the diopter adjustment wheel. When everything is sharp, you’re finished.
If you wear glasses and you made this adjustment without your glasses on, you just calibrated your camera for your own eyes. It’s likely that others will see blur when they look through your camera. This is to be expected.
Do you have more advice or suggestions on how to calibrate camera diopters? If so, please let me know below. Also, if you have any questions, please ask below as well. Thanks!
Loved the article, although I was looking for more information on the diopter adjustments through the kit lens. There are few cameras in which the diopter knob is missing. Probably old ones. I covered the same topic in a recent article I wrote myself.
Can you do an article where you shed some light on the diopter adjustment in old cameras via diopter lens?