LukeLewis
Member
- Joined
- May 7, 2021
- Messages
- 134
- Reaction Score
- 0
- Points
- 21
- #1
There are multiple methods for turning a color image into a black and white one in Adobe Photoshop. The problem is, some of those methods are better than others. Off the top of my head, I can think of one such method as being around pretty much forever. Another one has been around for a while and the last is the best and newest. Whichever process you choose, you’ll end up with a photo that has had the color removed from it. Whether or not that colorless image looks any good is another question. Let’s just say that some black and white photographs look better then other black and white photographs after they’ve been processed.
In today’s post, I’m going to walk you through the use of three tools that can strip the color from a photo in Adobe Photoshop. The tools range from lousy to great. After I demonstrate how to get rid of your photo’s color, I’ll explain how you can adjust the look of the color that was in the photo. I’ll also show you how you can do this non-destructively.
I’ve written a few posts on the “black and white” topic previously. If memory serves, these posts had to do with Camera Raw and Lightroom. While both of these applications would be the first place I would look to do something like this, Photoshop shouldn’t be counted out. It’s a powerhouse and should be considered as such.
Creating Black & White Photos in Adobe Camera Raw
How To Enhance Black & White Portraits in Adobe Camera Raw
Creating an Awesome Black & White Photo in Adobe Lightroom
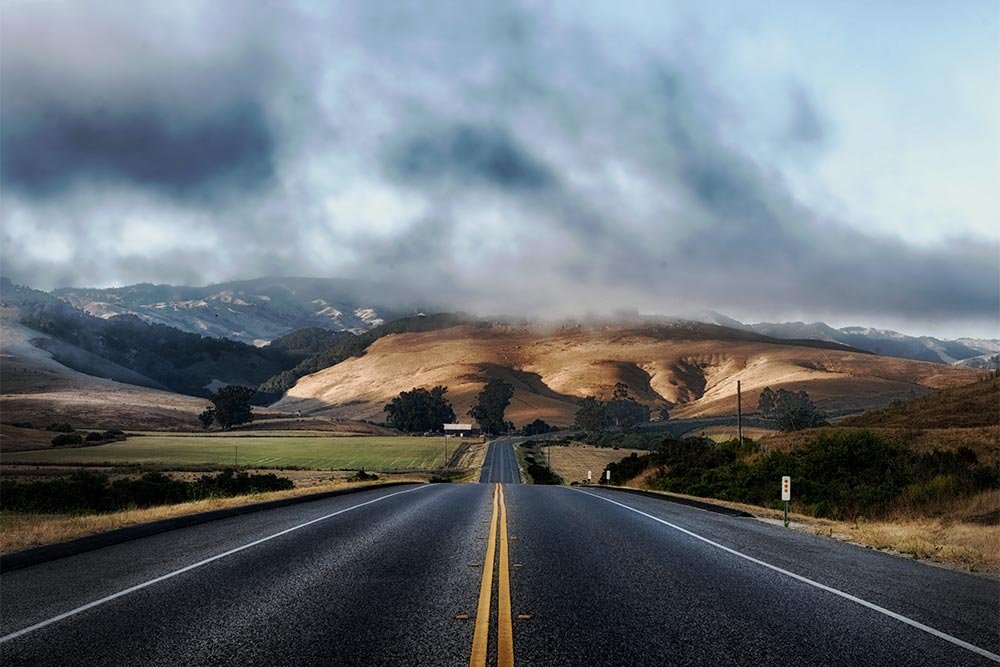
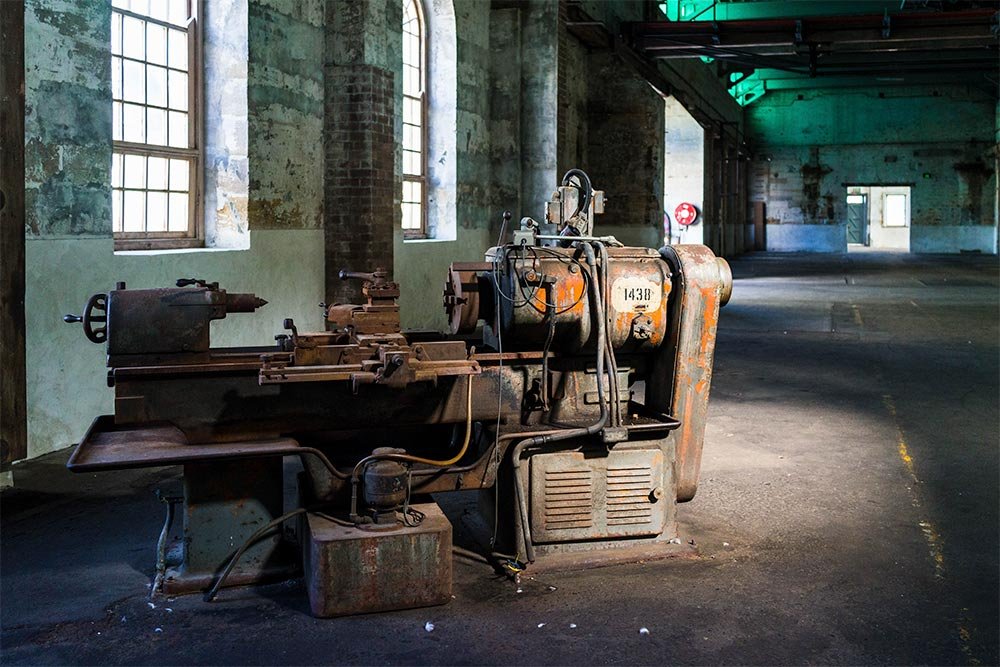
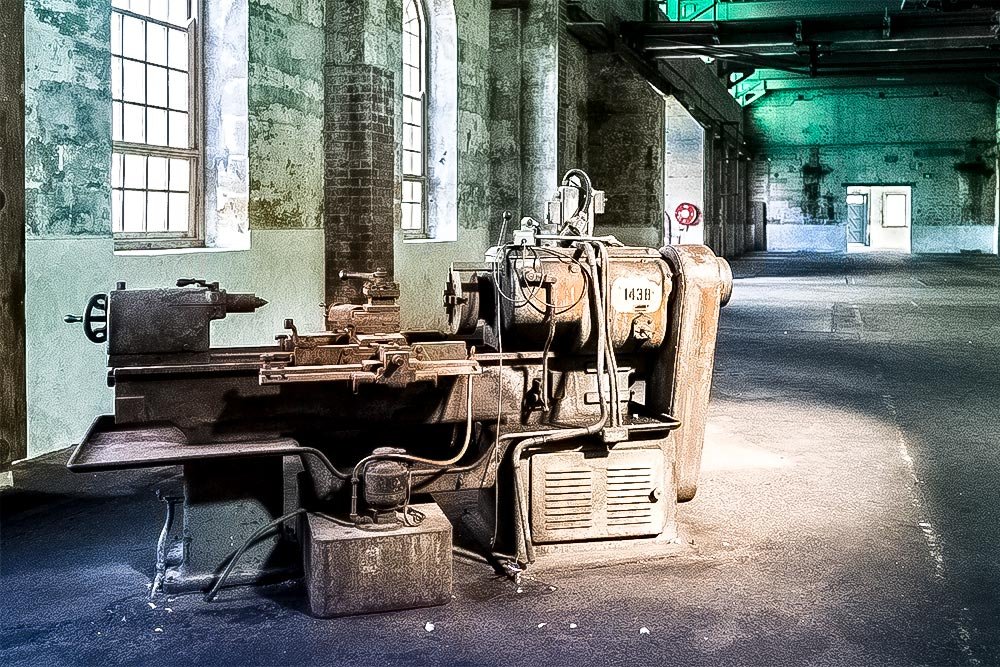
As you can see, in this image, we’ve got some greens, blues, yellows, oranges and a few others. This will be perfect later on when we start breaking these colors down.
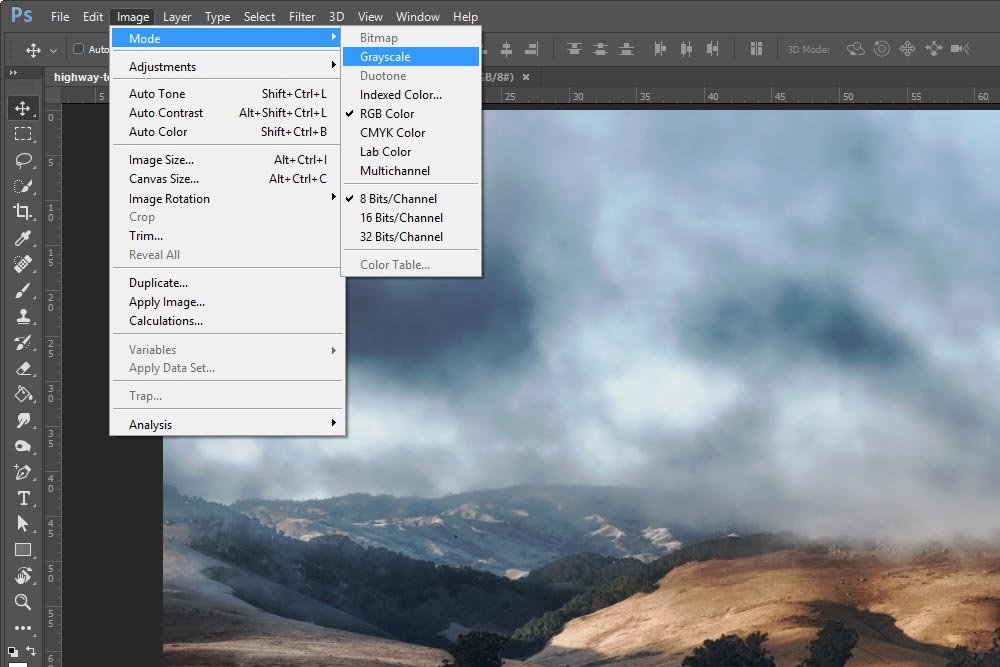
Once I do this, I’ll receive a message prompting me to make a decision. Do I really want to discard this file’s color information?
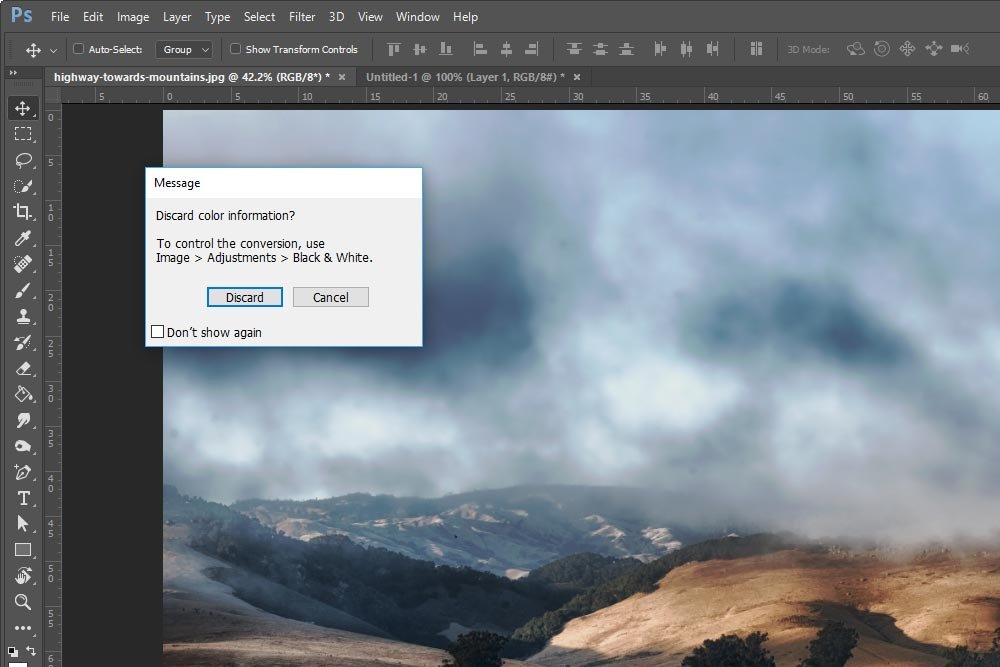
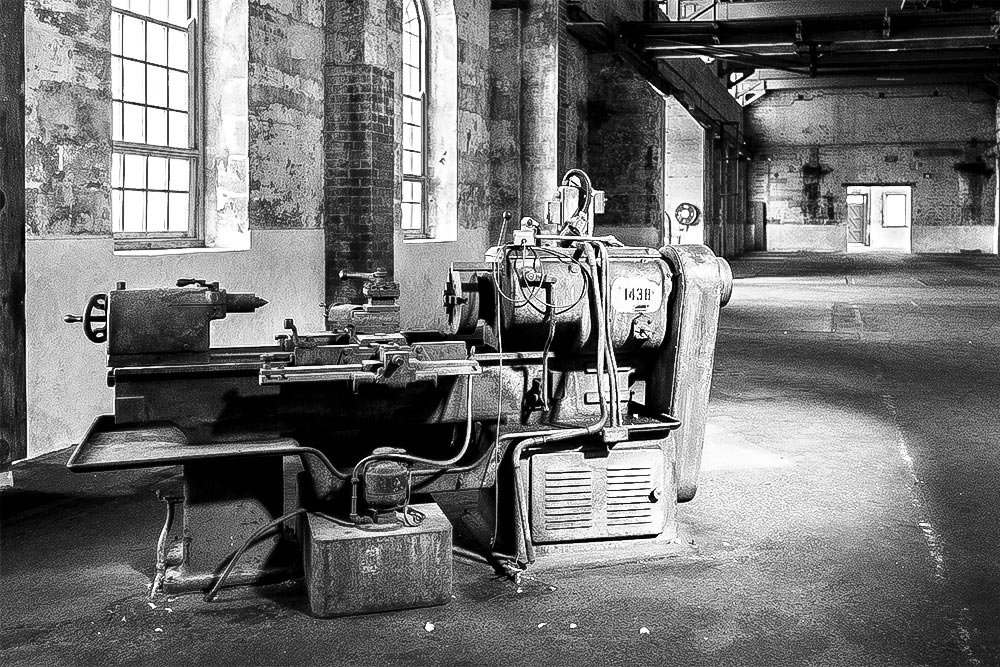
If yes, hit the Discard button and watch as the color uniformly disappears from the photograph.
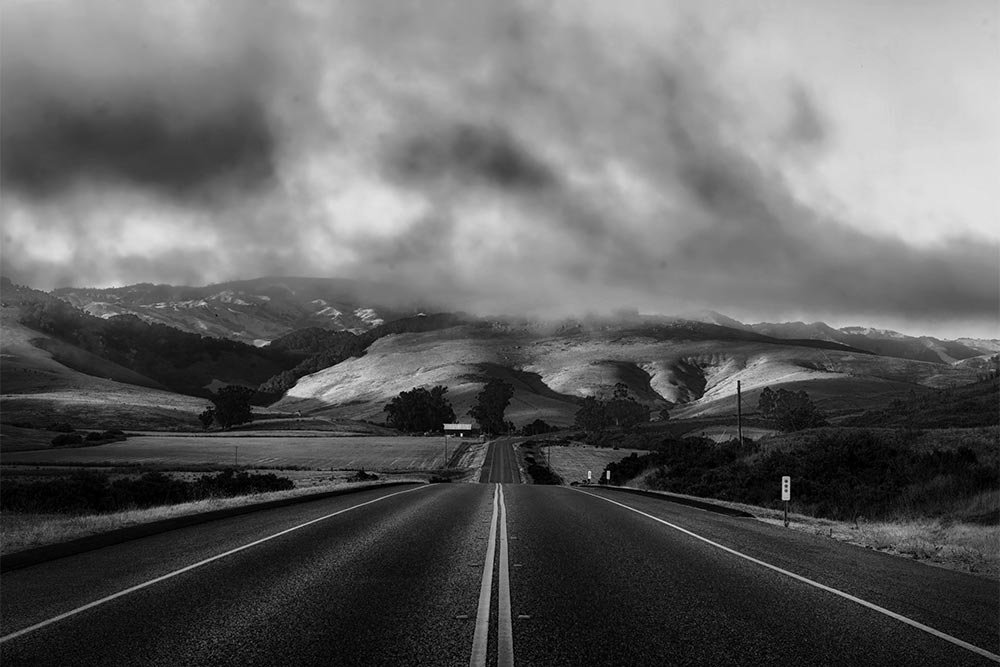
This is fine if you want a grayscale image.
While this looks like a good solution, there are a few issues with it. First, what if I want to drag a color photo into this workspace so I can look at the black and white version versus the color version? Let me try that now.
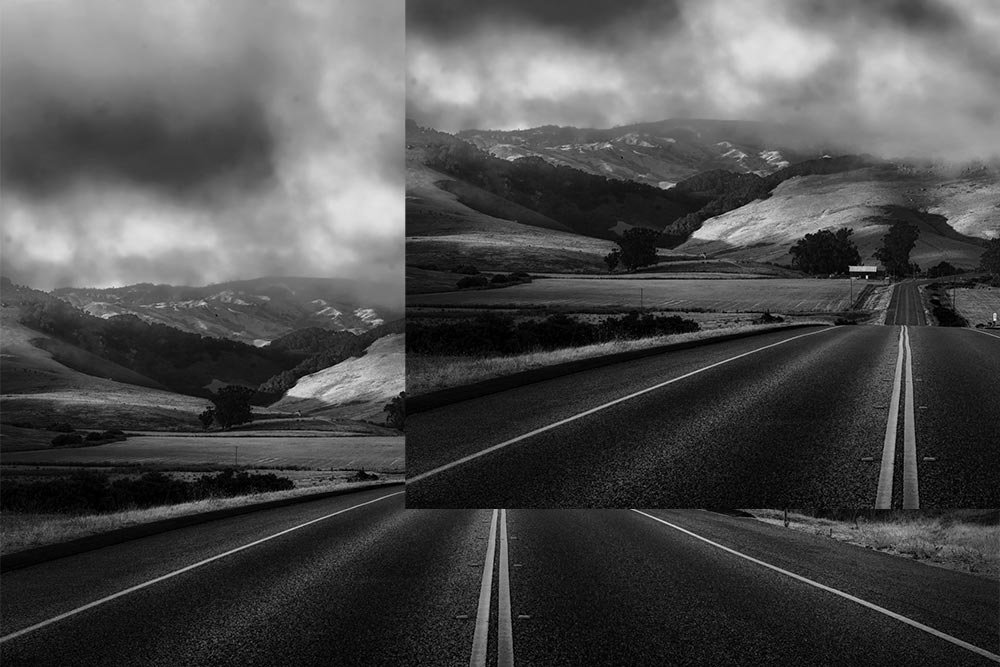
Oh wait, both layers are black and white. I wanted one to be color. It was when I dragged it over. What’s going on? Well, when I clicked the menu item I mentioned above, I changed the entire file’s color mode, not just the one layer’s. Because of this, any additional layer I create or file I bring into this one will also be desaturated. That’s not good.
Also, what if I want to adjust the luminance of one or two particular colors. Can I do that while using this method? No, I can’t. That’s not good either.
Finally, what if I want to get rid of the desaturation and go back to the color version after I do some work to this file. Can I do that? No, I can’t. The reason for this is that the change I made is considered “destructive.” This means that once it’s done, it’s done. That’s it and there’s no going back. This is probably the worst of all. There has to be a better way.
To kick things off, I’ll head up to the Image > Adjustments > Black & White menu item and click.
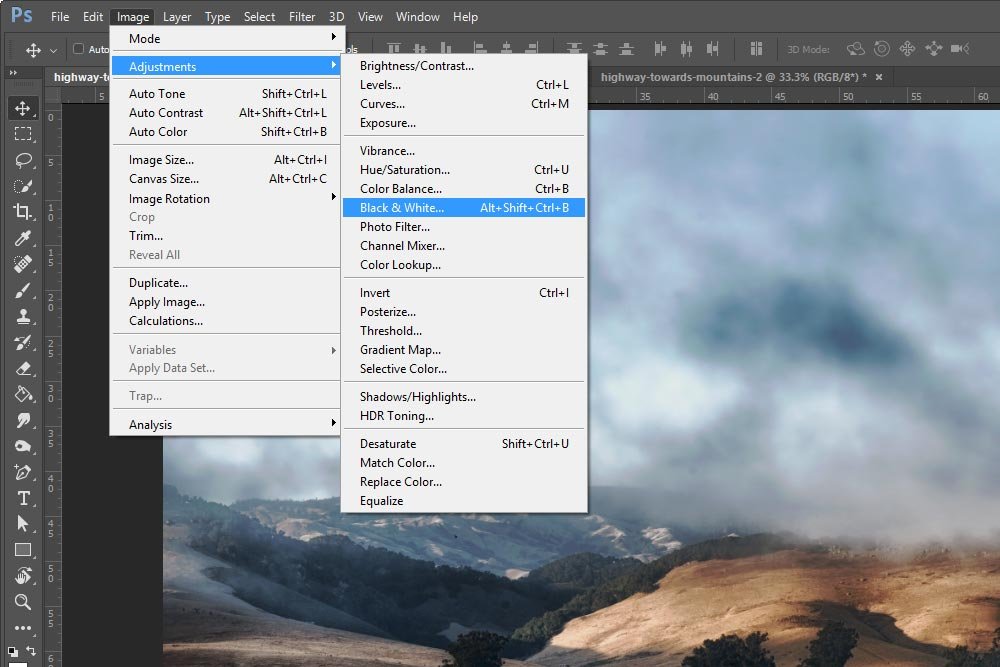
Once I do that, the Black & White dialog box will appear. The photo also gets desaturated.
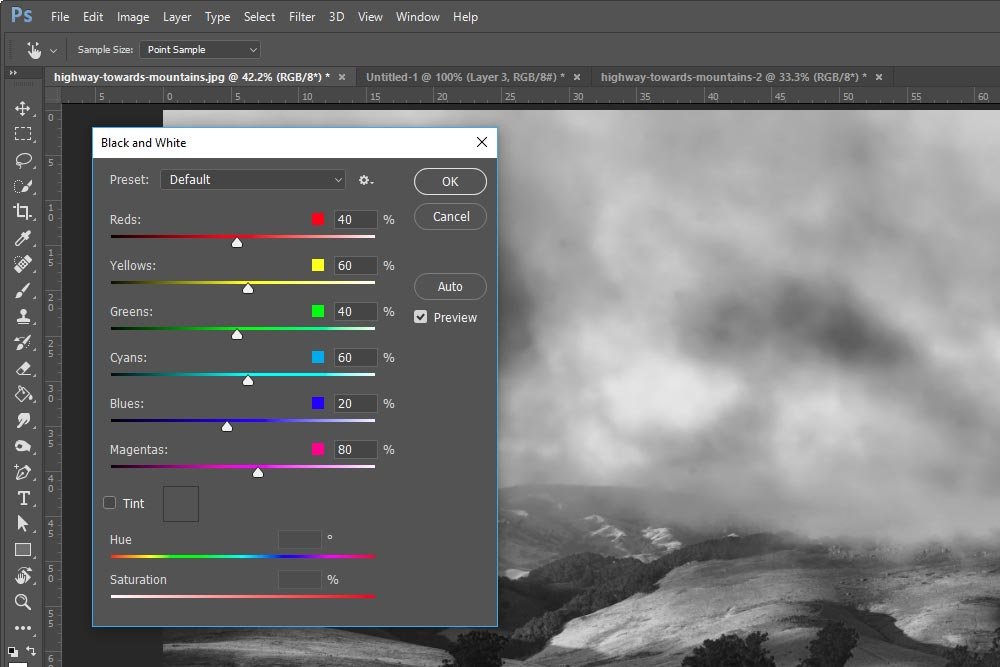
Having this Black & White adjustment dialog is crucial to altering the photo so it has some kick to it when it’s finished. Regular desaturated photos are oftentimes very flat and unappealing. Altering the luminance, color by color, can really transform the contrast and depth of a photo so it looks good.
Okay, let’s go down the list of pros and cons of using this method to convert a color photo to grayscale. First, does the entire file get converted to black and white or does just the one layer we’re attempting to alter? Let’s drag a copy of the photo in and see.
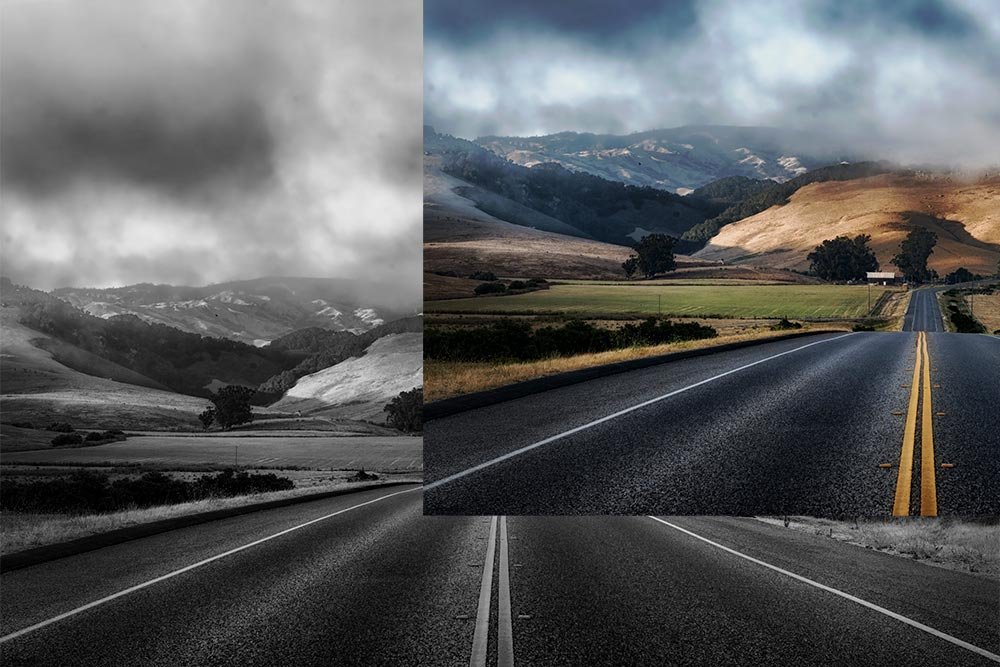
Perfect. The layer I dragged into the file stayed color, which means that the entire file didn’t get converted. Only the one layer did. That’s a very good thing.
Next, can I adjust the intensity of the colors in the photo? Well, I already told you that you can do that before committing to the change. That’s good, but what about going back and making further changes? Unfortunately, once this alteration has been made, we’re stuck with it. We can’t go back and make further edits. That’s not really good at all. This means the the change we made is destructive.
Finally, what if I wanted to get rid of the desaturation all together? Can I do that? Can I go back to the original? Nope, I can’t do that either. Again, the change I just made is permanent.
So, while this method is better than the last, it still reminds me of the way Photoshop used to be about 10 years ago. Fairly primitive. Let’s talk about the final and best method.
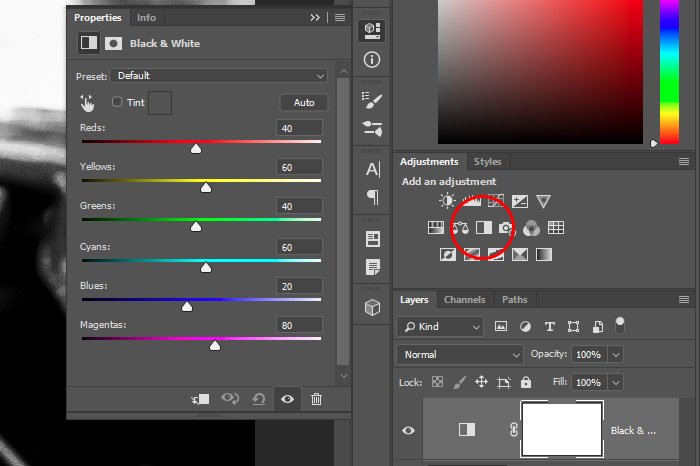
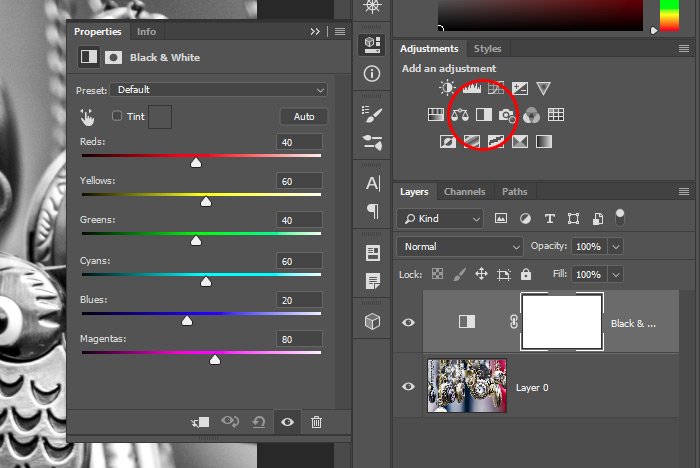
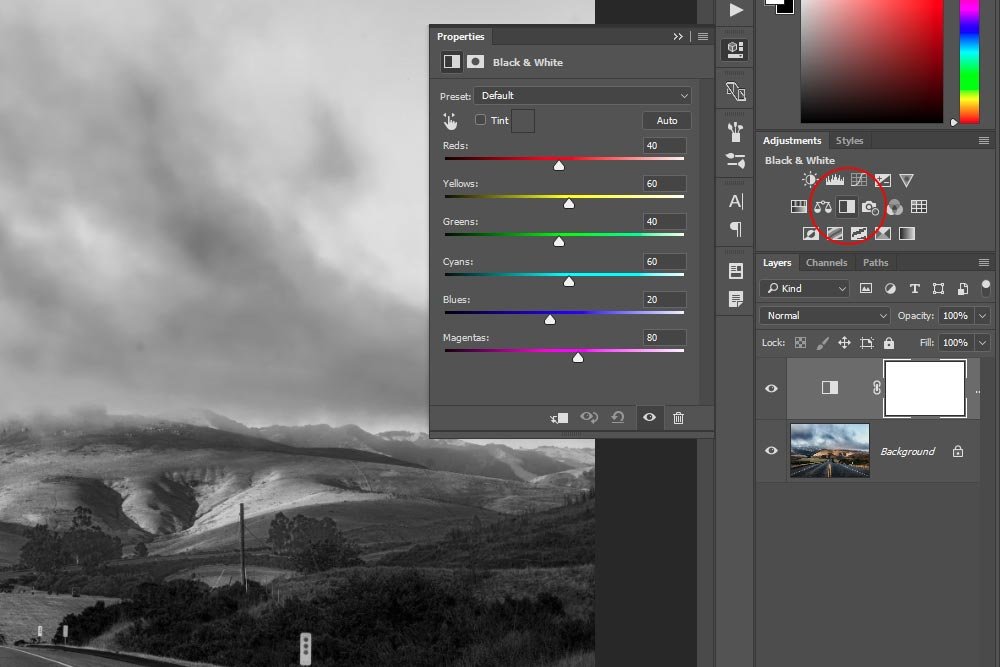
To remove the color from the demo image, I’ll head up to the Adjustments panel and click the Black & White icon. When I do that, a new adjustment layer will appear in the Layers panel and the Properties panel for this adjustment will pop open.
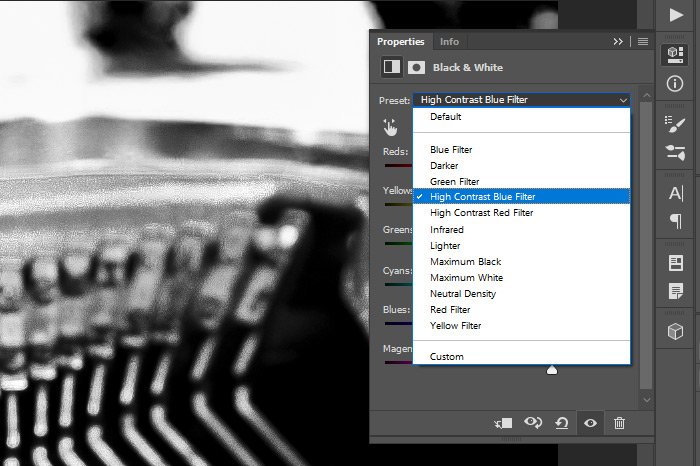
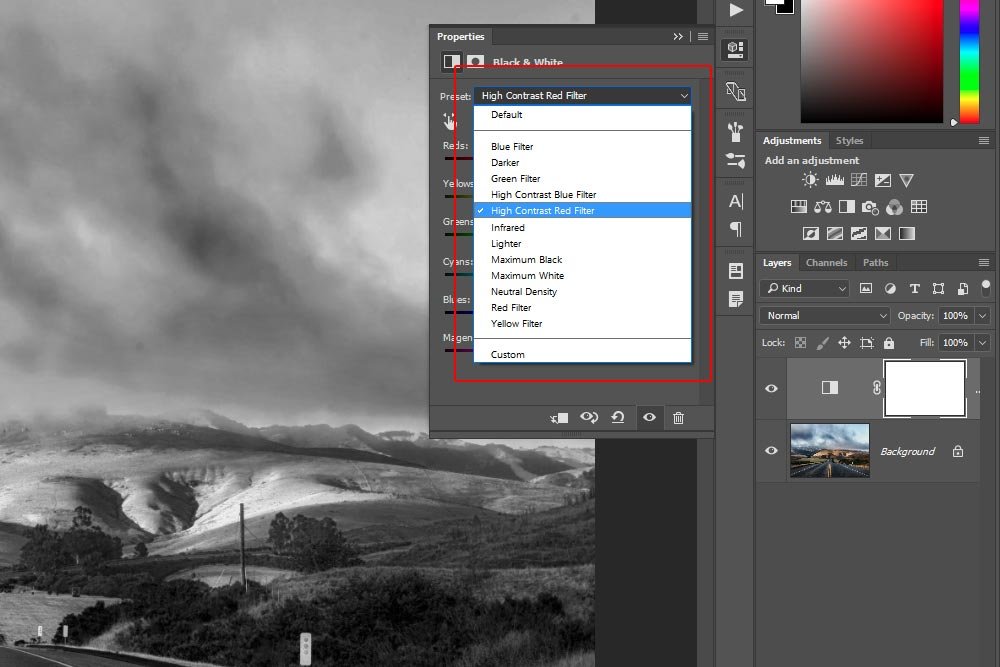
What’s really cool about this adjustment, as with other adjustments, is that it’s got some pretty neat presets. If I click on the Preset drop-down box, I’ll find about 13 options for me to choose from. Each option pushes the color sliders to different values, creating a different look for the photo. In this example, I clicked on the High Contrast Red Filter, which increased the red, orange and yellow values and reduced the greens, cyans and blues. Changing these values creates a lot of contrast in this particular photo. If the photo was of a red desert or a sunset or something like that, this option would have had the opposite effect.
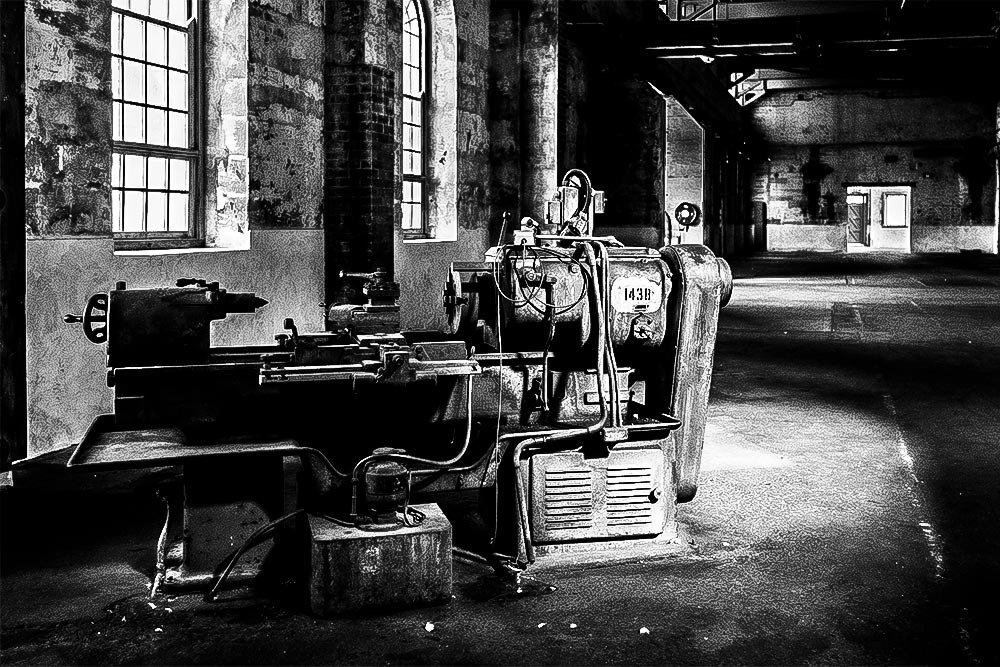
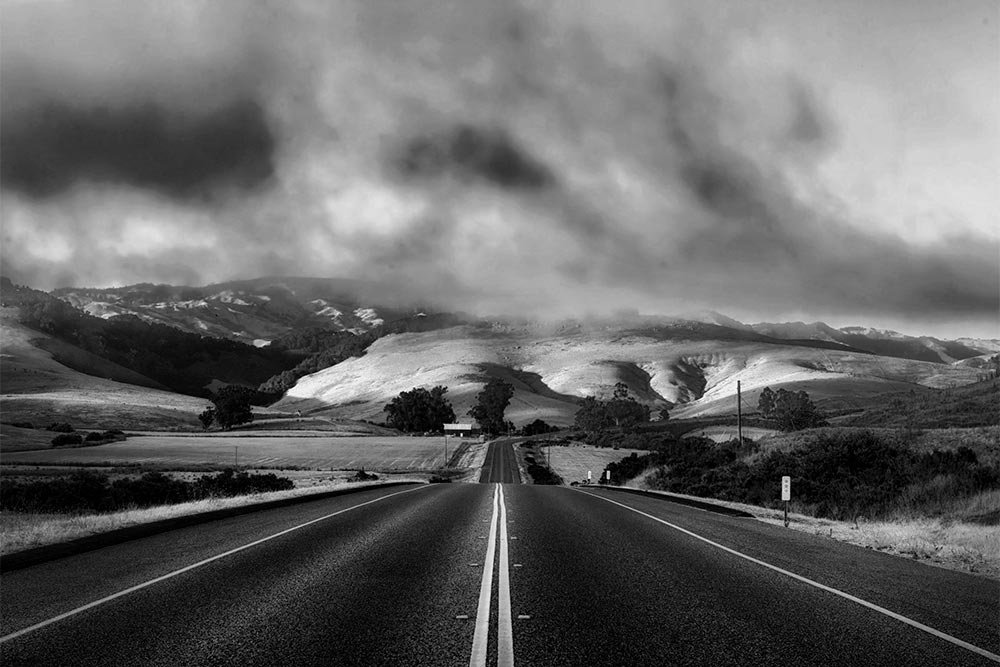
Here’s the output of the photo.
Now, so far, I changed the color photo to a black and white one and then changed the values of the specific colors of the photo, which resulted in an image with more contrast. The question is, can I get rid of the black and white attributes and bring my photo back to its original colored state? Why yes I can. All I would have to do to accomplish this is to delete the adjustment layer in the Layers panel. I would do this by selecting the layer and then clicking on the trash can down at the bottom of the panel. Or, I could click and drag the layer to the trash can icon and drop it there.
Also, what if I wanted to further edit the color values once I closed the Properties panel? Could I edit the values over and over and over again? Why yes I can. To do so, I would simply double-click on the adjustment layer thumbnail, which would open the Properties panel once again for further editing. All the earlier changes would still be live and set on the sliders, right where I left them.
The best part of the whole thing is that when using adjustment layers, they only affect the layers that are below them in the Layers panel. If I didn’t want a specific layer to be affected by this adjustment, all I would need to do is be sure that layer was higher than the adjustment layer. It seems that these types of layers have incredible flexibility and are non-destructive. Not a bad deal.
If I click the icon that has a picture of a small hand in it, I can activate the tool.
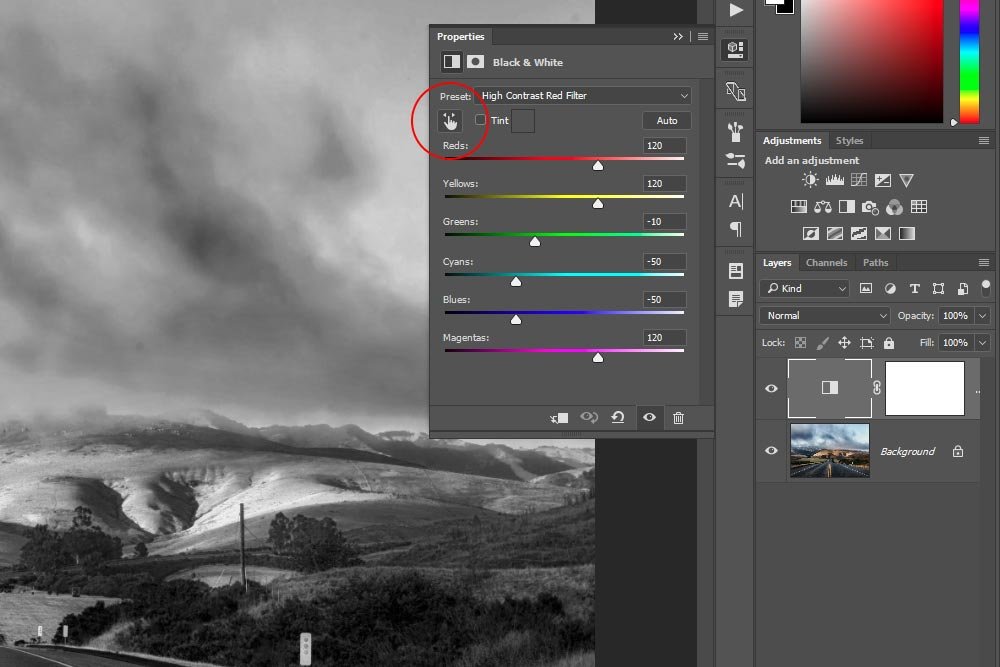
Once the tool is activated, I can move my mouse over any area of the photo, click and drag to the left or the right. Dragging to the left will darken the area (the color in the entire photo) and dragging to the right will lighten that color.
As an example, I’ll use the Targeted Adjustment Tool to brighten up the yellows in the image. Since I already know the lines in the road are yellow, I’ll click on one of them and drag all the way to the right.
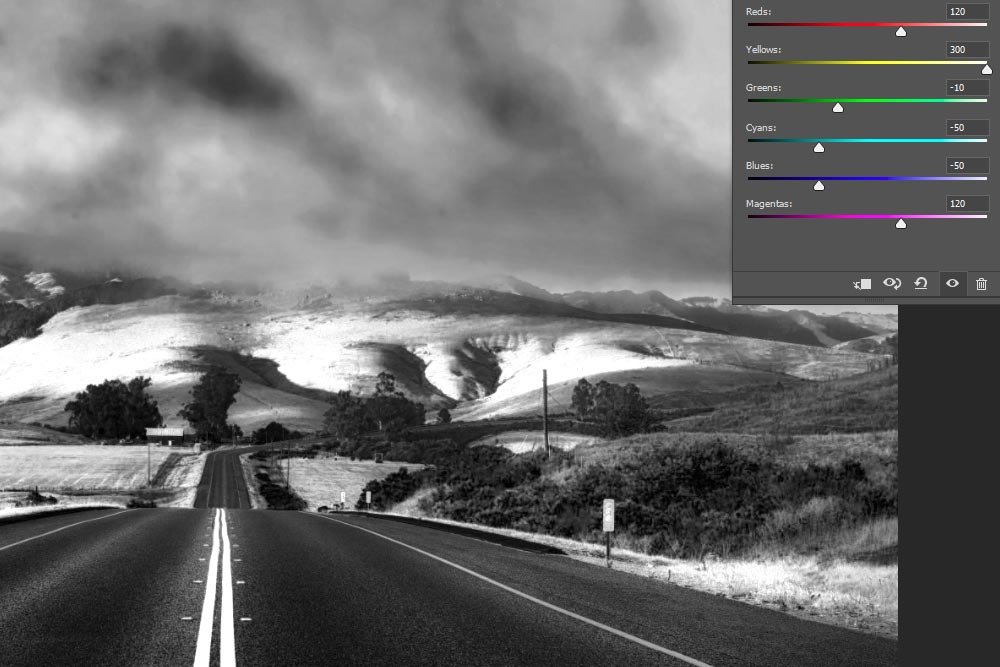
In the screenshot above, you can see that the yellow color slider is now pushed all the way to the right and the yellows in the photo are very light. I can do this same thing with virtually any color in the photo. The tool is quite versatile.
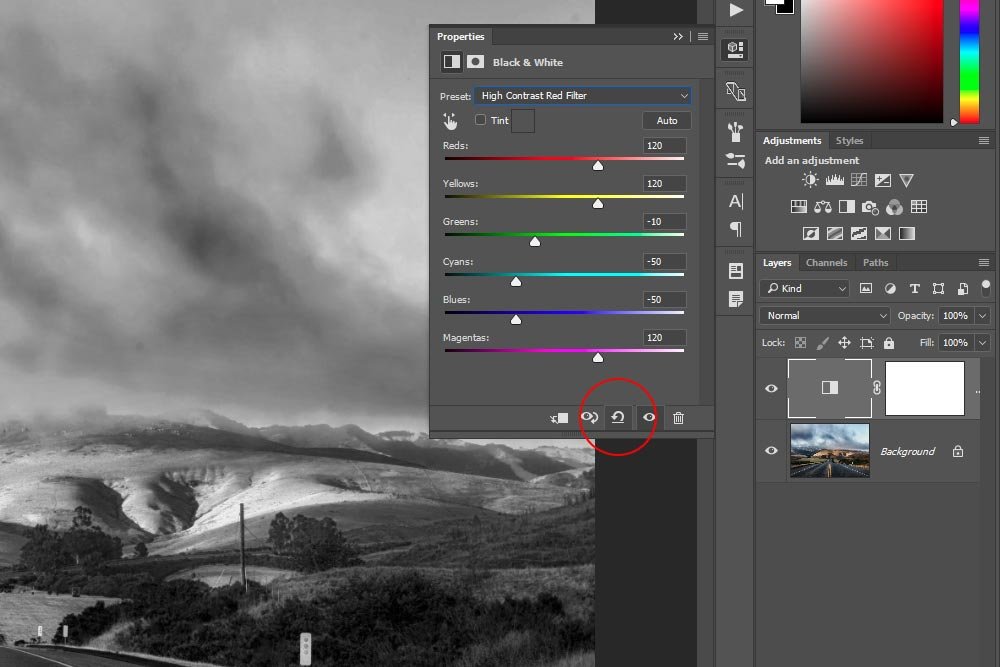
If I roll over this icon, a small message that says Reset Adjustment to Defaults will appear.
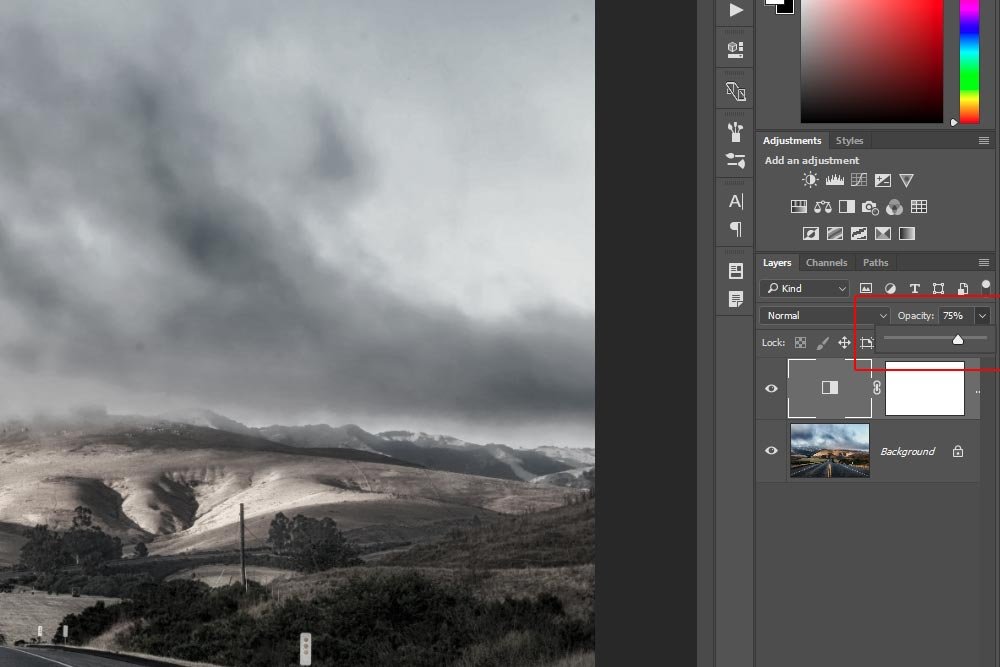
Since everything else is finished, all I have to do is to reduce the opacity to, say, 75%. To get this done, I’ll head over to the Layers panel and click the Opacity drop-down. From there, I can drag the slider to the left until it says 75%. Alternatively, I can just type that value into the drop-down box and press the Enter key on my keyboard to apply the change.
Once that’s finished, I can call the project complete.
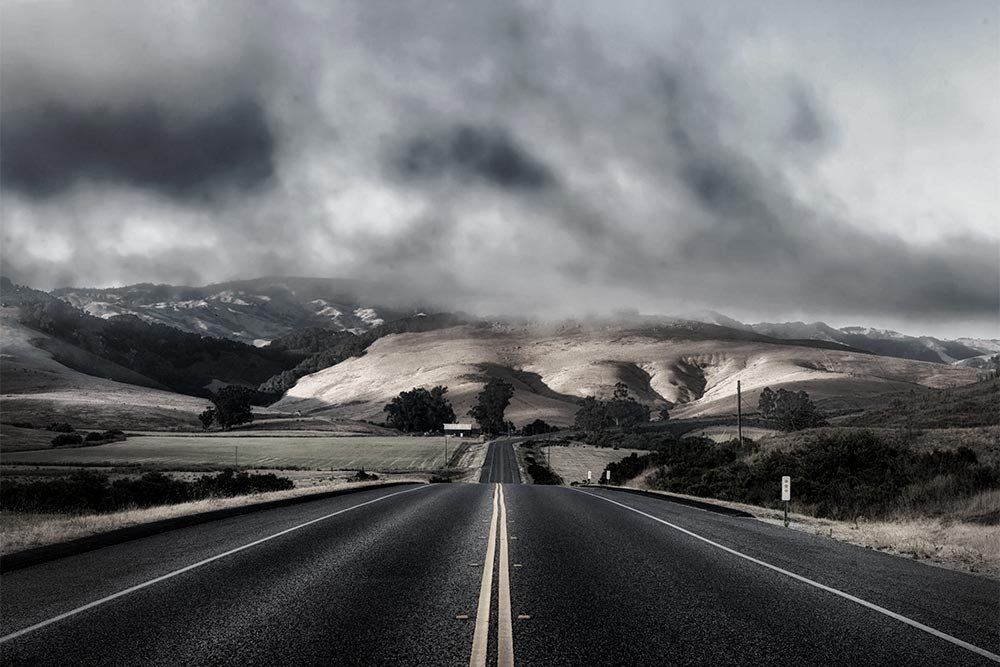
What’s even better than this? If I had enhanced the photo in Camera Raw before I even started. That way, there would be more color and vibrancy to work with. To learn how to make a photo look a heck of a lot better than its original version, please read through the post below.
How To Make A Photo “Pop” With Adobe Camera Raw
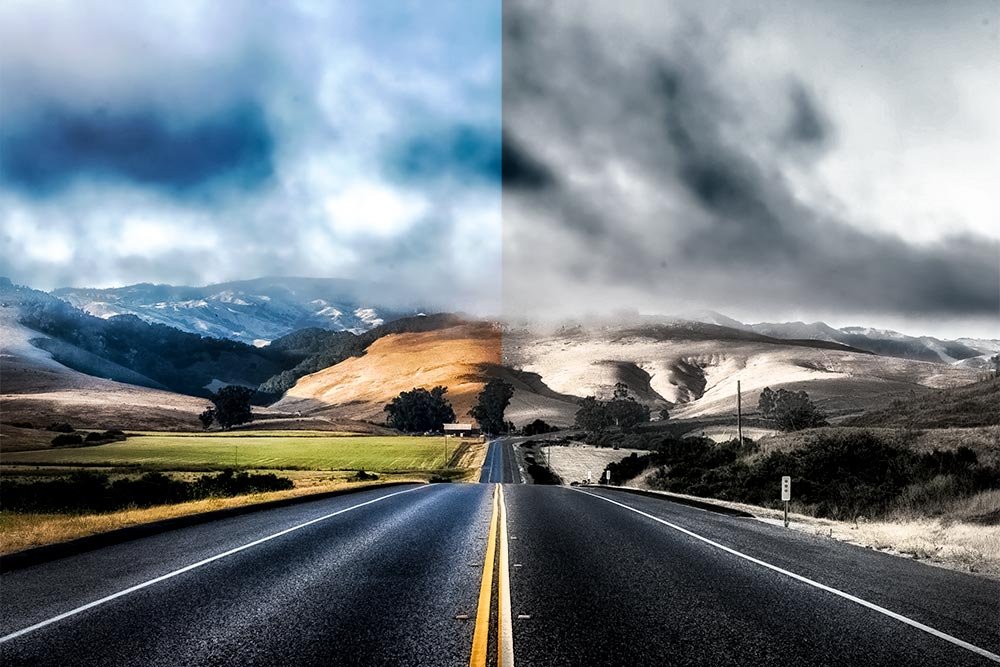
I hope I clearly explained the multiple methods for going about making a photograph black and white in Adobe Photoshop. If you have any questions or concerns, please let me know in the comment section below. Thanks for reading!
In today’s post, I’m going to walk you through the use of three tools that can strip the color from a photo in Adobe Photoshop. The tools range from lousy to great. After I demonstrate how to get rid of your photo’s color, I’ll explain how you can adjust the look of the color that was in the photo. I’ll also show you how you can do this non-destructively.
I’ve written a few posts on the “black and white” topic previously. If memory serves, these posts had to do with Camera Raw and Lightroom. While both of these applications would be the first place I would look to do something like this, Photoshop shouldn’t be counted out. It’s a powerhouse and should be considered as such.
Creating Black & White Photos in Adobe Camera Raw
How To Enhance Black & White Portraits in Adobe Camera Raw
Creating an Awesome Black & White Photo in Adobe Lightroom
Demo Photo
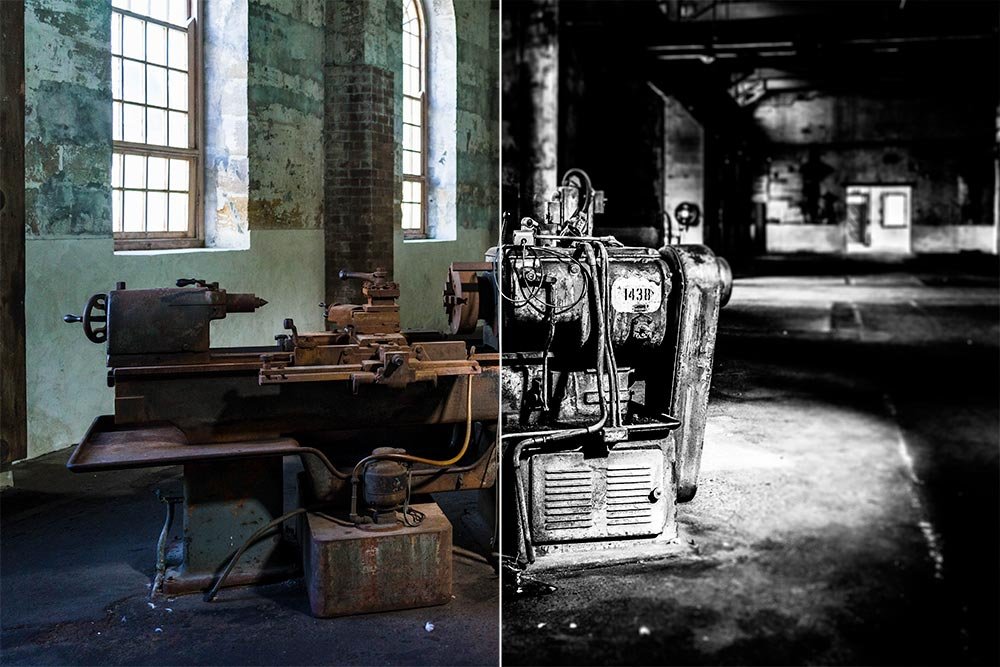
For this post, I needed to use a photo that has a decent range of color in it. If I chose something that was washed out (low saturation), my examples wouldn’t work well. If I chose something that was skewed towards one color, that wouldn’t work well either. Because of this requirement, I thought that by using something I’ve already taken advantage of in the past, the examples I set forth would be the best possible. Take a look at what I’m referring to.
As you can see, in this image, we’ve got some greens, blues, yellows, oranges and a few others. This will be perfect later on when we start breaking these colors down.
Turning an Image Grayscale
The very first and probably the most simple method for removing color from an image is to just go ahead and change the color mode of the file in question. To do this, go up to the Image > Mode > Grayscale menu item and click.
Once I do this, I’ll receive a message prompting me to make a decision. Do I really want to discard this file’s color information?

If yes, hit the Discard button and watch as the color uniformly disappears from the photograph.

This is fine if you want a grayscale image.
While this looks like a good solution, there are a few issues with it. First, what if I want to drag a color photo into this workspace so I can look at the black and white version versus the color version? Let me try that now.

Oh wait, both layers are black and white. I wanted one to be color. It was when I dragged it over. What’s going on? Well, when I clicked the menu item I mentioned above, I changed the entire file’s color mode, not just the one layer’s. Because of this, any additional layer I create or file I bring into this one will also be desaturated. That’s not good.
Also, what if I want to adjust the luminance of one or two particular colors. Can I do that while using this method? No, I can’t. That’s not good either.
Finally, what if I want to get rid of the desaturation and go back to the color version after I do some work to this file. Can I do that? No, I can’t. The reason for this is that the change I made is considered “destructive.” This means that once it’s done, it’s done. That’s it and there’s no going back. This is probably the worst of all. There has to be a better way.
Adjusting to Black & White
The next method for creating a black and white image in Adobe Photoshop is definitely a step up from the last. This time, we’ll have the ability to adjust the separate colors before making any sort of commitment.To kick things off, I’ll head up to the Image > Adjustments > Black & White menu item and click.

Once I do that, the Black & White dialog box will appear. The photo also gets desaturated.

Having this Black & White adjustment dialog is crucial to altering the photo so it has some kick to it when it’s finished. Regular desaturated photos are oftentimes very flat and unappealing. Altering the luminance, color by color, can really transform the contrast and depth of a photo so it looks good.
Okay, let’s go down the list of pros and cons of using this method to convert a color photo to grayscale. First, does the entire file get converted to black and white or does just the one layer we’re attempting to alter? Let’s drag a copy of the photo in and see.

Perfect. The layer I dragged into the file stayed color, which means that the entire file didn’t get converted. Only the one layer did. That’s a very good thing.
Next, can I adjust the intensity of the colors in the photo? Well, I already told you that you can do that before committing to the change. That’s good, but what about going back and making further changes? Unfortunately, once this alteration has been made, we’re stuck with it. We can’t go back and make further edits. That’s not really good at all. This means the the change we made is destructive.
Finally, what if I wanted to get rid of the desaturation all together? Can I do that? Can I go back to the original? Nope, I can’t do that either. Again, the change I just made is permanent.
So, while this method is better than the last, it still reminds me of the way Photoshop used to be about 10 years ago. Fairly primitive. Let’s talk about the final and best method.
Black & White Adjustment Layer
It appears that Adobe worked out all the kinks when they came up with adjustment layers. This final method is surely the best and I’ll explain exactly why below.To remove the color from the demo image, I’ll head up to the Adjustments panel and click the Black & White icon. When I do that, a new adjustment layer will appear in the Layers panel and the Properties panel for this adjustment will pop open.

What’s really cool about this adjustment, as with other adjustments, is that it’s got some pretty neat presets. If I click on the Preset drop-down box, I’ll find about 13 options for me to choose from. Each option pushes the color sliders to different values, creating a different look for the photo. In this example, I clicked on the High Contrast Red Filter, which increased the red, orange and yellow values and reduced the greens, cyans and blues. Changing these values creates a lot of contrast in this particular photo. If the photo was of a red desert or a sunset or something like that, this option would have had the opposite effect.

Here’s the output of the photo.

Now, so far, I changed the color photo to a black and white one and then changed the values of the specific colors of the photo, which resulted in an image with more contrast. The question is, can I get rid of the black and white attributes and bring my photo back to its original colored state? Why yes I can. All I would have to do to accomplish this is to delete the adjustment layer in the Layers panel. I would do this by selecting the layer and then clicking on the trash can down at the bottom of the panel. Or, I could click and drag the layer to the trash can icon and drop it there.
Also, what if I wanted to further edit the color values once I closed the Properties panel? Could I edit the values over and over and over again? Why yes I can. To do so, I would simply double-click on the adjustment layer thumbnail, which would open the Properties panel once again for further editing. All the earlier changes would still be live and set on the sliders, right where I left them.
The best part of the whole thing is that when using adjustment layers, they only affect the layers that are below them in the Layers panel. If I didn’t want a specific layer to be affected by this adjustment, all I would need to do is be sure that layer was higher than the adjustment layer. It seems that these types of layers have incredible flexibility and are non-destructive. Not a bad deal.
Customizing the Preset
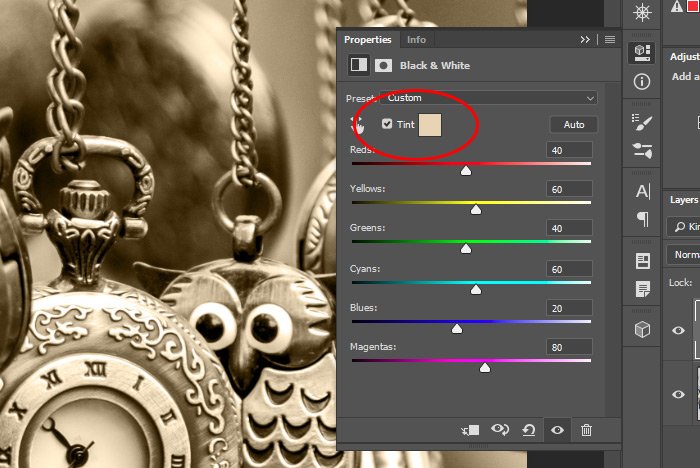
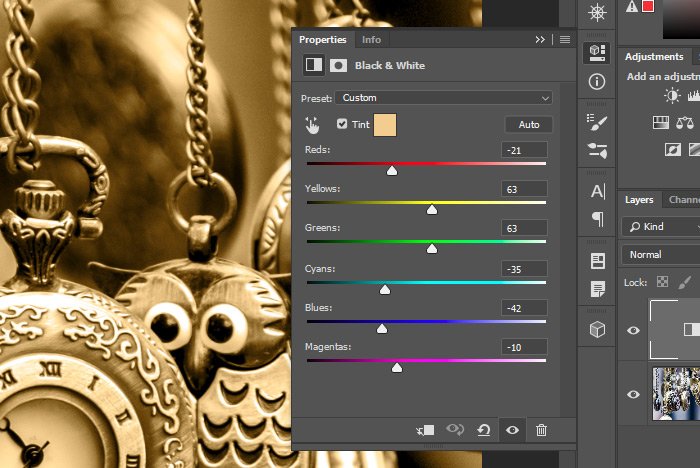
Just because I chose a preset, that doesn’t mean that I can’t continue adjusting the image by pushing the individual sliders manually. Also, I didn’t need to choose a preset at all. I could have jumped right into pushing the sliders in the beginning. The only issue with doing this is that once the image goes grayscale, it’s tough to know which color slider to push. That’s why the fine folks at Adobe created the Targeted Adjustment Tool.If I click the icon that has a picture of a small hand in it, I can activate the tool.

Once the tool is activated, I can move my mouse over any area of the photo, click and drag to the left or the right. Dragging to the left will darken the area (the color in the entire photo) and dragging to the right will lighten that color.
As an example, I’ll use the Targeted Adjustment Tool to brighten up the yellows in the image. Since I already know the lines in the road are yellow, I’ll click on one of them and drag all the way to the right.

In the screenshot above, you can see that the yellow color slider is now pushed all the way to the right and the yellows in the photo are very light. I can do this same thing with virtually any color in the photo. The tool is quite versatile.
Undoing the Modifications
If I went too far and want to start over or if I really just want to begin again for another reason, I can click the Reset icon at the bottom of the Properties panel.
If I roll over this icon, a small message that says Reset Adjustment to Defaults will appear.
Lessening the Grayscale
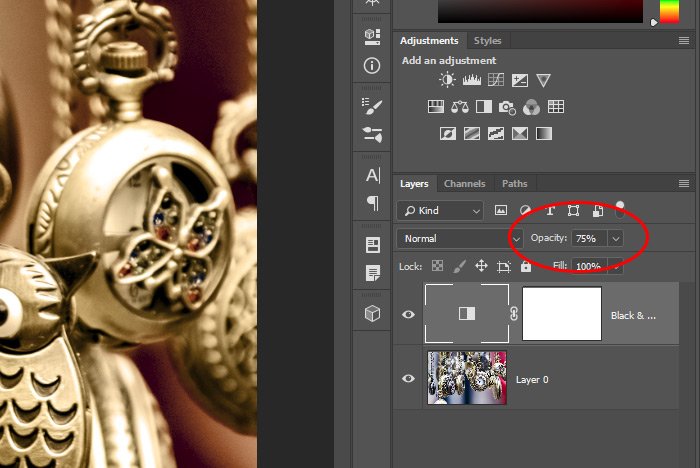
Oftentimes, editors don’t want to go full out black and white. Instead, they want to mute the original colors that are in the photo while adding some nice contrast to certain areas. While there are many ways editors can go about getting this done, following the instructions I gave above is a common one. That, and then reducing the opacity of the adjustment layer to a desirable level. I’ll show you how to reduce the opacity below.Since everything else is finished, all I have to do is to reduce the opacity to, say, 75%. To get this done, I’ll head over to the Layers panel and click the Opacity drop-down. From there, I can drag the slider to the left until it says 75%. Alternatively, I can just type that value into the drop-down box and press the Enter key on my keyboard to apply the change.

Once that’s finished, I can call the project complete.

What’s even better than this? If I had enhanced the photo in Camera Raw before I even started. That way, there would be more color and vibrancy to work with. To learn how to make a photo look a heck of a lot better than its original version, please read through the post below.
How To Make A Photo “Pop” With Adobe Camera Raw

I hope I clearly explained the multiple methods for going about making a photograph black and white in Adobe Photoshop. If you have any questions or concerns, please let me know in the comment section below. Thanks for reading!

