How many times have to taken a picture of a sunset, building, or something else that was supposed to be level, but wasn’t? We’ve all been there. I can’t even count how many times my photos have come out crooked. I can tell you one thing though, fixing a crooked image in Adobe Photoshop is super easy. And in this post, I’ll show you exactly what you’ll need to do to level out your crooked photographs. The process is much faster than you can image, so read on down below.
For today’s post, I’ll be using a photo of an old building. I borrowed it from a free stock photography site and I’ll edit it so it’s wildly leaning to one side. That’ll make my correction a lot more obvious and clear to see.
In this tutorial, I’ll be using the Crop Tool to straighten the image. Contained within the Crop Tool is another tool, which is appropriately called the Straighten Tool. I’ll keep the use of the Crop Tool very straightforward for today’s post and will cover it in much more depth in later posts. Since this exercise is only going to cover how to straighten a picture, I won’t need to go into the nuts and bolts of cropping.
Launching the Photo into Photoshop
Before I do anything else, I’ll need to open my photo into Photoshop. The process I use to do this is to browse for the image in Adobe Bridge and then open it into Camera Raw for any editing that needs to be done. After that, I’ll transfer the image to Photoshop, where I’ll crop or straighten it. To open your own photo into Photoshop, you can use any method you wish. The File > Open command is perfectly fine. It’s just that I’ve got a workflow that I use all the time. It works for me. Either way, the image is now sitting in Photoshop waiting for me to straighten. Here it is.
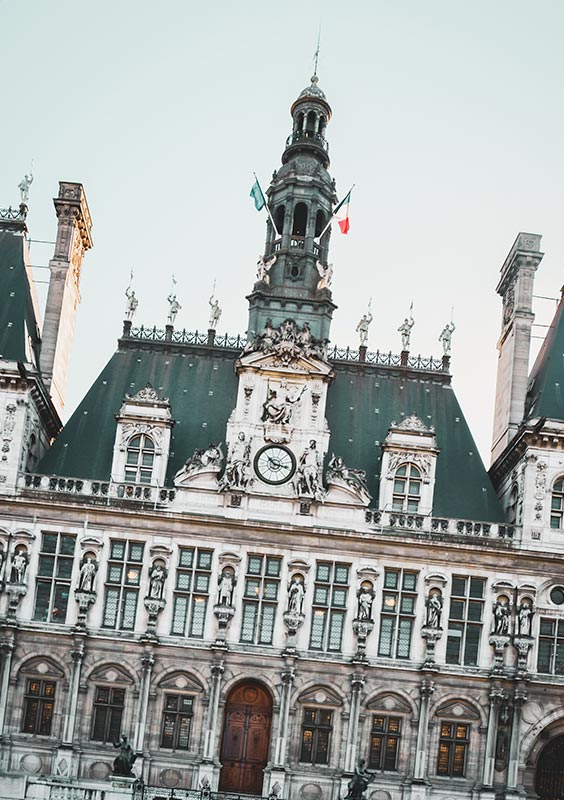
I told you I’d make it crooked.
Straightening the Photo
At this point, I can go ahead and begin work straightening this photo. To do this, I’ll look to the left toolbar and choose the Crop Tool.
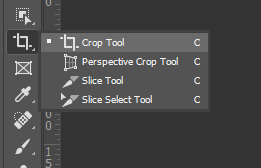
The moment I click on that tool, I’ll notice that some crop handles appear. They will outline the entire image. I took a screenshot of the top handles so you can see what they look like.

Since I’m only straightening the image, I can safely ignore these handles. Well, that is, after I take care of the next step.
Choosing the Crop Ratio
Depending on when the Crop Tool was last used in your install of Photoshop, you may need to change the size of the final cropped image. In my case, I’d like to keep the size of the original as much as I can, so I’ll make a selection in the ratio drop-down box that will allow for that. To do this, I’ll head up to the upper left corner and click the drop-down box that’s to the right of the Crop Tool drop-down. Inside this drop-down, I’ll select the Original Ratio option.
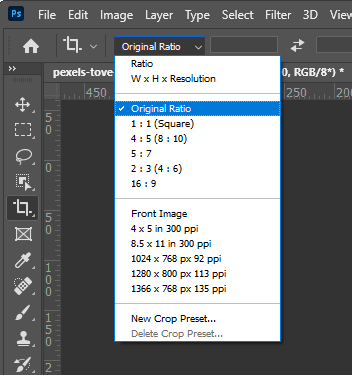
If the crop handles didn’t outline the entire image before, they will now.
Using the Straighten Tool
Now that everything is set up, I can go ahead and straighten the image. To do this, I’ll head up to the options bar and I’ll click on the Straighten button.

When I do this, I’ll notice my mouse turn into a different symbol. This one will look like an A on its side.
All that needs to be done at this point is to find a straight line in the image and then click and drag the Straighten Tool along that line. As long is the line is supposed to be perfectly horizontal or vertical, it can be used. Basically, what you’re doing is taking a line in the photo that’s meant to be level and dragging your mouse along that line, as closely aligned to it as possible. So in the photo I’m using, I’ll click and drag my mouse from left to right along the roof line.
Look closely at the roof line in the image below. You’ll see the line I drew.
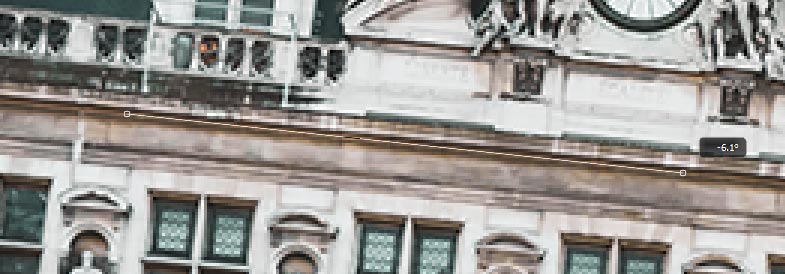
Also, it helps to zoom into the image you’re working on, so you can trace the straight edge in the image as closely as possible.
Once I draw the line and then let go of my mouse button, the image will straighten out. It still won’t be cropped, but it’ll straighten. Photos that are straightened will always be cropped too because they’ll be twisted and extra image will be sticking out of the sides. Take a look at my image.
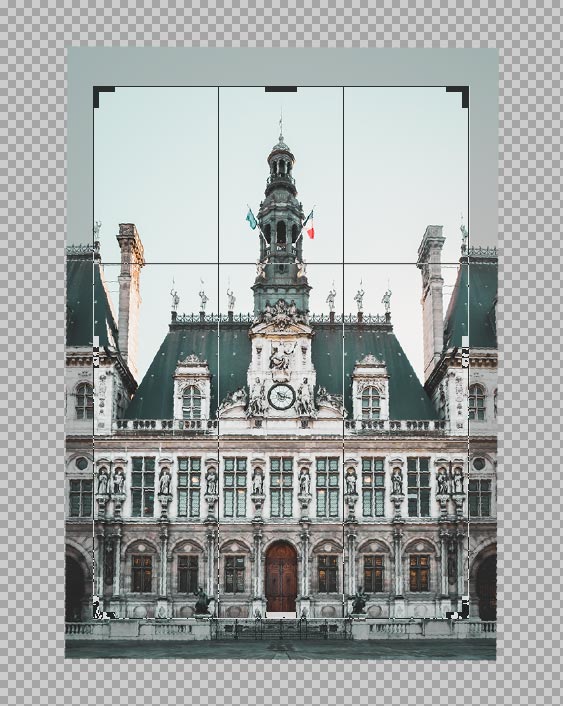
Now, if I just press the Enter key on my keyboard, Photoshop will crop the image. Here’s the final photo.
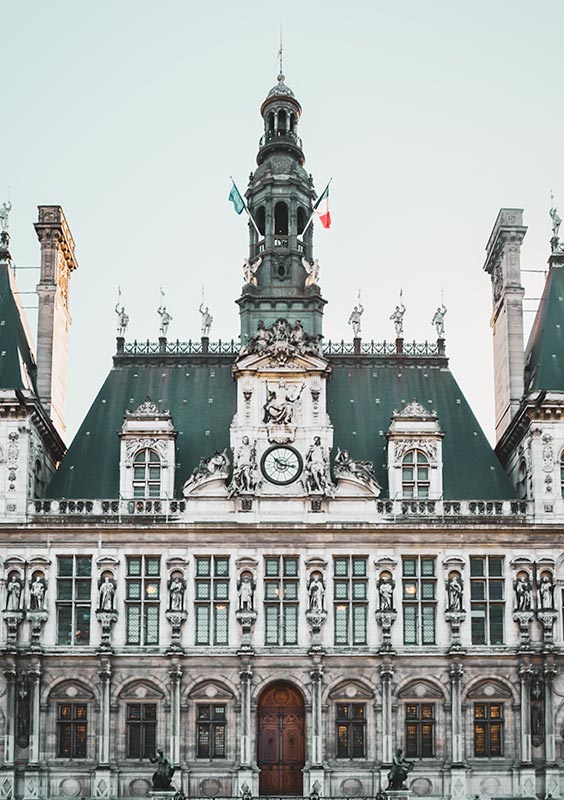
It’s that easy. I saved the photo out to post here and that was all I needed to do. If you have any questions about this process, please let me know down below. Also, if you have anything to add, please add that down below as well.
Crop and Straighten Photos Command
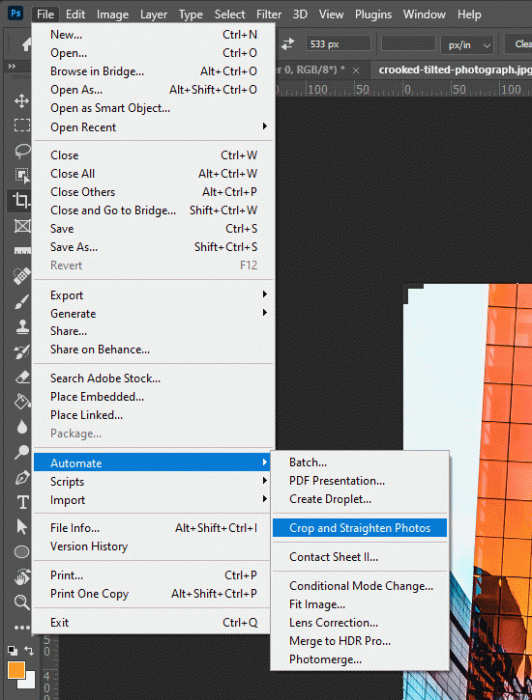
You can also straighten an image in Photoshop by using the File > Automate > Crop and Straighten Photos command. Only if there are obvious straight edges in the photograph though. If there’s nothing for Photoshop to grab onto, it can’t straighten anything. Also, from what I’ve found by experimenting with this tool, images need to be two dimensional, meaning, you can’t attempt to level out architecture that was photographed at strange angles. It just won’t work.
Take a look at this crooked and tilted photograph of a building.

I’ll run the auto straighten command in Photoshop right now. Let’s see what happens.
Here’s the final image:

This tool is a bit strange. Sometimes it doesn’t straighten an image at all. It makes no change whatsoever. It appears that if a larger leaning image has already been cropped and then this tool is used, it works just fine. You’ll need to play around with it for a while to get it to work. Just another option.
Leave a Reply