Taking advantage of Adobe Bridge to assist in downloading photos from your camera to store on a hard drive can be extremely helpful and efficient. While using your operating system to browse, select and copy files is, in general, a common practice, that method simply doesn’t offer the options Bridge does. Getting more done in less time is the name of the game.
In this post, I’m going to talk about how to go about utilizing Adobe Bridge as a partner with your camera. I’ll discuss the method I use when copying photos over to my computer, as well as what features I take advantage of while using Bridge as the go-between. Once you learn what it takes to save and organize files in this manner, you’ll wonder why you ever did it any other way. This method truly does enhance your workflow.
Connecting Your Camera
The very first task you need to complete is to connect your camera to your computer. Once that’s done and the camera is turned on, go ahead and open Adobe Bridge. Inside of Bridge, look for a small “Camera” icon up in the top task bar. When you find the camera, roll over it with your mouse. You should see “Get Photos From Camera…” appear.
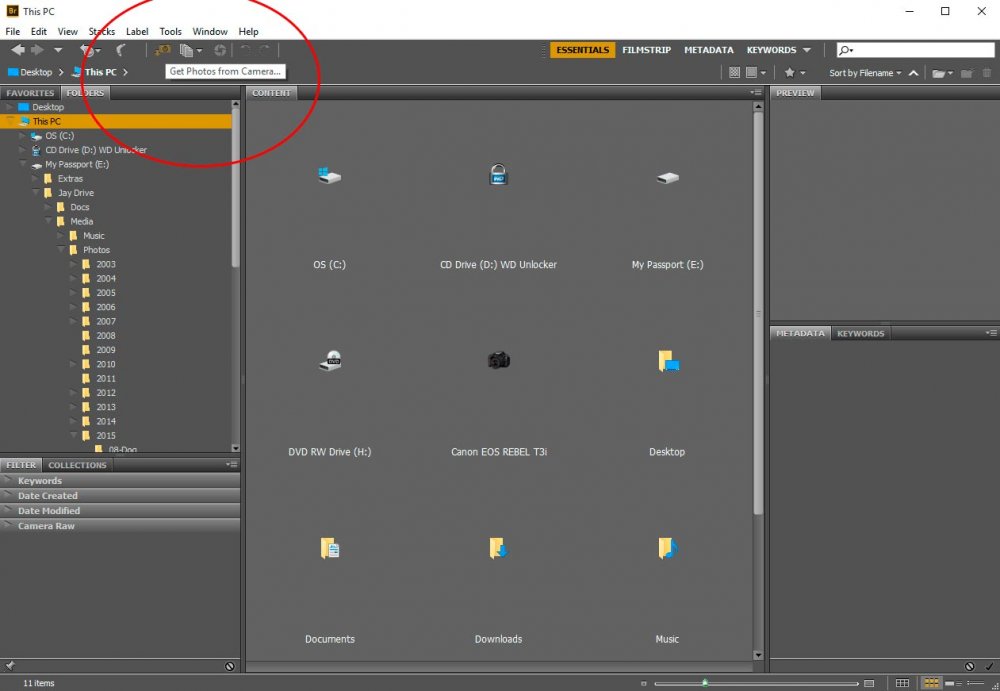
After you’re sure you found the correct icon, go ahead and click it. Now, directly after this, you might see a box appear that asks whether or not you’d like Bridge’s photo downloader to kick in every time you connect your camera to your computer. It’s a yes or no question, so answer it with your preference.
Introducing Bridge Photo Downloader
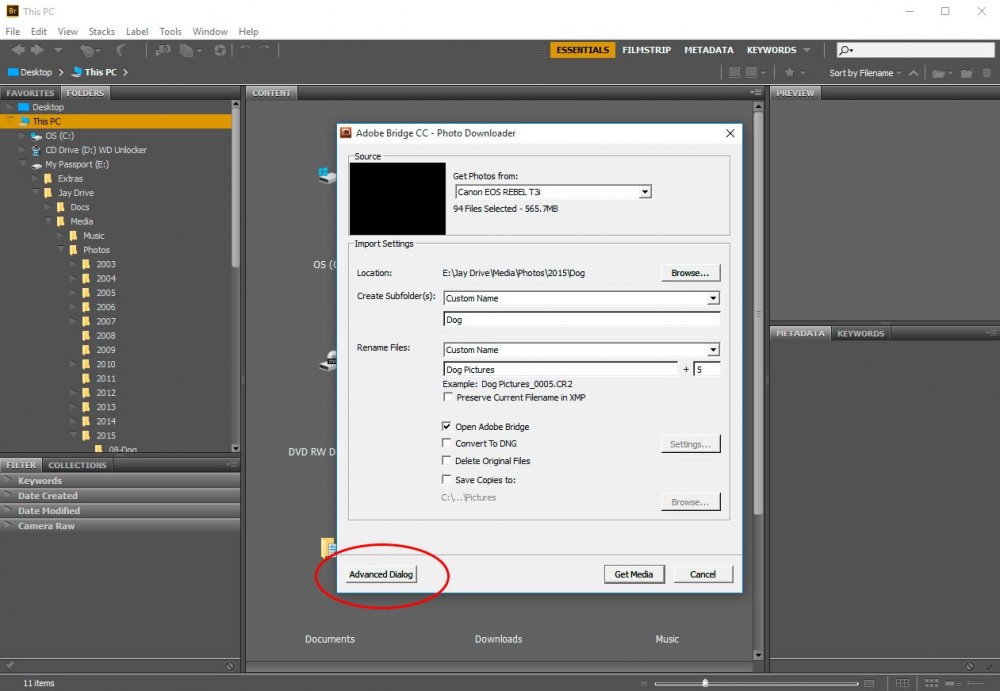
Once you’re finished answering the question, you should see the “Bridge Photo Downloader” dialog box appear. That looks something like this:
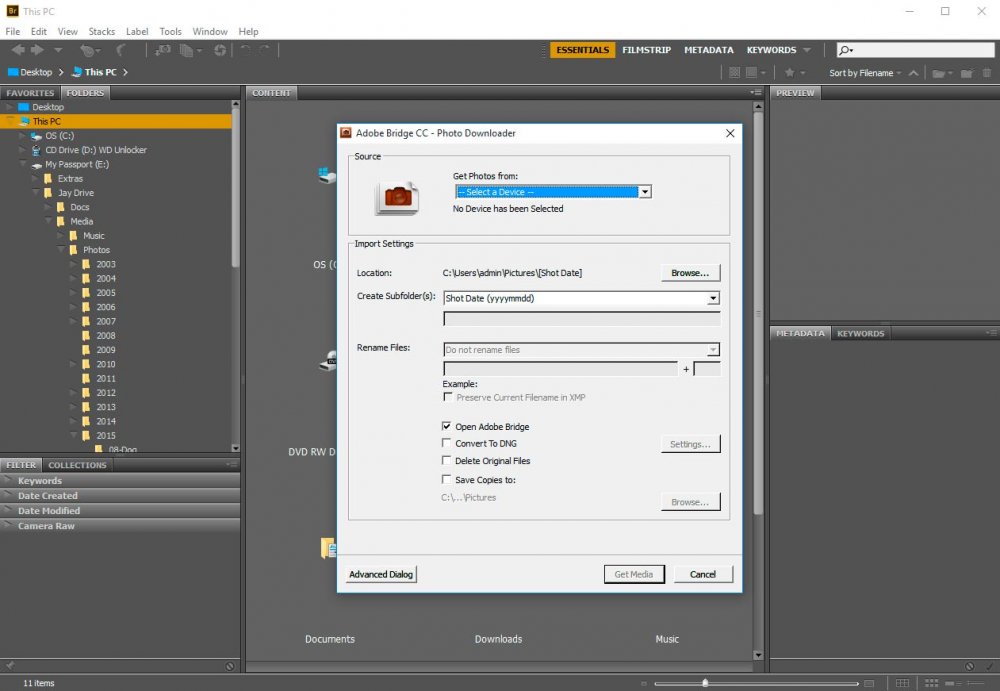
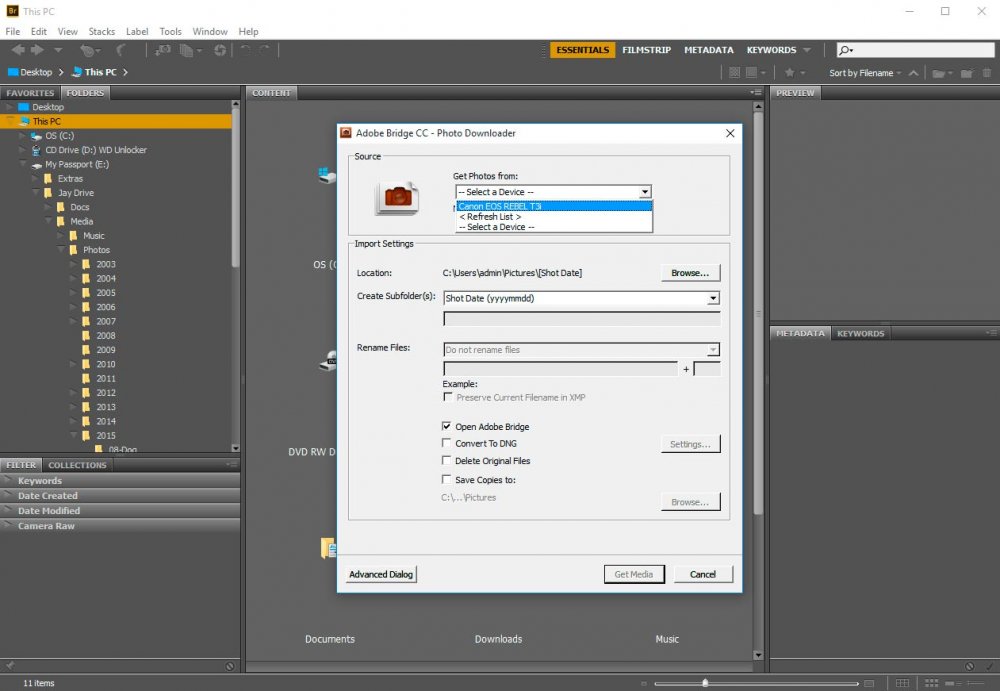
If you take a look at the very first drop-down box in Photo Downloader, you should see your camera listed as the device to download from. If you don’t, click the drop-down to choose your camera.
Defining Your Location
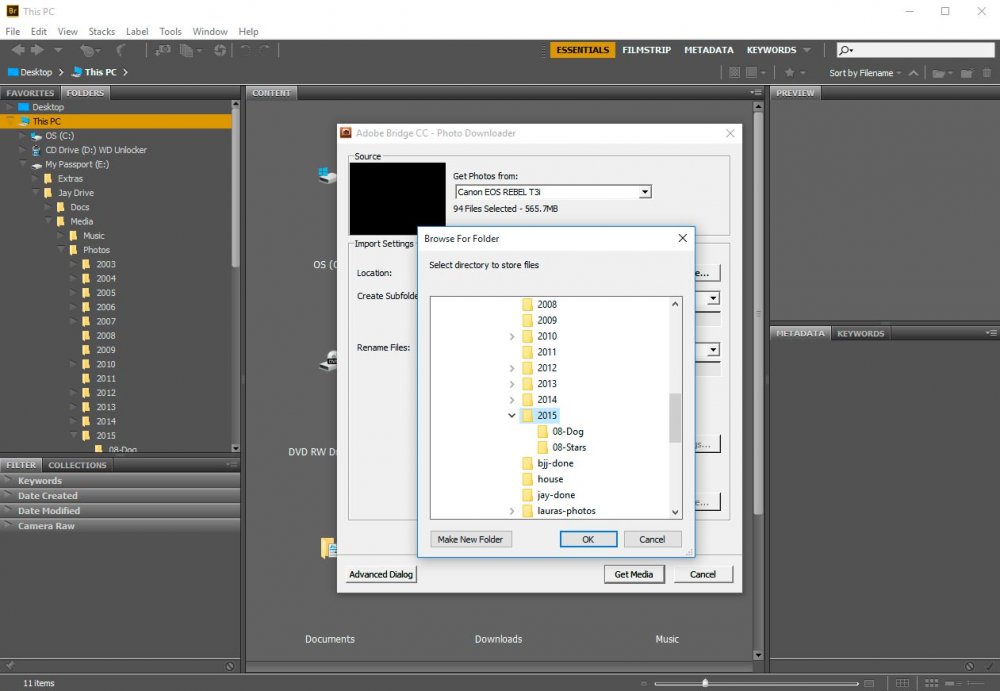
If you move down a bit in the Photo Downloader box, you’ll see an area defined as “Import Settings.” Inside this area, you’ll need to tell Bridge where you want it to save the photos from your camera to. In order to do this, you’ll need to click the “Location > Browse” button and navigate to your folder.
Next up is a really neat feature that Bridge offers. In the previous step, you needn’t navigate to the actual destination folder on your system. All you need to do is to tell Bridge where you’d like it to “create” a folder for your images. With this next feature, you get to name the folder that Bridge creates and tell it how to disperse your photos. Take a look at this next screenshot and I’ll explain what I mean.
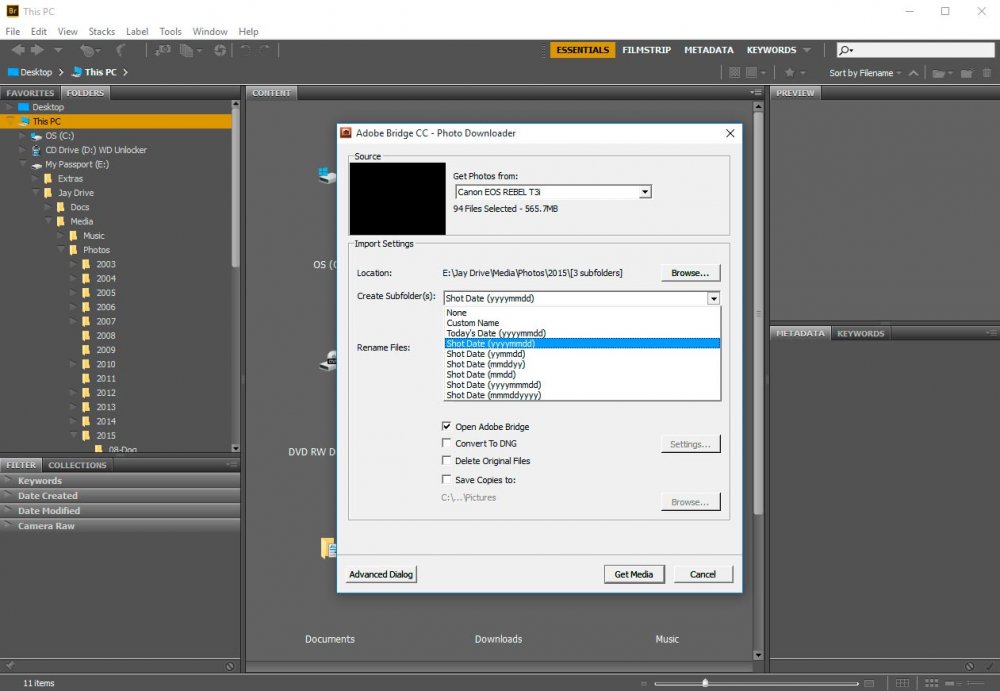
From the above image, you can see a few options that Bridge gives you. Personally, I like to give my folder a custom name. That’s simply my preference. The thing is, if you’re a traveling photographer or someone who engages in distinct photo shoots every day, you may want to allow Bridge to create a different sub-folder for each one of those shoots. For instance, if you chose one of the “Shot Date” selections and have three day’s worth of photos on your card, and each of those days had a different location of shooting, Bridge would create three folders – one for each day. It would also name your new folder after the selection you chose. How cool is that? But if you’re like me – someone who likes to take random shots here and there, you might just want to choose the “Custom Name” selection and type in the name directly below the drop-down box.
Renaming Your Photo Files
This next feature, which is directly below the last one, is just as neat. When you use Bridge to download photos from your camera, not only do you have the ability to create a new folder or folders, you also get to name the photos in pretty much any way you wish. So if you click on the drop-down box that’s to the right of the title “Rename Files,” you’ll see a plethora of choices.
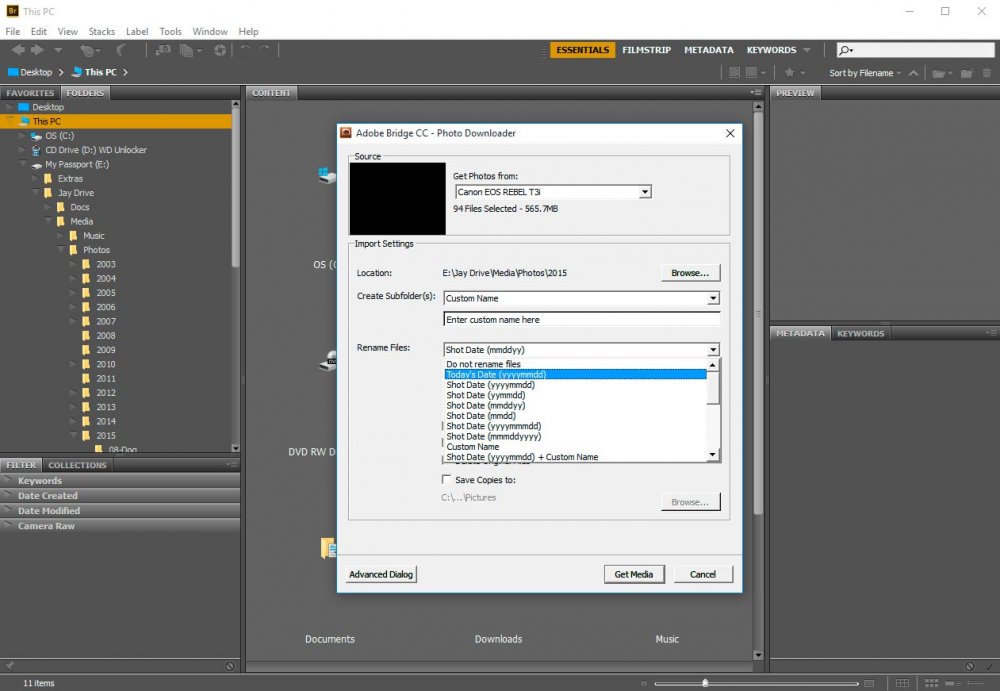
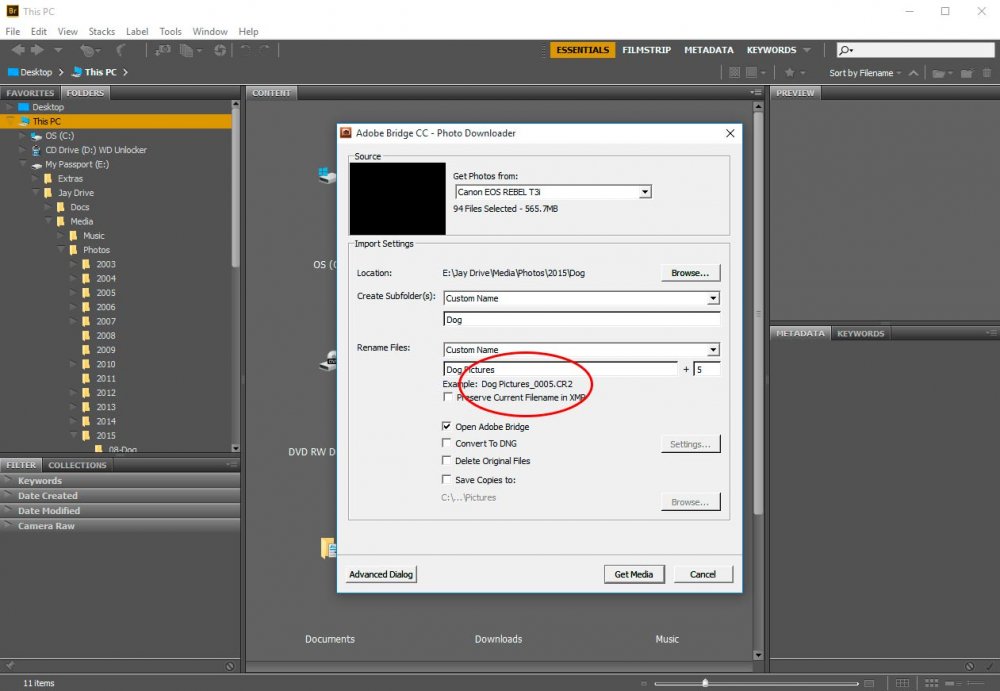
So, say we choose the “Custom Name” selection. Once the drop-down box is closed, you should see a small field with a number “1” inside of it. This is actually the first number in a sequence of numbers that Bridge is going to append to the end of each of your files. So, if I name my files “Dog Pictures” and for whatever reason, would like to begin the sequence of numbers at 5, then I would just type both of those values into their respective fields. And directly below those fields, to the right of the word “Example,” I would see the first file name.
Additional Options
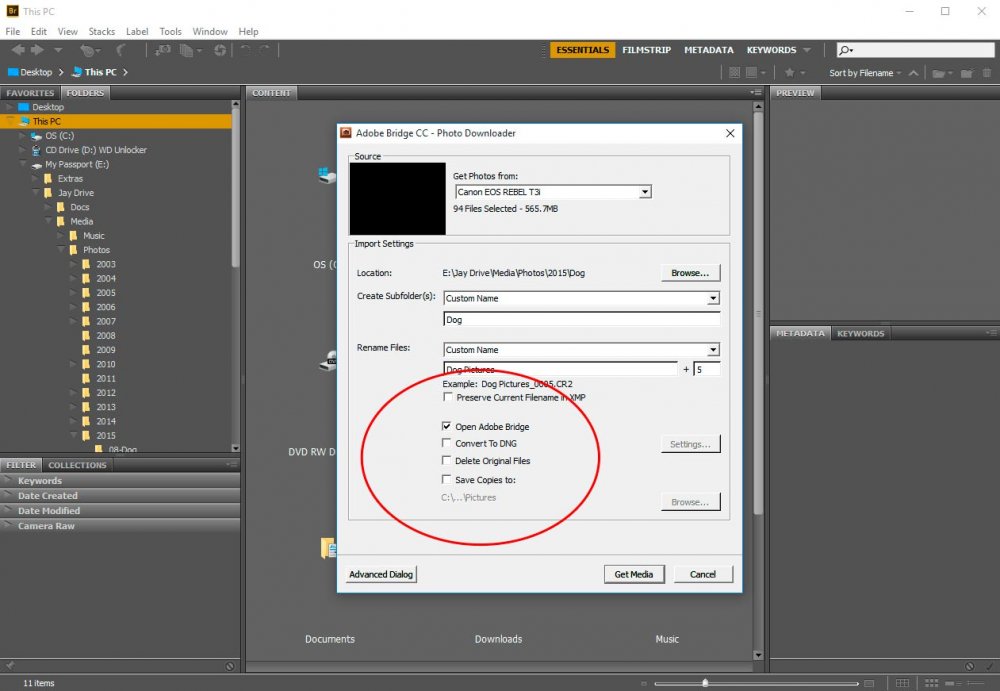
Below the folder and file fields, you’ll find some additional options, such as “Open Adobe Bridge,” “Convert to DNG,” “Delete Original Files” and “Save Copies To.” Check these boxes off as you wish. Just be careful when you instruct Bridge to delete the existing files from your camera. That’s a risky maneuver, in my opinion. Also, if you’re going to be working in either Lightroom or Photoshop, you may want to convert the files from RAW to DNG, to save a little space. I’ll be covering DNG files in a later post, so if you aren’t familiar with them or with what they are, you may want to check back here.
For many people, just filling in the preferences in this first dialog box is enough. If it is for you, then go ahead and click the “Get Media” button at the bottom of the box. I’ll warn you though, there are some additional features you can take advantage of, so you might want to continue reading below.
Advanced Dialog
Inside the “Advanced Dialog” box is where the fun starts. If you’re familiar with Adobe Lightroom at all, this dialog box will look somewhat familiar. I actually wrote a post that covers how to import photos from a DSLR camera into Lightroom, so after you’re finished with this one, you may want to head over there to check out that one. Some of the topics are similar.
In order to enter the Advanced Dialog box, all you need to do is click the button at the bottom of the dialog box you’re already in.
Once you do that, you’ll be presented with a new dialog box that looks like this:
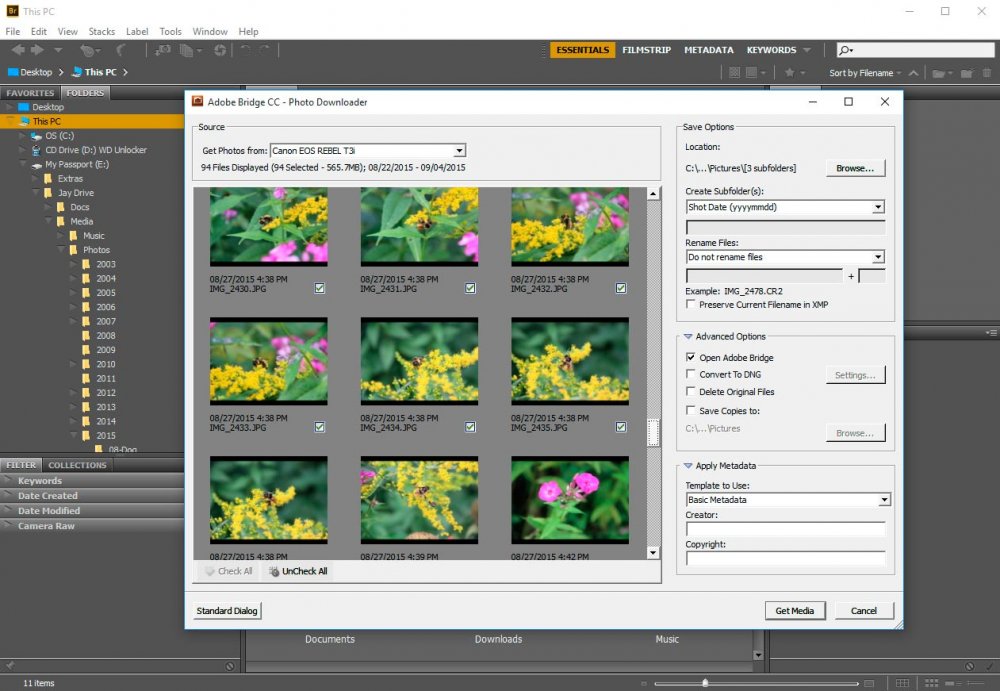
As you can see by looking at the available options inside this advanced dialog box, we’ve already covered quite a few of them in the earlier sections of this post. What’s new is that we’re now able to view and select thumbnails of the photos that are stored on our camera. This is especially helpful if you want to download photos piecemeal or if you simply want to download some, but not others. An easy tip to follow if you only want to download a few is to use the “UnCheck All” button below the thumbnails to remove all the selections from all photos. After nothing is selected, then you can go about re-checking which photos you’d like to download to your hard drive.
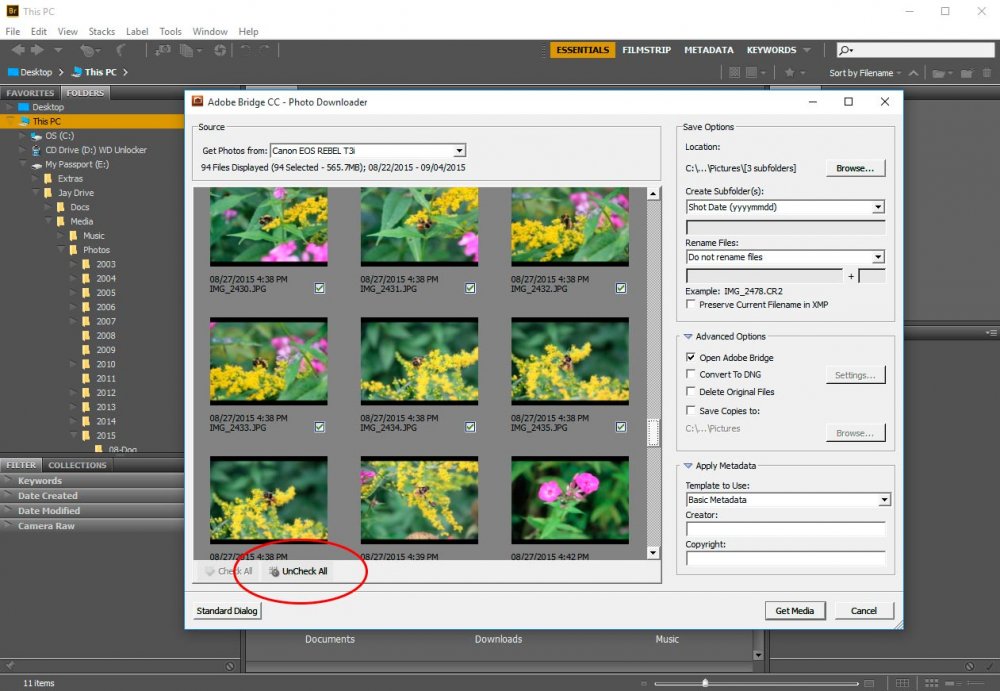
If you accidentally click the “UnCheck All” button, you can just click on “Check All” to re-select all photos.
Creating a Copyright in Your Photo’s Metadata
This last section is very helpful to photographers. After you go through all the time and effort to take great photographs, I think it’s important to apply a copyright to those photos. By using Bridge’s photo downloader, this task becomes extremely simply to accomplish.
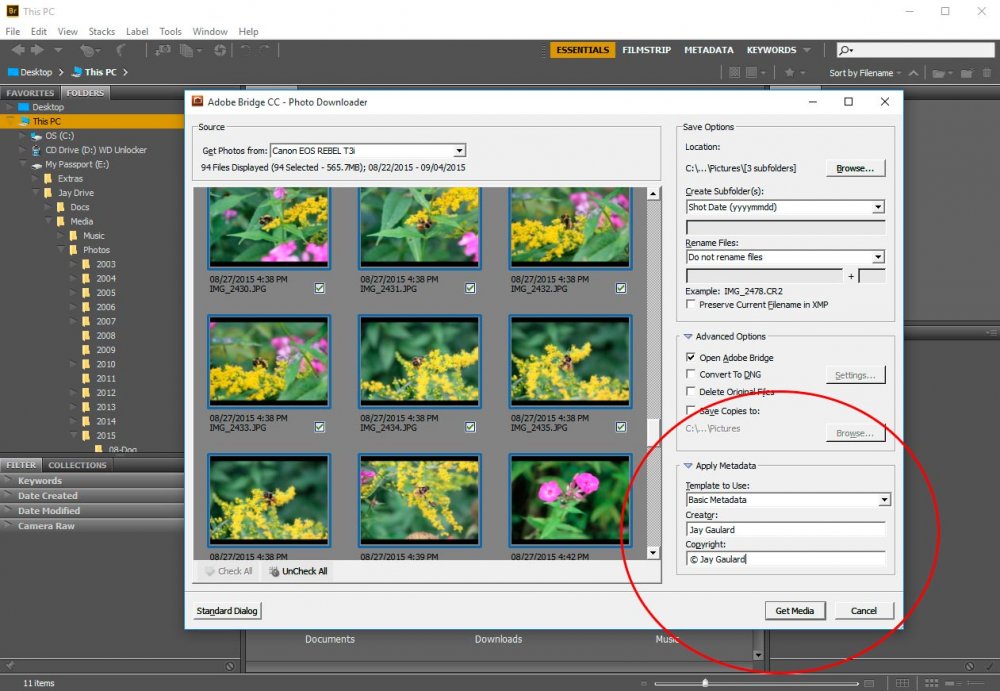
If you take a look at the “Apply Metadata” section of the advanced dialog box, you’ll see two fields. The first one called “Template to Use.” Since we haven’t created any templates yet (instructions in a later post), we can go ahead and skip that field. As we move onto the next one, we see that we can insert our name or company’s name. And below that, we can insert our copyright. Now, just as I covered in my Lightroom post, we can generate the copyright © symbol in Windows by holding down the Alt key and then typing 0169 using the number keypad on our keyboard. For Mac, hold down the Opt key and then type g. This will give you some metadata that looks like this:
Viewing Our Downloaded Photos in Bridge
Once we’re finished filling in all our metadata, we can go ahead and click the “Get Media” button at the bottom of the dialog box and wait for Bridge to do its thing. I altered a few settings for this demonstration and just downloaded everything to my desktop. This way, I can delete the folder later on.
Once Bridge is finished, you should see its interface populated with the photos you downloaded.
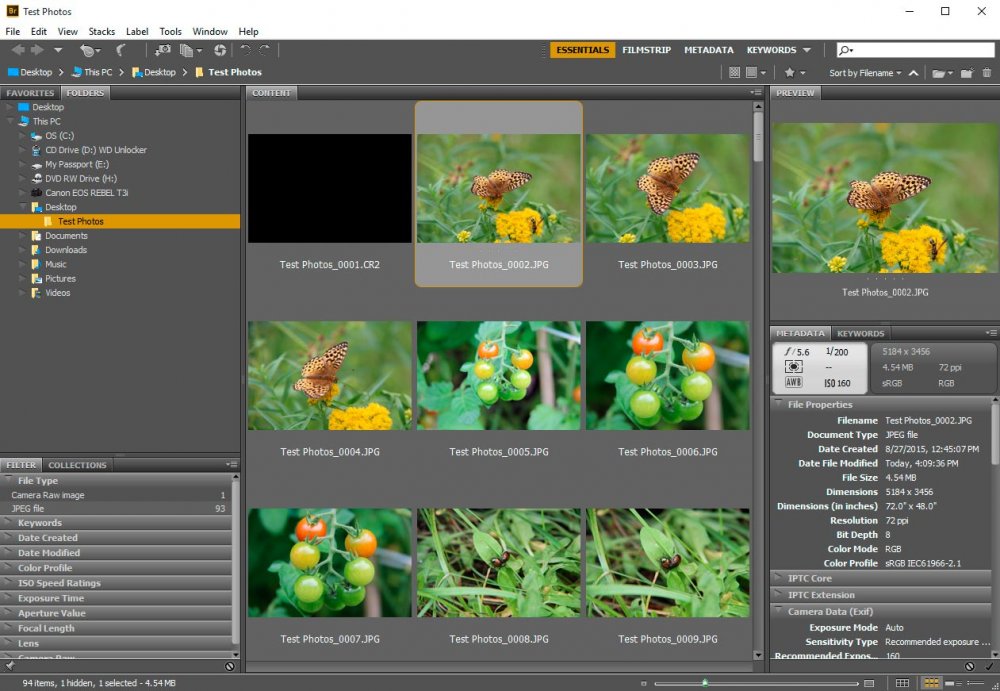
What’s neat is that Adobe Bridge offers all sorts of information to the right of your thumbnails. If you click around the panels a bit, you’ll see all of your customizations, such as file name, location, metadata as well as all your camera data. It’s some valuable data.
That covers how you can go about downloading photographs from your camera directly into Adobe Bridge.
Leave a Reply