When it comes to photography, focus is huge. Besides lighting and composition, focus is one of the most important aspects to consider. The adding of purposeful blur along with the absence of any blur at all can truly make or break an image. There’s truly nothing else that can evoke emotion like a tack sharp landscape or a face that’s been isolated from everything else going on around it.
In this post, I’d like to show you some examples of photographs where the photographer took the time to consider what he or she focused on. I’ll show you the image along with my own commentary to better fill you in with what the photographer may have been thinking. If you’ve got opinions on the focus of the below photos, please chime in. The more commentary, the better.
Everything is Sharp
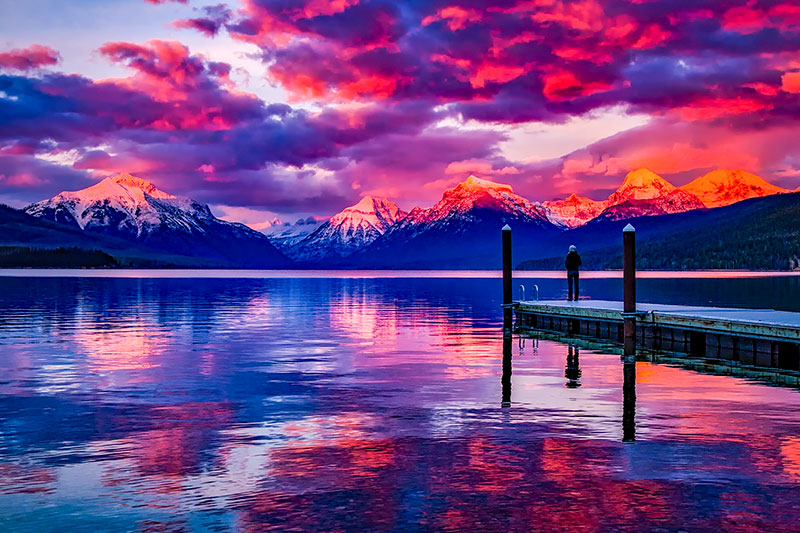
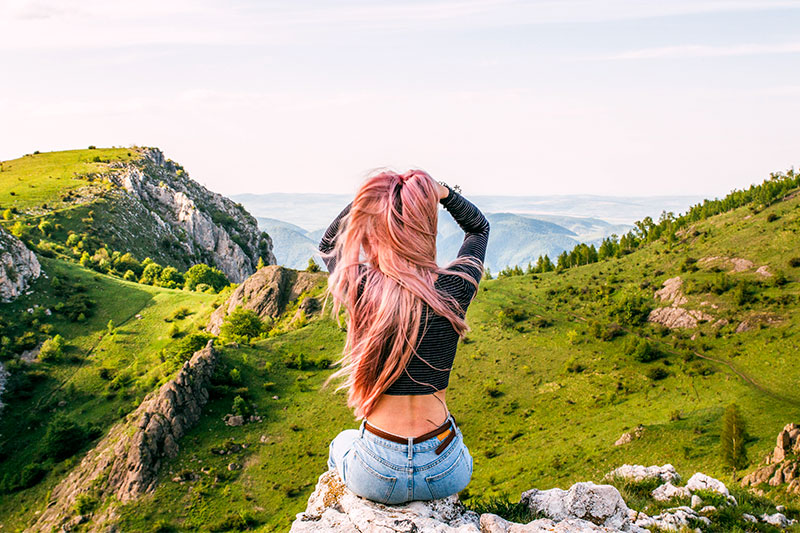
Take a look at these following two images. They’re great examples of not only landscape shots, but how you should focus for landscape shots. To have everything in your scene come out in focus, you’ll need three things; a smaller sized aperture, distance from your subject, a focus on infinity. These three are easily accomplished with the right lens and a bit of practice. In the photos, take notice of the foreground and the background. Notice how each is just as in focus as the other. Also, check out the person in each photo. Imagine they were blurry. The entire photo would be ruined and unusable. So when taking landscape photos, pay close attention to what’s sharp in your images and what’s not, especially in the foreground. That’s the area that usually causes problems. If you have to crop on post-processing, then do so.
Action & Clarity
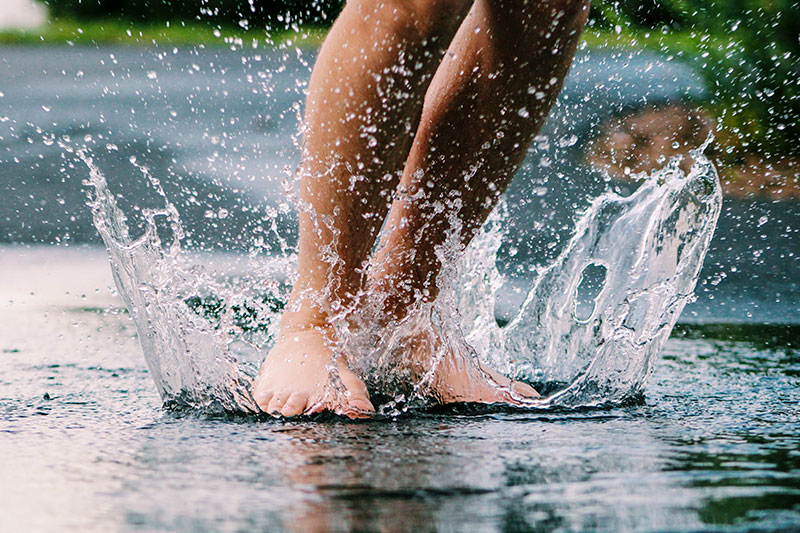
When it’s meant to be sharp, it better be sharp. In the next photo, the water that splashes up because of the feet jumping in it is meant to be as clear as a bell. Can you imagine looking at this photo with the water showing motion blur? It wouldn’t have had nearly the same amount of impact. Now, that’s not to say that motion blur can’t be a good thing. I just think in this photo the clarity is better than the alternative. The same holds true for sports photography. When people want to see a play by play, they want to see details.
Completely Out of Focus
I know this may seem rudimentary, but I can’t count how many people I have known who have reviewed their shots after a long day of shooting and who have ended up with many unusable ones. Until you get used to what you’re doing with your autofocus, be sure to review your photos closely while in the field. One of the biggest issues I see is when people have their autofocus point set to the wrong spot in their scene. So if they take a photo of someone standing in front of a tree, they’ll accidentally focus on the tree as opposed to the person. It’s a highly irritating thing to have occur, so please learn about your autofocus points and how to set them.

Creative Focus
There are many things you can do to creatively focus in your shots. One of the best techniques is to use a shallow depth of field to give the illusion of depth, even when not much of it exists. Another technique is to use the same shallow depth of field to play what’s in focus off of what’s out of focus. Many people don’t realize that while they’re attempting to isolate an object in their image, they’re also doing something entirely else to the rest of their scene. Keep that remainder of the scene in mind and make it look good. Check out these two great photographs.


Which Eye to Focus On?
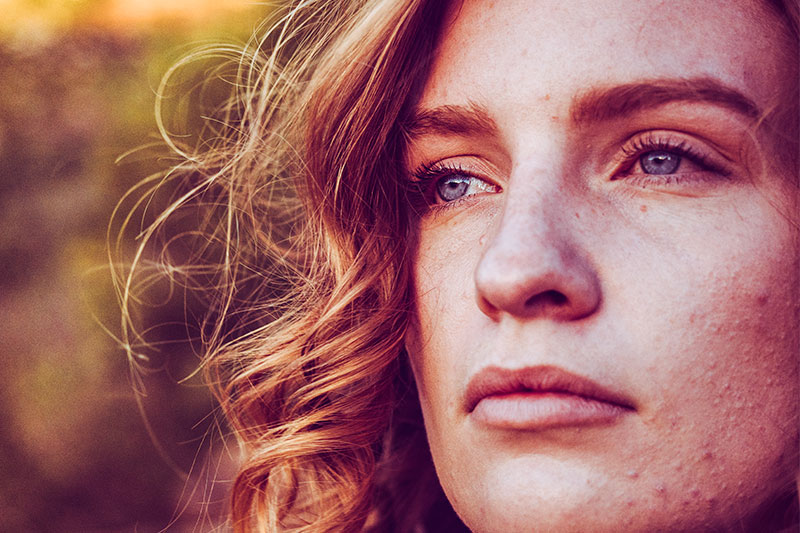
There may come a day when you find yourself taking photo shoots of people’s faces up close. If it’s getting dark in your scene or if you’re trying to get creative, you may need to open your lens’s aperture up, which will create a shallow depth of field. These types of shots are also best taken up close, which will exacerbate the effect. During these times, pay close attention to which eye you’d like to focus on. You likely won’t get both of them in focus and it really does matter which one you choose. In this next image, take notice of which eye is sharp and then pretend the other one is sharp. See how the entire mood of the photo changes?
Choosing the Right Spot
Sometimes, there is no right or wrong. You just need to pick what you’d like to be sharp in an image and then go with it. When it doesn’t really matter, just pick something that looks nice. Other times, it really does matter a lot what you focus on. If you’re taking a photograph of a music concert and would like to show off the band, you better focus on that. But if it’s the audience you want to accentuate, forget about the band and stick with the audience. Take a look at the next two images and see if you can think of what was most important to the photographer.


Motion Blur
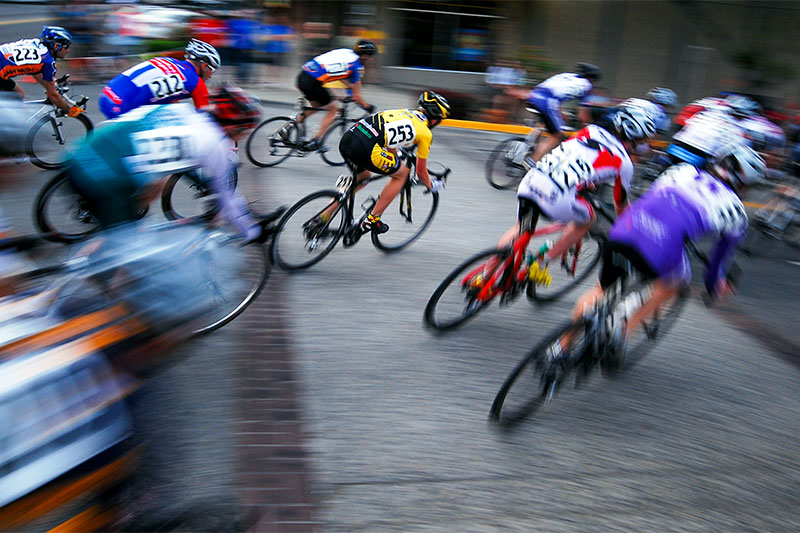
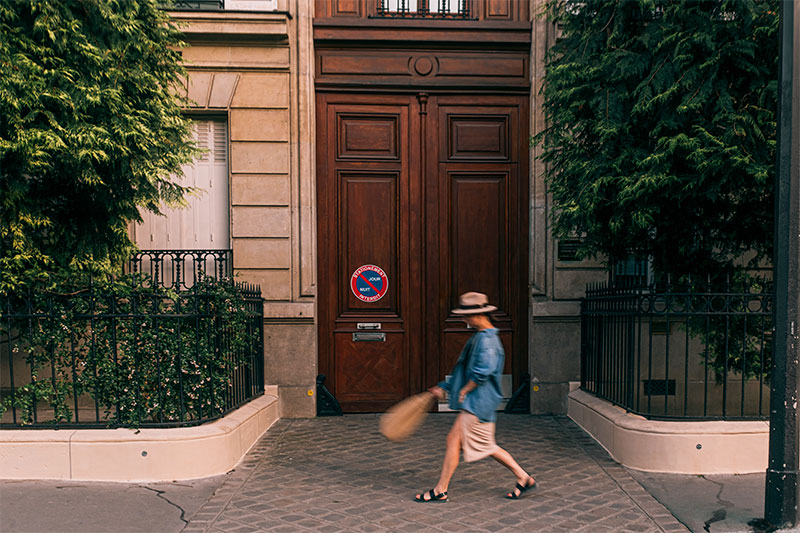
This is a tricky subject. There are two different types of motion blur; one where you move your camera to cause the blur and the other where your subject moves to cause the blur. In both cases, this type of blur is caused by a shutter speed that’s too slow. To make matters more complicated, sometimes motion blur introduce to an image on purpose to add movement. I will tell you that this style of photography can take a lot of practice to get right. I encourage you to look up some resources and then to head out for as much practice as possible. For these final two images, can you decipher what’s going on? Is the blur intentional or not? Do these images look good to you?
Well, what do you think of these examples of the various types of focus a camera and lens can offer you? Can you think of any more types? What’s your favorite? I personally like playing with close up depth of field a lot, but I’ve been known to dabble in landscape. I enjoy trying to capture the entire scene in focus, which can be challenging at times. Leave your feedback down below. And if you want, leave some of your photos as well. Thanks!
Leave a Reply